Yamaha DGX-660 DGX-660 Owners Manual
Yamaha DGX-660 Manual
 |
View all Yamaha DGX-660 manuals
Add to My Manuals
Save this manual to your list of manuals |
Yamaha DGX-660 manual content summary:
- Yamaha DGX-660 | DGX-660 Owners Manual - Page 1
the instrument. We also recommend that you keep this manual in a safe and handy place for future reference. Before using the instrument, be sure to read "PRECAUTIONS" on pages 5-6. Keyboard Stand Assembly For information on assembling the keyboard stand, refer to the instructions on page 12 of this - Yamaha DGX-660 | DGX-660 Owners Manual - Page 2
For DGX-660 SPECIAL MESSAGE SECTION This product utilizes batteries or an external power supply (adapter). DO NOT connect this product to any power supply or adapter other than one described in the manual, on the name plate, or specifically recommended by Yamaha. WARNING: Do not place this product - Yamaha DGX-660 | DGX-660 Owners Manual - Page 3
and DGX-660 FCC INFORMATION (U.S.A.) 1. IMPORTANT NOTICE: DO NOT MODIFY THIS UNIT! This product, when installed as indicated in the instructions contained in this manual, meets FCC requirements. Modifications not expressly approved by Yamaha may void your authority, granted by the FCC, to use the - Yamaha DGX-660 | DGX-660 Owners Manual - Page 4
long periods of time. 14 Refer all servicing to qualified service personnel. Servicing is required when the apparatus has been damaged in any way, such as power-supply cord or plug is damaged, liquid has SHOCK, DO NOT EXPOSE THIS APPARATUS TO RAIN OR MOISTURE. (UL60065_03) 4 DGX-660 Owner's Manual - Yamaha DGX-660 | DGX-660 Owners Manual - Page 5
Then have the device inspected by Yamaha service personnel. - The power cord or plug becomes frayed or damaged. - It emits unusual smells or smoke. - Some object has been dropped into the instrument. - There is a sudden loss of sound during use of the instrument. DMI-5 1/2 DGX-660 Owner's Manual 5 - Yamaha DGX-660 | DGX-660 Owners Manual - Page 6
in use. Even when the [ ] (Standby/On) switch is in standby status (display is off), electricity is still flowing to the instrument at the minimum level. When you are not using the instrument for a long time, make sure you unplug the power cord from the wall AC outlet. 6 DGX-660 Owner's Manual DMI - Yamaha DGX-660 | DGX-660 Owners Manual - Page 7
of the unit. You should note this serial number in the space provided below and retain this manual as a permanent record of your purchase to aid identification in the event of theft. Model No. Serial No. (bottom_en_01) The name plate is located on the bottom of the unit. DGX-660 Owner's Manual 7 - Yamaha DGX-660 | DGX-660 Owners Manual - Page 8
Product Registration *2 *1: May not be included depending on your particular locale. Check with your Yamaha dealer. *2: The PRODUCT ID on the sheet will be needed when you fill out the User Registration form. Music Rest Insert the music rest into the slots as shown. 8 DGX-660 Owner's Manual - Yamaha DGX-660 | DGX-660 Owners Manual - Page 9
Audio file 85 Loading Files from a USB Flash Drive 86 Deleting files from a USB Flash Drive 87 Deleting User Data from the Instrument 87 Appendix Troubleshooting 88 Messages 89 Specifications 90 Index 92 DGX-660 Owner's Manual 9 Reference Appendix - Yamaha DGX-660 | DGX-660 Owners Manual - Page 10
of Yamaha's high-quality XG tone generation format. Naturally, you can play back any XG song data using an XGlite tone generator. However, keep in mind that some songs may play back differently compared to the original data, due to the reduced set of control parameters and effects. 10 DGX-660 Owner - Yamaha DGX-660 | DGX-660 Owners Manual - Page 11
Realistic and Dynamic Sounds Page 27 Yamaha's authentic Voices (especially the highly acclaimed Live!, Sweet! and Cool! Voices) deliver incredibly natural and dynamic sound-with all the nuances of the original instrument, from delicate to powerful. Play Along with Styles Page 32 The DGX-660 also has - Yamaha DGX-660 | DGX-660 Owners Manual - Page 12
assembly instructions and select the parts as needed. 1 Assembly Parts Back board L R Side boards Stand bases A (1 pc.) B (1 pc.) C (2 pcs.) q Joint connectors (4 pcs.) w Metal brackets e 3 x 8 mm roundhead screws (12 pcs.) r 6 x 70 mm roundhead screws (4 pcs.) 12 DGX-660 Owner's Manual - Yamaha DGX-660 | DGX-660 Owners Manual - Page 13
, using the screws r. "L" (Left) and "R" (Right) are marked on the upper surfaces of the stand bases. If you have trouble fastening the screws, use a screwdriver to rotate the joint connectors so that the connector holes are aligned with the screw holes on the stand bases. DGX-660 Owner's Manual 13 - Yamaha DGX-660 | DGX-660 Owners Manual - Page 14
. Refer to the instructions provided with your pedal unit. • For information on the pedal functions, refer to page 22. 5 At least 10 cm Be sure to place your hands at least 10 cm from either end of the keyboard when positioning it. At least 10 cm 5 Put the keyboard on the stand. Check the back - Yamaha DGX-660 | DGX-660 Owners Manual - Page 15
using the screws y. y 5 x 16 mm roundhead screws Post-assembly checklist Once you've assembled the stand, check the following points: • Are there any parts left over? If so, read the assembly instructions the assembly instructions and diagrams and retighten all screws. DGX-660 Owner's Manual 15 - Yamaha DGX-660 | DGX-660 Owners Manual - Page 16
@4 [STYLE] button page 32 @5 [VOICE] button page 27 @6 [MUSIC DATABASE] button page 33 @7 [SPLIT ON/OFF] button page 28 @8 [DUAL ON/OFF] button page 28 @9 [HARMONY ON/OFF] button page 31 #0 [PITCH BEND] wheel page 56 #1 USB TO DEVICE terminal ...... pages 77, 80, 81 16 DGX-660 Owner's Manual - Yamaha DGX-660 | DGX-660 Owners Manual - Page 17
category list Music Database category list !9 !6 !7 !8 @2 @3 @4 @5 @6 @0 #1 @1 !5 @7 @8 @9 #0 A-1 C0 C1 C2 C3 C4 C5 C6 C7 Rear Panel #2 #3 #4 #5 Rear Panel #2 CONTRAST knob page 23 #3 USB TO HOST terminal.......... pages 74, 76, 77 #4 SUSTAIN jack page 21 #5 PEDAL UNIT jack - Yamaha DGX-660 | DGX-660 Owners Manual - Page 18
for a second. CAUTION • When using a power adaptor, even when the power is off, a small amount of electricity is still being consumed by the instrument. When you are not using the instrument for a long time, make sure to unplug the AC power adaptor from the wall AC outlet. 18 DGX-660 Owner's Manual - Yamaha DGX-660 | DGX-660 Owners Manual - Page 19
sure to follow the instructions in the Owner's Manual to turn off the power to the instrument and the connected devices, in order to protect the devices from damage. If you do not want the power to turn off automatically when a device is connected, disable Auto Power Off. DGX-660 Owner's Manual 19 - Yamaha DGX-660 | DGX-660 Owners Manual - Page 20
ears, consult a physician. NOTICE • When the instrument's sound is output to an external device, first turn on the power to the instrument, then to the external device. Reverse pieces of equipment. NOTE • Use audio cables and adaptor cables having no (zero) resis- tance. 20 DGX-660 Owner's Manual - Yamaha DGX-660 | DGX-660 Owners Manual - Page 21
Resonance This function simulates the sustain sound produced with the damper pedal on a grand piano. If you want to use this function, select a voice in the pedal. During playback of a Style or Song, you can change the tempo by tapping the pedal twice at the desired tempo. DGX-660 Owner's Manual 21 - Yamaha DGX-660 | DGX-660 Owners Manual - Page 22
LP-7A/LP-7AWH pedal unit (sold separately). When connecting the pedal unit, make sure to also assemble the unit on the supplied keyboard stand. NOTE • Make sure that power is off when connecting or disconnect- ing the pedal unit. • This affects only Main/Dual Voices and Harmony sound (pages 27, 28 - Yamaha DGX-660 | DGX-660 Owners Manual - Page 23
Setting Up MAIN Display When the power is turned on, the MAIN display automatically appears. This display shows the basic settings of the instrument, including the and is muted. Specified as Song recording target. Contains no data. Contains data and can be played back. DGX-660 Owner's Manual 23 - Yamaha DGX-660 | DGX-660 Owners Manual - Page 24
for selection simply because it is the easiest and most intuitive selection method. Please note however, that most items or values that can be selected using the dial can also be selected using the [+] and [-] buttons. Press briefly Press briefly to decrease. to increase. 24 DGX-660 Owner's Manual - Yamaha DGX-660 | DGX-660 Owners Manual - Page 25
entered Piano settings. 3 Play the keyboard. NOTE • You can turn the Metronome on or off by pressing the [METRONOME ON/OFF] button. For information on setting the Metronome tempo and time signature, refer to page 29. 4 Press the [EXIT] button to exit the Piano Room display. DGX-660 Owner's Manual - Yamaha DGX-660 | DGX-660 Owners Manual - Page 26
Room, you can play back only the latest recorded audio file; other audio files recorded in the Piano Room can only be played back after exiting from the Piano Room. For information on playing back the Audio files, refer to "Playing Back a Song or Audio File" on page 39. 26 DGX-660 Owner's Manual - Yamaha DGX-660 | DGX-660 Owners Manual - Page 27
Piano Voice will play over the entire keyboard. NOTE • Keep in mind that this Piano Reset function is different from the Piano Room feature (page 25), even though the button is the same. • This function cannot be used while the Piano Room display (pages 25, 26) is shown. DGX-660 Owner's Manual - Yamaha DGX-660 | DGX-660 Owners Manual - Page 28
Basic Guide Try is divided into the left hand and right hand areas. Two voices will sound at the same time. You can confirm whether the Dual function is on in area of the keyboard. The highest key for the left hand area is referred to as the "Split Point" which (page 60). 28 DGX-660 Owner's Manual - Yamaha DGX-660 | DGX-660 Owners Manual - Page 29
Basic Guide Try Playing a Variety of Instrument Voices Using the Metronome sound on the first beat of each measure while the other beats will click. 3 Press the CATEGORY [f] button to call up "Time Signature - Denominator." Press the [EXIT] button to exit the TEMPO display. DGX-660 Owner's Manual - Yamaha DGX-660 | DGX-660 Owners Manual - Page 30
. 2 Use the CATEGORY [r] or [f] button repeatedly to select "Bell." 2 Press the CATEGORY [r] or [f] buttons repeatedly to select "Metronome Volume." 3 Rotate the dial to turn the bell sound on or off. Metronome volume 3 Rotate the dial to set the Metronome Volume. 30 DGX-660 Owner's Manual - Yamaha DGX-660 | DGX-660 Owners Manual - Page 31
Guide Try Playing a Variety of Instrument Voices Adding Harmony You can add harmony notes to the Main Voice. 1 Press the [HARMONY ON/OFF] button to turn Harmony on. How to sound each Harmony Type Harmony type 01 to 10, 13 Press the right-hand keys on when using the Multi DGX-660 Owner's Manual 31 - Yamaha DGX-660 | DGX-660 Owners Manual - Page 32
in a variety of different musical genres including pop, jazz, , then confirm whether the Auto Accompaniment is on. Basic Guide NOTE • You can also play the Styles in the use any of these Styles, always execute step 3 and later so that all accompaniment parts will sound. 32 DGX-660 Owner's Manual - Yamaha DGX-660 | DGX-660 Owners Manual - Page 33
the desired Music Database. This operation calls up the panel settings such as Voice and Style that are registered to the selected Music Database. The Music Database List is provided in the separate Data List. 3 Play the keyboard as described in Steps 6 to 7 in this page. DGX-660 Owner's Manual 33 - Yamaha DGX-660 | DGX-660 Owners Manual - Page 34
the left of it. To play a minor seventh chord Press the root note together with the nearest white and black keys to the left of it (three keys altogether). Changing the Chord Fingering type There are three different Chord Fingering Types. For details, refer to page 64. 34 DGX-660 Owner's Manual - Yamaha DGX-660 | DGX-660 Owners Manual - Page 35
selected Key Signature. Set this to the same as your music score. Since the number of flats or sharps is shown to the right of Key Signature in the display, you can also find the desired Key Signature by counting the number of flats or sharps. Hold for longer than a second. DGX-660 Owner's Manual - Yamaha DGX-660 | DGX-660 Owners Manual - Page 36
use the music score or the chord progression of your performance, play only the root key with the left hand. Pressing a key Keyboard Voice Style Key Signature Type No.001 Natural! Grand Piano No.184 Learning 4-4 button to turn off the Smart Chord function. Basic Guide 36 DGX-660 Owner's Manual - Yamaha DGX-660 | DGX-660 Owners Manual - Page 37
Basic Guide The Drum instruments (Kick, Snare and Hi-Hat) are assigned to the left-side section while the Piano sound is assigned to the right. 2 Search for the desired Style. 2-1 Press the [START/STOP] button to start the metronome. A "WAITING" indication appears in the display. As necessary, use - Yamaha DGX-660 | DGX-660 Owners Manual - Page 38
MIDI files in SMF (Standard MIDI useful Voices of this instrument. These are piano solo pieces. These are piano ensemble pieces. When you need to practice backing (accompaniment) patterns, these songs are ideal for that purpose. Includes famous classical music download DGX-660 Owner's Manual - Yamaha DGX-660 | DGX-660 Owners Manual - Page 39
Playing Songs and Audio Files Basic Guide Playing Back a Song or Audio File SONG AUDIO Before using a USB flash drive, be sure to read "Precautions when using the USB TO DEVICE terminal" on page 80. 1 If you 63. NOTE • The tempo of audio playback cannot be changed. DGX-660 Owner's Manual 39 - Yamaha DGX-660 | DGX-660 Owners Manual - Page 40
Basic Guide Playing Songs and Audio Files Fast Forward, Rewind, and Pause SONG AUDIO This instrument lets you fast forward [FF], rewind [REW] and contains no data. Track is muted. NOTE • Up to two Track buttons can be pressed simultaneously for turning on or off. 40 DGX-660 Owner's Manual - Yamaha DGX-660 | DGX-660 Owners Manual - Page 41
music the display. Basic Guide Lyrics Both chords and the sound of to read after you use the Quantize function (page MIDI file format files containing lyric data. Lyrics display may not be possible with some files. 4 Press the [EXIT] button to return to the MAIN display. DGX-660 Owner's Manual - Yamaha DGX-660 | DGX-660 Owners Manual - Page 42
with Song Lesson 1 Select the desired Song for your lesson (page 39). NOTE • Audio files cannot be used with the Lesson features. NOTE • The Song Lesson features can be applied also to User Songs and Songs ( -hand lesson : Left-hand lesson : Both-hands lesson Basic Guide 42 DGX-660 Owner's Manual - Yamaha DGX-660 | DGX-660 Owners Manual - Page 43
the beginning. Basic Guide NOTE • The used in the lesson. The displayed range (61 keys 88 keys) To stop Lesson playback, press the [START/ STOP] button. Even during playback, you can change the Lesson number by pressing the [WAITING], [YOUR TEMPO] or [MINUS ONE] button. DGX-660 Owner's Manual - Yamaha DGX-660 | DGX-660 Owners Manual - Page 44
MIDI file. If you want to re-record a specific section or edit parameters such as Voice, use played on portable music players by using a computer. Metronome, the AUX IN sound and MIC INPUT sound cannot be recorded. 1 Press target. Basic Guide If a the dial. 44 DGX-660 Owner's Manual Track 1 (and - Yamaha DGX-660 | DGX-660 Owners Manual - Page 45
Guide Recording Your Performance NOTE • You can use the Metronome while recording although the met- ronome sound to save the Song. The Song will be stored as a MIDI file to Song number 101-105. To cancel saving, press the power off without executing the save operation. DGX-660 Owner's Manual 45 - Yamaha DGX-660 | DGX-660 Owners Manual - Page 46
the dial to select the desired Style after specifying the [A] track. NOTE • You can use the Metronome while recording although the metronome sound will not be recorded. After pressing the [REC] button, set the Time Signature and start Metronome before going on to step 3. 46 DGX-660 Owner's Manual - Yamaha DGX-660 | DGX-660 Owners Manual - Page 47
already recorded tracks on or off using the track buttons. See page power off when a "Now Writing..." message is shown in the display. Doing so can damage the flash memory and result in a loss of data. 6 To hear the newly recorded performance, press the [START/STOP] button. DGX-660 Owner's Manual - Yamaha DGX-660 | DGX-660 Owners Manual - Page 48
display. Hold for longer than a second. 3 Press the [+] (YES) button to clear the track. A clear-in-progress message will appear briefly on the display. Basic Guide 48 DGX-660 Owner's Manual - Yamaha DGX-660 | DGX-660 Owners Manual - Page 49
sound via AUX IN and MIC INPUT jacks). All the sound produced via this instrument other than Metronome can be recorded. NOTICE • Don't use • Never attempt to disconnect the USB flash drive or turn the power off during recording. Doing so may corrupt the USB flash drive . DGX-660 Owner's Manual 49 - Yamaha DGX-660 | DGX-660 Owners Manual - Page 50
Guide Memorizing a border appears around the selected one. Press and hold Bank number 3 Use the dial to select a Bank number. NOTE • Data cannot be saved to off the power while memorizing settings to the Registration Memory, otherwise the data may be damaged or lost. 50 DGX-660 Owner's Manual - Yamaha DGX-660 | DGX-660 Owners Manual - Page 51
Functions Other settings Transpose, Pitch Bend Range, Assignable Pedal, Portamento Time * Style settings are not available for Registration Memory when using the Song/Audio features. You can check the Registration Memory status in the MAIN display (page 23). Basic Guide DGX-660 Owner's Manual 51 - Yamaha DGX-660 | DGX-660 Owners Manual - Page 52
. NOTICE • Keep in mind that this operation also deletes the data you have purchased. Be sure to save the important data to a computer via Musicsoft Downloader (MSD) software. For details, refer to "Computer-related Operations" (page 8). 52 DGX-660 Owner's Manual - Yamaha DGX-660 | DGX-660 Owners Manual - Page 53
or Song will call up the optimum Chorus type for the entire sound, you can select a different Chorus type manually. 1 Press the [FUNCTION] button. 2 Use the CATEGORY [r] and [f] buttons to call up "Reverb Type." the item in Step 2, refer to the Function List on page 73. DGX-660 Owner's Manual 53 - Yamaha DGX-660 | DGX-660 Owners Manual - Page 54
a selected Main Voice, you can set these parameters manually. 1 Press the [FUNCTION] button. 3 Use the dial to turn DSP on. Press the [EXIT loaded Song or Style, for example, the currently playing Voices may not sound as expected. This is normal, since the Song or Style has its DGX-660 Owner's Manual - Yamaha DGX-660 | DGX-660 Owners Manual - Page 55
. 3 Use the dial to turn panel sustain on or off. NOTE • The sustain of some Voices may not be obviously or audi- bly affected when the panel sustain function is turned on. Current Transpose value 3 Use the dial to set the Transpose value between -12 and +12. Reference DGX-660 Owner's Manual 55 - Yamaha DGX-660 | DGX-660 Owners Manual - Page 56
• The pitch may not be raised to the designated value depending on the selected Voice. • The effects produced by using the PITCH BEND wheel may not be applied to the Split Voice when the [ACMP ON/OFF] is ON. Current value 3 Use the dial to set the Tuning value. Reference 56 DGX-660 Owner's Manual - Yamaha DGX-660 | DGX-660 Owners Manual - Page 57
. Lowers the high range for a softer sound. Lowers the mid range for a brighter sound. Features more powerful sound. NOTE • "5 (Powerful)" produces a more punchy sound but may produce distortion depending on the Voice and Style, compared to the other Master EQ types. DGX-660 Owner's Manual 57 - Yamaha DGX-660 | DGX-660 Owners Manual - Page 58
adjusted by the [MASTER VOLUME] control of the instrument. Select this when using external audio equipment. The output gain level is fixed at the same level, "ALWAYS ON" is selected the speaker sound is always on regardless of whether a plug is inserted or not. Reference 58 DGX-660 Owner's Manual - Yamaha DGX-660 | DGX-660 Owners Manual - Page 59
low sounds and high sounds to be clearly heard. IAC is effective only from the sound output Use the dial to turn IAC on or off. Current setting 3 Use the dial to set the desired value. The setting range is from -3 to 3. The higher the value, the deeper the effect. Reference DGX-660 Owner's Manual - Yamaha DGX-660 | DGX-660 Owners Manual - Page 60
settings to the Registration Memory (page 50). The Voice-related settings are reset when a different Voice is selected. If you want to store the created sound for future recall, memorize the settings to the Registration Memory. Reference 60 DGX-660 Owner's Manual - Yamaha DGX-660 | DGX-660 Owners Manual - Page 61
are playing. Intro Main Reference Ending Fill-in Intro This is used for the beginning of the performance. When the Intro finishes, Style There are two variations (A and B), and the Style playback sound changes harmonically in response on the chords you play with your DGX-660 Owner's Manual 61 - Yamaha DGX-660 | DGX-660 Owners Manual - Page 62
the [MAIN/AUTO FILL] button as necessary. The Section will change to Fill-in then Main A or B. The Style plays while you are playing the keys. Style playback stops instantly when you release the keys. 62 DGX-660 Owner's Manual - Yamaha DGX-660 | DGX-660 Owners Manual - Page 63
time signatures in 3 (3/4, etc.). 2 Use the CATEGORY [r] and [f] buttons to call sound will be heard without Style playback. This is referred to as "Stop Accompaniment." The specified chord will be shown in the display, and affects the Harmony function (page 31). Reference DGX-660 Owner's Manual - Yamaha DGX-660 | DGX-660 Owners Manual - Page 64
the left of the Split Point are used to play the Split Voice. The initial default Split Point is key number 54 (the F#2 key), but you can change it to another key. 1 Press the [FUNCTION] button. During the Lesson playback, the Split Point cannot be changed. Reference 64 DGX-660 Owner's Manual - Yamaha DGX-660 | DGX-660 Owners Manual - Page 65
notation and keyboard diagram in the display, try playing a chord in the "Playing" range. When you've played the chord properly, a bell sound signals your success and the chord name in the display will be highlighted. To exit from this function, press the [EXIT] button. DGX-660 Owner's Manual 65 - Yamaha DGX-660 | DGX-660 Owners Manual - Page 66
USB flash drive are played back, letting you use the instrument as a background music source. Five playback group settings are provided. ) 4 (Download) Overview Demo Song All preset Songs All User Songs All Songs transferred from a computer All Song files (MIDI files) and DGX-660 Owner's Manual - Yamaha DGX-660 | DGX-660 Owners Manual - Page 67
call up "Song Volume." Audio Volume 3 Rotate the dial to set the Audio volume. Song Volume 3 Rotate the dial to set the Song volume. Reference DGX-660 Owner's Manual 67 - Yamaha DGX-660 | DGX-660 Owners Manual - Page 68
106-) for which you want to set the guide track. 2 Press the [FUNCTION] button. Use the CATEGORY [r] and [f] buttons to select the "Right-Part" or "LeftPart." 4 Use the dial to select the channel you want to play back as the specified rightor left-hand part. Reference 68 DGX-660 Owner's Manual - Yamaha DGX-660 | DGX-660 Owners Manual - Page 69
Connect a microphone to the MIC INPUT jack. NOTE • Make sure to use a conventional dynamic microphone. 3 Turn on the power of the instrument. 4 Press the [MIC SETTING] button once or /OFF to pedals. Refer to "Assigning specific functions to the pedal" (page 21). Reference DGX-660 Owner's Manual 69 - Yamaha DGX-660 | DGX-660 Owners Manual - Page 70
USER data. For details, see next section. MIC SETTING 2 display 2 Use the CATEGORY [r] or [f] button to select the specific parameter to be adjusted. For information on each parameter, see below. 3 Set the value of the specific parameter by rotating the dial. Reference 70 DGX-660 Owner's Manual - Yamaha DGX-660 | DGX-660 Owners Manual - Page 71
Up the Microphone Settings Saved to USER 1 Press the [MIC SETTING] button once or twice to call up the MIC SETTING 1 display. 2 Select "PRESET" by using the CATEGORY [r] or [f] button, then select "USER" by rotating the dial. Reference DGX-660 Owner's Manual 71 - Yamaha DGX-660 | DGX-660 Owners Manual - Page 72
change, follow the instructions below. 1 Find the desired call up the FUNCTION display. 4 Use the dial, the [+] and of the MIDI Initial Send power, and can be transferred to the computer as Backup Data (page 52). Previous item Next item Reference Current item Value 72 DGX-660 Owner's Manual - Yamaha DGX-660 | DGX-660 Owners Manual - Page 73
you can control pitch by using the PITCH BEND wheel (page sound being panned full right. 000-127 008 Determines how much of the Split Voice's signal is sent to the Reverb effect. 000-127 000 Determines how much of the Split Voice's signal is sent to the Chorus effect. DGX-660 Owner's Manual - Yamaha DGX-660 | DGX-660 Owners Manual - Page 74
Pedal Assignable Pedal Portamento Time PC (USB TO PC Mode HOST terminal) Local External Clock MIDI 1 (Normal)/ 2 (Piano)/ 3 (Soft)/ 4 (Bright)/ 5 (Powerful) 1 (Normal) Refer to MIDI, set this parameter to ON. ON/OFF Determines whether MIDI messages generated via key DGX-660 Owner's Manual - Yamaha DGX-660 | DGX-660 Owners Manual - Page 75
sounded used guide Power Downloader. Local External Clock Song Out Style Out Keyboard Out PC1 OFF ON OFF OFF OFF PC2 OFF OFF OFF OFF ON OFF ON OFF OFF OFF ON NOTE • Preset Song data cannot be transmitted from the instrument by the Song Out function, but User Songs can. DGX-660 Owner's Manual - Yamaha DGX-660 | DGX-660 Owners Manual - Page 76
connection is made. • When using a USB cable to connect the instrument to your computer, make the connection directly without passing through a USB hub. • For information on setting up your sequence software, refer to the owner's manual of the relevant software. Reference 76 DGX-660 Owner's Manual - Yamaha DGX-660 | DGX-660 Owners Manual - Page 77
and searching. 1 Turn off the power to the instrument. 2 Connect the USB wireless LAN adaptor UD-WL01 to the USB TO DEVICE terminal of the instrument. 3 Turn on the power to the instrument. 4 Press the [FILE CONTROL] button to call up the FILE CONTROL display. Reference DGX-660 Owner's Manual 77 - Yamaha DGX-660 | DGX-660 Owners Manual - Page 78
refer to the manual of the access point. INITIALIZE 1. Select "WPS" by using the CATEGORY [r] or [f] button, then press the [EXECUTE] button. 2. Press the WPS button on your access point within two minutes. Initializes the connection setup to the default factory status. 78 DGX-660 Owner's Manual - Yamaha DGX-660 | DGX-660 Owners Manual - Page 79
by using the CATEGORY [r] or [f] button and press the [EXECUTE] button to actually save them. Switches to the Infrastructure mode. For information on making settings for/on your iPhone/iPad, refer to the "iPhone/iPad Connection Manual" on the website (page 8). Reference DGX-660 Owner's Manual 79 - Yamaha DGX-660 | DGX-660 Owners Manual - Page 80
support all commercially available USB devices. Yamaha cannot guarantee operation of USB devices that you purchase. Before purchasing a USB device for use with this instrument, please visit the following web page: http://download.yamaha flash drive and the data. Reference 80 DGX-660 Owner's Manual - Yamaha DGX-660 | DGX-660 Owners Manual - Page 81
be selected. To exit from the FILE CONTROL display press the [EXIT] button. NOTE • No sound will be produced if you play the keyboard while the FILE CONTROL display is showing. Also, in this and Style Recommender. • While data is being loaded from a USB flash drive. DGX-660 Owner's Manual 81 - Yamaha DGX-660 | DGX-660 Owners Manual - Page 82
display. 5 Press the [EXIT] button to exit from the FILE CONTROL display. 2 Use the CATEGORY [r] or [f] buttons to call up "Format." Reference 3 Press the [ turn off the power or disconnect the USB flash drive during the operation. Doing so may result in data loss. 82 DGX-660 Owner's Manual - Yamaha DGX-660 | DGX-660 Owners Manual - Page 83
overwrite a file that already exists on the USB flash drive, use the dial or the [+] and [-] buttons to select the file The Save operation cannot be cancelled during execution. Never turn off the power or disconnect the USB flash drive during the operation. Doing so may DGX-660 Owner's Manual 83 - Yamaha DGX-660 | DGX-660 Owners Manual - Page 84
overwrite a file that already exists on the USB flash drive, use the dial to select the file, then skip ahead to step • The Save operation cannot be cancelled during execution. Never turn off the power or disconnect the USB flash drive during the operation. Doing so may result DGX-660 Owner's Manual - Yamaha DGX-660 | DGX-660 Owners Manual - Page 85
audio signals via the AUX IN jack during conversion, that sound also will be recorded. After a while, a message . NOTICE • Never turn off the power or disconnect the USB flash drive during the operation. Doing use the dial to select the file, then go on to the next step. DGX-660 Owner's Manual 85 - Yamaha DGX-660 | DGX-660 Owners Manual - Page 86
operation cannot be cancelled during execution. Never turn off the power or disconnect the USB flash drive during the operation. Doing from the FILE CONTROL display. 2 Use the CATEGORY [r] or [f] buttons to call up "Load." Reference 3 Use the dial to select the file you 86 DGX-660 Owner's Manual - Yamaha DGX-660 | DGX-660 Owners Manual - Page 87
USB flash drive is connected to the instrument. Reference 3 Use the dial to select the file you want to delete. power or disconnect the USB flash drive during the operation. Doing so may result in data loss. 6 Press the [EXIT] button to exit from the FILE CONTROL display. DGX-660 Owner's Manual - Yamaha DGX-660 | DGX-660 Owners Manual - Page 88
Appendix Troubleshooting For the Instrument Problem When the instrument is turned on or off, a popping sound is temporarily produced. The power is automatically turned off. When using a mobile phone, noise is produced. Noise is heard from the instrument's speakers or headphones when using the - Yamaha DGX-660 | DGX-660 Owners Manual - Page 89
MIDI data was received at one time and failed to proceed. Over Current Communication with the USB device has been shut down because of the overcurrent to the USB device. Disconnect the device from the USB TO DEVICE terminal, then turn on the power position before use. The DGX-660 Owner's Manual 89 - Yamaha DGX-660 | DGX-660 Owners Manual - Page 90
Dimensions (W x D x H) Weight Keyboard Other Controllers Display Panel Tone Generation Polyphony Preset Number of Keys Type Touch Response Pitch Bend Wheel Type Size Color Contrast Score Display Function Lyrics Display Function Language Language Piano Sound Yes 90 DGX-660 Owner's Manual Appendix - Yamaha DGX-660 | DGX-660 Owners Manual - Page 91
• Pedal Unit: LP-7A/LP-7AWH • Foot Pedal: FC3A • Footswitch: FC4A/FC5 • USB wireless LAN adaptor: UD-WL01 • Wireless MIDI Adaptor: UD-BT01 * The contents of this manual apply to the latest specifications as of the printing date. To obtain the latest manual, access the Yamaha website then download - Yamaha DGX-660 | DGX-660 Owners Manual - Page 92
69 MIDI 44, 74 MIDI Reference 8 Music Database 33 Music Rest 8 Mute 40 N Number buttons 24 O Output Gain Level 58 Overview Demo 38 P Panel settings 50 Pause 40 Pedal unit 22 Piano Reset 27 Piano Room 25 Pitch 25, 55, 56 PITCH BEND wheel 56 Playback 39 Portamento 21 Power On - Yamaha DGX-660 | DGX-660 Owners Manual - Page 93
FOR THE UNITED KINGDOM Connecting , packaging, and/or accompanying documents means that used electrical and electronic products should not be mixed with contact your local municipality, your waste disposal service or the point of sale where you purchased the items. [For DGX-660 Owner's Manual 93 - Yamaha DGX-660 | DGX-660 Owners Manual - Page 94
- Yamaha DGX-660 | DGX-660 Owners Manual - Page 95
UNITED KINGDOM/IRELAND Yamaha Music Europe GmbH (UK) Sherbourne Drive, Tilbrook, Milton Keynes, MK7 8BL, U.K. Tel: +44-1908-366700 GERMANY Yamaha Music -88-88 GREECE Philippos Nakas S.A. The Music House 19th klm. Leof. Lavriou 190 02 Peania - Attiki, Greece Tel: +30-210-6686260 SWEDEN Yamaha Music - Yamaha DGX-660 | DGX-660 Owners Manual - Page 96
Yamaha Global Site http://www.yamaha.com/ Yamaha Downloads http://download.yamaha.com/ Manual Development Department © 2015 Yamaha Corporation Published 10/2015 POGR*.*-**A0 Printed in Indonesia ZS39130
-
 1
1 -
 2
2 -
 3
3 -
 4
4 -
 5
5 -
 6
6 -
 7
7 -
8
-
9
-
10
-
11
-
12
-
13
-
14
-
15
-
16
-
17
-
18
-
19
-
20
-
21
-
22
-
23
-
24
-
25
-
26
-
27
-
28
-
29
-
30
-
31
-
32
-
33
-
34
-
35
-
36
-
37
-
38
-
39
-
40
-
41
-
42
-
43
-
44
-
45
-
46
-
47
-
48
-
49
-
50
-
51
-
52
-
53
-
54
-
55
-
56
-
57
-
58
-
59
-
60
-
61
-
62
-
63
-
64
-
65
-
66
-
67
-
68
-
69
-
70
-
71
-
72
-
73
-
74
-
75
-
76
-
77
-
78
-
79
-
80
-
81
-
82
-
83
-
84
-
85
-
86
-
87
-
88
-
89
-
90
-
91
-
92
-
93
-
94
-
95
-
96
 |
 |
Owner’s Manual
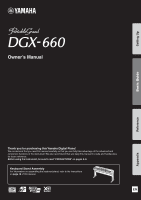
Keyboard Stand Assembly
For information on assembling the keyboard stand, refer to the instructions
on
page 12
of this manual.
Thank you for purchasing this Yamaha Digital Piano!
We recommend that you read this manual carefully so that you can fully take advantage of the advanced and
convenient functions of the instrument. We also recommend that you keep this manual in a safe and handy place
for future reference.
Before using the instrument, be sure to read “PRECAUTIONS” on pages 5–6.
EN
Setting Up
Reference
Appendix
Basic Guide