Yamaha DRX-1 Owner's Manual
Yamaha DRX-1 Manual
 |
View all Yamaha DRX-1 manuals
Add to My Manuals
Save this manual to your list of manuals |
Yamaha DRX-1 manual content summary:
- Yamaha DRX-1 | Owner's Manual - Page 1
U DVD Recorder Enregistreur de DVD DRX-1 OWNER'S MANUAL MODE D'EMPLOI - Yamaha DRX-1 | Owner's Manual - Page 2
USER-SERVICEABLE PARTSINSIDE. REFER SERVICING TO QUALIFIED SERVICE operating and maintenance problems. WARNING: TO provided or the manufacturer's instructions have been adhered to. 10 mast and supporting GENERAL INFORMATION structure service or repairs to this product, ask the service technician - Yamaha DRX-1 | Owner's Manual - Page 3
with other electronic devices.This equipment generates/uses radio frequencies and, if not installed and used according to the instructions found in the users manual, may cause interference harmful to the operation of other electronic devices. Compliance with FCC regulations does not guarantee that - Yamaha DRX-1 | Owner's Manual - Page 4
manual carefully. Keep it in a safe place for future reference. 2 The recommended operating temperature range for the Recorder causing an electrical shock to the user and/or damage to this unit. qualified YAMAHA service personnel when any service is needed. 2x) - Video cable - DVD+RW disc If any item - Yamaha DRX-1 | Owner's Manual - Page 5
Picture Screen 18 User preferences 19 Recording 24 Before you start recording 24 Manual recording of a TV channel or from a video camera ________ 24 Timer programming 26 If a timer recording is incorrect 28 Playback 30 Playing a DVD+RW/+R disc 30 Playing a pre-recorded DVD-Video disc 30 - Yamaha DRX-1 | Owner's Manual - Page 6
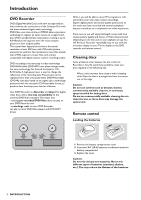
easy to use, with the on-screen display on your TV, the display on the DVD recorder and remote control. Cleaning discs Some problems occur because the disc inside the Recorder is dirty.To avoid these problems, clean your discs regularly in the following way: ● When a disc becomes dirty, clean it - Yamaha DRX-1 | Owner's Manual - Page 7
Please refer to your TV,VCR, Stereo and any other User Manual(s) as necessary to make the optimal connections. - Do not connect the power cords until all other connections are made. - Do not connect your DVD Recorder to your TV via your VCR.The video quality could be distorted by the copy protection - Yamaha DRX-1 | Owner's Manual - Page 8
connection provides the optimum sound quality. For this you need a Multi-channel A/V receiver that supports one or more of the audio types supported by your DVD Recorder (MPEG 2, Dolby Digital and DTS). Check the receiver manual and the logos on the front of the receiver. ● Connect one of the - Yamaha DRX-1 | Owner's Manual - Page 9
audio cable. ● After installation set Digital Output to PCM only (see 'User preferences.') Connecting to a receiver equipped with Dolby Pro Logic ● Make a video connection between the DVD Recorder and the TV. ● Then connect the Recorder's Left and Right AUDIO OUT jacks to the corresponding inputs on - Yamaha DRX-1 | Owner's Manual - Page 10
OUT jack on the video camera. Use the video cable supplied (3).Then connect the AUDIO Left (white) and Right (red) IN jacks of the DVD Recorder to the corresponding OUT jacks on the video camera using the AUDIO cable supplied (4). ● If your video camera has mono sound, use only the left - Yamaha DRX-1 | Owner's Manual - Page 11
If the Recorder is switched off while setting user preferences, all preferences have to be set again after switching on the Recorder again. Manual setting When following items may be set in Initial setup: Menu language The DVD Recorder's system menus will be displayed in the language you choose. - Yamaha DRX-1 | Owner's Manual - Page 12
Automatic TV Channel Search Make sure the antenna is connected to the DVD Recorder. See 'Connecting to the antenna.' Your DVD Recorder will search for all TV channels that are available in your area setup is now complete.You can still adjust the settings. See 'User preferences.' 8 INSTALLATION - Yamaha DRX-1 | Owner's Manual - Page 13
forward during disc playback REC VOLUME AUTO/MAN - to adjust the recording volume level automatically or manually MANUAL - 3 4 to increase/decrease the recording volume level CHANNEL - to select TV channels manually When the Recorder is in monitor mode. TITLE - ∞ selects previous title/chapter/track - Yamaha DRX-1 | Owner's Manual - Page 14
) - connection to an amplifier, receiver or stereo system with a digital (coaxial) audio input IN RC6 - for connection to a media control system VENTILATION OPENINGS - allow the DVD Recorder to cool. Do not block the vents. Leave at least one inch space free around the vents 10 FUNCTIONAL OVERVIEW - Yamaha DRX-1 | Owner's Manual - Page 15
, minutes and seconds - Remote Control command received TITLE TRACK CHAPTER DVD RW SA VCD HQ SP EP+ TOTAL TRACK TIME REMAIN AM PM MONITOR TIMER CHANNEL RECORD -40 -30 -20 -10 0 OVER -40 -30 -20 MPEG DIGITAL DTS PCM MANUAL -10 0 OVER STEREO SAP STEREO - The current channel is - Yamaha DRX-1 | Owner's Manual - Page 16
up/left/right ENTER/OK - acknowledge menu selection TOP MENU - displays DVD disc menu or Index Picture Screen for a DVD+RW SYSTEM MENU - displays Recorder system menu bar EDIT - displays edit menu for DVD+RW or DVD+R disc TITLE/CHAP - select title - select chapter SUBTITLE - select subtitle language - Yamaha DRX-1 | Owner's Manual - Page 17
(up to two minutes) is needed by the Recorder to automatically make the disc compatible with DVD video players. DVD+R Records and plays. Discs for playing only: DVD-Video DVD-R (DVD-Recordable) These play only if they contain DVD-Video. DVD-RW Plays only if it is recorded in Video mode and has been - Yamaha DRX-1 | Owner's Manual - Page 18
buttons on the remote control and/or front panel of the DVD Recorder. On-screen display information System menu bar Super Audio CD Of Recorder's menu is not displayed properly, this is a TV-related issue and is not an improper functioning of the DRX-1. System menu bar icons Part 1 Part 2 User - Yamaha DRX-1 | Owner's Manual - Page 19
preference menu icons Picture settings Sound settings Language settings Feature settings Remote control settings Record settings Installation -- --- off on off -- --- off on off User preference menu operation 1 Press SYSTEM MENU on the remote control. 2 Press t (left cursor) to select - Yamaha DRX-1 | Owner's Manual - Page 20
DVD+RW (Rewritable) DVD+R DVD-Video Super Video-CD Video-CD no disc disc error Disc status icons 0 rec recording 9 stop stop 2 play playing ; pause pause play 0 ; pause record 'Manual recording Checking input'). It displays the currently selected signal, or which device you are viewing or recording - Yamaha DRX-1 | Owner's Manual - Page 21
due on another day When an OTR is in progress, the end time appears. 10:15 pm End time of the OTR When no timer recording is scheduled, the current time appears. Current time Note: The Tuner info box and Timer info box will disappear automatically. OPERATION 17 - Yamaha DRX-1 | Owner's Manual - Page 22
the index picture, the program name, length of recording and mode in which it was recorded and recording date of the title are shown. If no name is known, the DVD Recorder will fill in the source (i.e. channel recorded) and the time of the recording instead. Empty spaces (erased titles or blank space - Yamaha DRX-1 | Owner's Manual - Page 23
the DVD Recorder for PROBLEMS, IT IS RECOMMENDED THAT THE USER SWITCH THE CONNECTION TO THE "STANDARD DEFINITION" OUTPUT. IF THERE ARE QUESTIONS REGARDING OUR VIDEO MONITOR COMPATIBILITY WITH THIS MODEL 525P DVD PLAYER, PLEASE CONTACT OUR CUSTOMER SERVICE CENTER. This unit is compatible with YAMAHA - Yamaha DRX-1 | Owner's Manual - Page 24
bar.Also see 'Initial setup Language.' Settings can be changed for: - Playback audio - Recording audio - Subtitle - Menu (DVD Recorder system menus only) Recording audio You can set a preference for recording a stereo or secondary audio program. Select 'Stereo' or 'SAP.' This setting applies only - Yamaha DRX-1 | Owner's Manual - Page 25
150 minutes 240 minutes 360 minutes In practice, the DVD recorder may record a few minutes more than indicated. You can only play a disc in the mode in which it was recorded. 1 In the Record settings menu, select 'Record mode.' Record settings Record mode Auto chapters Filter mode EP+ On Sport - Yamaha DRX-1 | Owner's Manual - Page 26
Add Delete Add To exit press SYSTEM MENU VCR Plus+® ch If you intend to use the VCR Plus+ system, you need to manually assign channel numbers to Guide channel numbers. Installation VCR Plus+ ch. VCR Plus+ ch. ... 003 004 005 006 007 ... Channel To exit press SYSTEM MENU 1 In the Installation - Yamaha DRX-1 | Owner's Manual - Page 27
Date screen will reappear automatically.You can repeat the procedure with a new channel number. Time/Date Manually If the time in the DVD Recorder display is not correct, the clock must be set manually. Time/date Manual Time AM/PM Year Month Date Daylight Saving 03: 46 PM 2001 06 16 On To exit - Yamaha DRX-1 | Owner's Manual - Page 28
is write protected. In this respect, your DVD Recorder behaves just like a Video Cassette Recorder. If you want to make a recording without the risk of overwriting earlier recordings use the safe Record Function (see 'Manual Recording - Safe Recording'). In the Index Picture Screen you can select - Yamaha DRX-1 | Owner's Manual - Page 29
left.The display will show 'DISC FULL.' Safe record is not possible then. Recordings on DVD+R are always automatically made after the last title on the disc. Manual audio control You can control the audio volume recording level of your DVD Recorder manually. 1 In monitor mode, press REC VOLUME AUTO - Yamaha DRX-1 | Owner's Manual - Page 30
with the VCR Plus+® system 1 Insert a recordable DVD+RW or DVD+R disc. 2 Normally, the DVD Recorder displays the contents of the disc on the the recording of all the desired broadcast material. 26 RECORDING A PlusCode number is a number of up to eight digits, printed in most TV guides next to - Yamaha DRX-1 | Owner's Manual - Page 31
. 5 Confirm with ENTER/OK. 6 If the VCR Plus+ channel has not been set, the DVD Recorder will ask you to enter the channel number. Refer to a channel mapping list.You may find this in your TV Guide or newspaper. Use t/u (left/right cursor) or the 0-9 buttons to select the correct channel, then - Yamaha DRX-1 | Owner's Manual - Page 32
to Fridays. Memory full All the timer blocks are in use. Solution: ● Delete one of the Timer recordings. Clock not set-check Clock channel The clock is not set. Set it manually (See 'Time/Date Manually') or adjust the Clock channel (See 'Time/Date Automatic.') Data error Solution: ● Make sure all - Yamaha DRX-1 | Owner's Manual - Page 33
at the bottom of the screen briefly.Then the Timer List will reappear. 7 Remove the menus by pressing TIMER, repeatedly if necessary. Note: If Timer Recordings overlap or conflict with each other, they will be highlighted in red in the Timer List. How to stop a Timer - Yamaha DRX-1 | Owner's Manual - Page 34
all operating commands.When this occurs, please refer to the instructions in the disc jacket or case.When an appears in the top left corner of the TV screen, the operation is not permitted by the Recorder or the disc. 1 Insert a pre-recorded DVD-Video disc. Make sure the label is facing up. If - Yamaha DRX-1 | Owner's Manual - Page 35
English General features TITLE 1 DVD VIDEO TITLE 2 CHAPTER 1 CHAPTER 2 CHAPTER 3 CHAPTER 1 CHAPTER 2 Note: Unless stated otherwise, all operations described are based on remote control operation. A number of operations can also - Yamaha DRX-1 | Owner's Manual - Page 36
Slow Motion 1 Press SYSTEM MENU to access the system menu bar. 2 Press t/u (left/right cursor) to select H (Slow motion) in the system menu bar. 3 Use w (down cursor) to enter the slow motion menu. ➤ Playback will pause. 4 Use t/u (left/right cursor) to move the picture backward or forward one - Yamaha DRX-1 | Owner's Manual - Page 37
English Repeat Scan DVD Discs - Repeat chapter/title/disc ● To repeat the currently playing chapter, press REPEAT. ➤ appears on the TV screen. ● To repeat the currently playing title, press - Yamaha DRX-1 | Owner's Manual - Page 38
was made from a digital video camera using the i.LINK DV input, the original recording date and time are automatically stored as DVD subtitles. ● Press SUBTITLE to display the recording date and time. ➤ The recording date and time are displayed in the right bottom corner of the screen. 31/ 08 - Yamaha DRX-1 | Owner's Manual - Page 39
, press TOP MENU again. Camera Angle If the disc contains sequences recorded from different camera angles, the angle icon appears, showing the number directly using the numerical buttons 0-9. 1 Make sure PBC is On. See 'User preferences - Feature settings.' 2 Load a (Super) Video CD with PBC and - Yamaha DRX-1 | Owner's Manual - Page 40
, the Audio CD screen appears. ➤ During play, the current track number and its elapsed playing time will show on the TV screen and on the Recorder display. Audio Disk Mode 1 2: 45 14 72: 50 play track time total tracks total time Moving to another track ● Press during play to step forward - Yamaha DRX-1 | Owner's Manual - Page 41
English Access control Child Lock (DVD and VCD) When activating Child Lock, only discs that are authorized can be played without entering a code. The Recorder memory maintains a list of 50 authorized ('Child safe') disc titles. A disc will be placed in the list when you select 'Play always.' Each - Yamaha DRX-1 | Owner's Manual - Page 42
Play once Play always Choose 'Play always' to insert the disk in the child- safe list Access Control Parental Level (DVD-Video only) Movies on pre-recorded DVD discs may contain scenes not suitable for children.Therefore, some discs may contain 'Parental Control' rating information that applies to - Yamaha DRX-1 | Owner's Manual - Page 43
disc will play in full. Ratings 1 to 8 (1 = childsafe - 8 = adults only): The disc contains scenes not suitable for children. If you set a rating for the Recorder, all scenes with the same rating or lower will play. Higher rated scenes will not play unless an alternative is available on the disc.The - Yamaha DRX-1 | Owner's Manual - Page 44
in the Index Picture Screen, press . ➤ This selects the first title on the DVD+RW. 2 Press v (up cursor). ➤ You enter the Disc Information Screen. 3 the instructions on the screen. (See 'Operation Managing disc content - Editing') Erase this title You may simply erase a title by recording over it - Yamaha DRX-1 | Owner's Manual - Page 45
title on the DVD+RW. 2 recording. 'Disc Locked' will appear on the TV screen if you attempt recording recording DVD+R disc While a DVD+RW disc can be played instantly on most DVD players, a DVD+R disc can be played only on the DVD recorder DVD+R disc was recorded on a different brand of DVD recorder - Yamaha DRX-1 | Owner's Manual - Page 46
play on your DVD Recorder. However a DVD player may show the original versions instead of the edits.You can prepare your discs so that a DVD player will also the record settings menu. See 'User preferences - Record Settingss - Auto chapters.') After the recording is finished, you can manually add - Yamaha DRX-1 | Owner's Manual - Page 47
to delete some before inserting new chapter markers. During recording you can add chapter markers by pressing EDIT on the ➤ 'Delete markers' will appear. You can delete all chapter markers (manually and automatically generated) fin the current title. Perform steps 1 and 2 CONTENT (DVD+RW/+R ONLY) 43 - Yamaha DRX-1 | Owner's Manual - Page 48
into more than two titles, use the above procedure several times. Append recording If you want to append a video recording to an earlier recorded title, do the following. 1 On the Index Picture Screen, select Index Picture Screen. 6 Press to stop recording. 44 MANAGING DISC CONTENT (DVD+RW/+R ONLY) - Yamaha DRX-1 | Owner's Manual - Page 49
English Troubleshooting If it appears that the DVD Recorder is faulty, first consult this checklist. It may be that something has been overlooked. Under no circumstances attempt to repair the system yourself; this will invalidate the warranty. Look for the specific symptom(s).Then perform only the - Yamaha DRX-1 | Owner's Manual - Page 50
control. Note: To achieve maximum compatibility, make sure the disc contains at least 5 minutes recorded in HQ mode, 12 minutes in SP+, 20 minutes in EP or 30 minutes in EP+ mode. For more information about compatibility with DVD players refer to 'Troubleshooting' in the instructions for Use. 46 - Yamaha DRX-1 | Owner's Manual - Page 51
instructions, a wrong disc in use, or incorrect connections. Consult your authorized YAMAHA dealer or Service Center for assistance. 5 Unplug the power cord, then reconnect it to a power source and use the DVD Recorder again as usual. DVD Recorder system notes DVD+RW and DVD+R discs recorded - Yamaha DRX-1 | Owner's Manual - Page 52
by which you can control the DVD Recorder via the TV screen. One-Touch Recording.With this feature you can easily start a recording (by pushing just one button) and select the switch-off time in intervals of 30 minutes. See TV system. Public Broadcast Service.The channel that transmits data for - Yamaha DRX-1 | Owner's Manual - Page 53
brands. The following buttons will operate TVs: - VOL + increase TV volume - VOL - decrease TV volume - MUTE mute TV sound Other buttons normally operate the DVD Recorder but will operate the TV if you press and hold TV SHIFT. - CH + next higher TV channel - CH - next lower TV channel - 0 - 9 choose - Yamaha DRX-1 | Owner's Manual - Page 54
, 1050, 1057 1058, 1063, 1073, 1077, 1079 Pilot 1003, 1005, 1064 Pioneer 1019, 1031 Price Club 1046 Portland 1003, 1012, 1064 Prism 1007, 1060 Proscan 1006 Proton 1021, 1063 Pulsar 1002, 1057, 1058, 1075, 1077 White_Westinhouse 1029, 1028, 1030 Yamaha 1003, 1005 Zenith 1002, 1012, 1028 - Yamaha DRX-1 | Owner's Manual - Page 55
Specifications DISC FORMATS SUPPORTED Disc type DVD+RW DVD+R DVD-RW (Video format) DVD-R DVD-Video SVCD Video CD Audio CD CD-R CD-RW Playback Recording RECORDABLE DISC FORMATS Medium Diameter Capacity (single side) Recording time DVD+RW: Phase-Change ReWritable DVD+R: dye-based 12 cm - Yamaha DRX-1 | Owner's Manual - Page 56
ELECTRONIQUE FRANCE S.A. RUE AMBROISE CROIZAT BP70 CROISSY-BEAUBOURG 77312 MARNE-LA-VALLEE CEDEX02, FRANCE YAMAHA ELECTRONICS (UK) LTD. YAMAHA HOUSE, 200 RICKMANSWORTH ROAD WATFORD, HERTS WD1 7JS, ENGLAND YAMAHA SCANDINAVIA A.B. J A WETTERGRENS GATA 1, BOX 30053, 400 43 VÄSTRA FRÖLUNDA, SWEDEN
-
 1
1 -
 2
2 -
 3
3 -
 4
4 -
 5
5 -
 6
6 -
 7
7 -
8
-
9
-
10
-
11
-
12
-
13
-
14
-
15
-
16
-
17
-
18
-
19
-
20
-
21
-
22
-
23
-
24
-
25
-
26
-
27
-
28
-
29
-
30
-
31
-
32
-
33
-
34
-
35
-
36
-
37
-
38
-
39
-
40
-
41
-
42
-
43
-
44
-
45
-
46
-
47
-
48
-
49
-
50
-
51
-
52
-
53
-
54
-
55
-
56
 |
 |
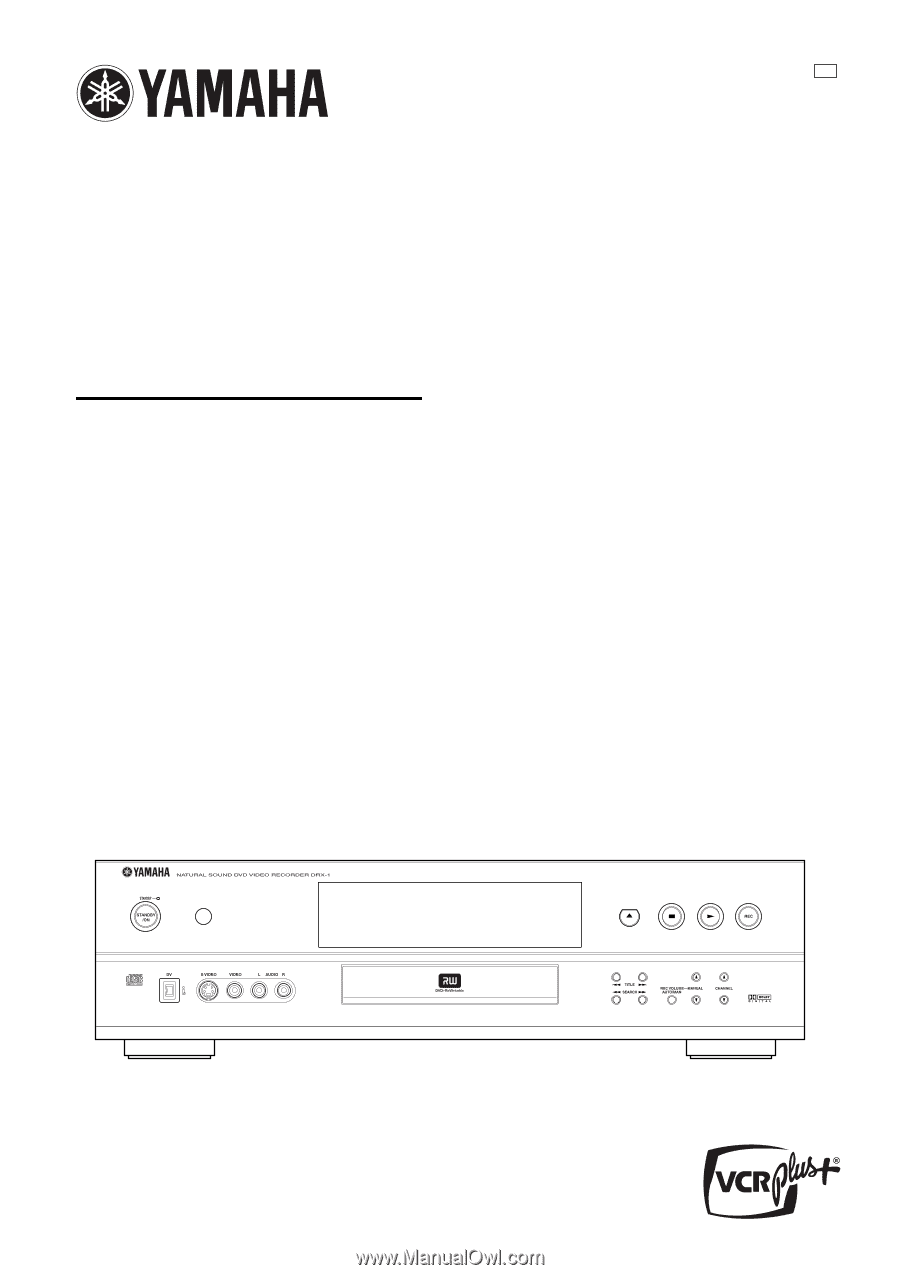
DVD Recorder
Enregistreur de DVD
DRX-1
OWNER’S MANUAL
MODE D’EMPLOI
U