Yamaha DTXPRESS Owner's Manual
Yamaha DTXPRESS Manual
 |
View all Yamaha DTXPRESS manuals
Add to My Manuals
Save this manual to your list of manuals |
Yamaha DTXPRESS manual content summary:
- Yamaha DTXPRESS | Owner's Manual - Page 1
DRUM TRIGGER MODULE Owner's Manual - Yamaha DTXPRESS | Owner's Manual - Page 2
SPECIAL MESSAGE SECTION This product utilizes batteries or an external power supply (adapter). DO NOT connect this product to any power supply or adapter other than one described in the manual, on the name plate, or specifically recommended by Yamaha. WARNING: Do not place this product in a - Yamaha DTXPRESS | Owner's Manual - Page 3
AC power adaptor when not using the instrument, or during electrical storms. • Before connecting the instrument to other electronic components, turn off the power for all components. Before turning the power on or off for all components, set have qualified Yamaha service personnel replace the backup - Yamaha DTXPRESS | Owner's Manual - Page 4
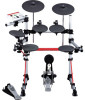
the YAMAHA DTXPRESS. The DTXPRESS is a compact drum trigger module that is equipped with an AWM tone generator and sequencer functions. To get the most out of your DTXPRESS, please read this manual carefully. Also, after reading, keep this manual in a safe place for future reference. How to use the - Yamaha DTXPRESS | Owner's Manual - Page 5
128 key- board voices that comply to the GM System Level 1. • An internal digital reverb section that is the same as found in Yamaha's MU Series of GM/XG tone generators. • User drum kits use a single drum map that can be edited freely. ■ Sequencer Section • A 2-track sequencer for recording songs - Yamaha DTXPRESS | Owner's Manual - Page 6
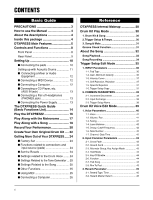
■ Connecting the Power Supply 13 The DTXPRESS Quick Guide (Basic Functions List 14 Play the DTXPRESS 16 Play Along with the Metronome 17 Play Along with a Song 18 Record Your Performance 20 Create Your Own Original Drum Kit ..... 22 Getting More Out of Your DTXPRESS ..... 24 ■ Factory Set 24 - Yamaha DTXPRESS | Owner's Manual - Page 7
Trigger Bypass 52 1-3. Volume Mode 52 1-4. Jump to Recent Page 52 1-5. Hi-Hat Offset 53 1-6. Factory Set 57 3-6. Sync Mode 57 3-7. Use Tempo 58 3-8. Click Mode 58 Trouble shooting 66 Drum Voice List 68 GM Keyboard Voice List 72 Preset Drum Kit List 72 Preset Song List 79 Trigger Setup List - Yamaha DTXPRESS | Owner's Manual - Page 8
to enter the DTXPRESS' Drum Kit Play Mode. !0 !3 !5 !6 o Utility Button (UTIL) Press the button to enter the Utility Mode that contains basic settings for operation of the DTXPRESS. !0 Click Button (CLICK) Press this button to start/stop the metronome (click sound). (P. 17) !1 Trigger Button (TRIG - Yamaha DTXPRESS | Owner's Manual - Page 9
26) @7 Output Jacks (OUTPUT L/MONO, R) These jacks are used to connect the DTXPRESS to an external amplifier, mixer, etc. For monaural playback use the L/MONO jack. For stereo playback connect both L/R jacks. @8 Power Supply Jack (DC IN 12V) Connect an AC adaptor to this jack. To prevent the adaptor - Yamaha DTXPRESS | Owner's Manual - Page 10
to the 1 KICK jack, the 9/10 jack can be used to connect a second bass drum pedal to create a double-bass drum set. • The 9/10 jacks correspond to a 2-trigger input that uses a stereo jack for L (9) and R (10). We recommend the use of these jacks when connecting the Yamaha Bar Pad (BP-80). You can - Yamaha DTXPRESS | Owner's Manual - Page 11
the optional Yamaha DT10 Drum Triggers attached to a set of acoustic drums, it is possible to connect acoustic drums to the DTXPRESS. ■ A setup example using both acoustic drums and drum pads. Referring to the illustration shown below, connect the output cable from each pad and drum trigger to each - Yamaha DTXPRESS | Owner's Manual - Page 12
SELECT switch to the "MIDI" position. Set to "MIDI" MIDI Data DTXPRESS MIDI Device Always use a standard MIDI cable when connecting devices. Also, use a MIDI cable that is not more than 15m in length. Using a longer cable may result in irregular operation and other problems. * The OUTPUT jack is - Yamaha DTXPRESS | Owner's Manual - Page 13
the external signal is adjusted with the AUX IN VOL knob. Setting Up ■ Connecting the Power Supply A special power source adaptor supplies power to the DTXPRESS. Make sure the power is switched OFF and connect the supplied power adaptor to the DC IN jack on the rear panel. To prevent the cord from - Yamaha DTXPRESS | Owner's Manual - Page 14
the drum kit, song, and set the song tempo and metronome. m Enters the Drum Kit Play mode. Set the basic settings and settings for MIDI and the sequencer of the DTXPRESS. m Enters the Utility mode Starts/stops the metronome! Sets the pad's sensitivity and dynamic range. m Enters the Trigger Setup - Yamaha DTXPRESS | Owner's Manual - Page 15
The DTXPRESS Quick Guide (Basic Functions List) Listen to the Selected Song 1. Press the [PLAY] button to open this display, KIT =1 Acoustic SONG=1 Latiniq Song Number Song Name 2. Use the [SEL] buttons to flash the song number. 3. Use the [VALUE-]/[VALUE+] buttons to select the song. 4. - Yamaha DTXPRESS | Owner's Manual - Page 16
of preset drum kits that have been specially programmed by Yamaha. m [Preset Drum Kit List] (P. 72) Use the [SEL] buttons to move the flashing cursor to the drum kit number, then use the [VALUE-]/ [VALUE+] buttons to select the drum kit. Drum Kit Number Drum Kit Name KIT =1 Acoustic SONG - Yamaha DTXPRESS | Owner's Manual - Page 17
that are displayed next to "Groov=". The Groove Function can be used to check your accuracy on the entire drum set or on an entire song. The Groove Check Function can be used not only on the snare drum, but on any of the DTXPRESS' pads. Also, you can change the metronome's pattern to a sixteenth or - Yamaha DTXPRESS | Owner's Manual - Page 18
1. Select a Song Select one of the DTXPRESS' songs and listen to it. Song numbers 1-95 are preset songs that have been created by Yamaha. m [Preset Song List] (P. 79) Press the [PLAY] button to display the Drum Kit & Song display. KIT =1 Acoustic SONG=1 Latiniq Use the [SEL] buttons to move - Yamaha DTXPRESS | Owner's Manual - Page 19
when you want to practice individual drum parts. In the Drum Kit & Song setting display, press the [PAGEt] button twice, the following display (Song & Mute) will appear. SONG=1 Latiniq Ki=®Sn=mCy=®Mi=® Mute (Does not produce sound) Produces sound Use the [SEL] buttons to select - Yamaha DTXPRESS | Owner's Manual - Page 20
MIDI IN/TO HOST jacks can be recorded simultaneously. • Sequence data can be freely used to change the tempo, select the voice or drum kit during playback. m P. 48 [2. Program Change, Bank Select] • Before recording, set the number of measures for the song you want to record. Recording is done in - Yamaha DTXPRESS | Owner's Manual - Page 21
● When the Record Mode is set to Replace ("Rpl"). The following display will appear while recording ( stop recording, the display will return to the Drum Kit & Song display. If the power is cut off during recording, all user song data may be lost. Please use caution. 4. Listen to the Song Press the - Yamaha DTXPRESS | Owner's Manual - Page 22
trigger input). In this case, you will have to assign which voice will be used here. 1-2. Select the Drum Voice Category. Next, decide the drum voice category. The drum voice category is the same category that was used in the Metronome Click Voice (P. 19). For this example, let's select "s: Electric - Yamaha DTXPRESS | Owner's Manual - Page 23
created to the DTXPRESS' memory. Drum kit numbers "49" - "80" (these are called user drum kits) are used for saving individual drum kits. Press the [SAVE/ENT] button, the following display will appear. Store Drumkit To= 49 Init Kit Use the [VALUE-]/[VALUE+] buttons to set the drum kit number ("49 - Yamaha DTXPRESS | Owner's Manual - Page 24
Switch the trigger bypass function (above) ON/OFF from a pad. m P. 44 [2-6. Function] ■ Set the Reverb The DTXPRESS is equipped with a digital reverb section. • Set the reverb type and reverb time for each drum kit m P. 45 [3-1. Reverb Type, Time] • The following three methods can be used to set the - Yamaha DTXPRESS | Owner's Manual - Page 25
VOL. knob. m P. 52 [1-3. Volume Mode] • Display the page that was previously used in the Trigger Setup Edit mode and Drum Kit Voice Edit mode. m P. 52 [1-4. Jump to Recent Page] Getting More Out of Your DTXPRESS ■ Using MIDI The DTXPRESS is equipped with MIDI IN/OUT jacks and a TO HOST jack. These - Yamaha DTXPRESS | Owner's Manual - Page 26
the same, no matter what type of computer is used. Computer Serial Port Serial Cable TO HOST DTXPRESS Use a cable to connect the devices and set the HOST SELECT SWITCH according to the type of computer serial port and clock used. Carefully read the instructions on the right side of this page and - Yamaha DTXPRESS | Owner's Manual - Page 27
the same order as they are displayed in the DTXPRESS. The Table of Contents (P. 6) and Index (P. 85) will assist in locating functions and lists. DTXPRESS Internal Makeup 28 Drum Kit Play Mode 30 About the Song 32 Trigger Setup Edit Mode 35 Drum Kit Voice Edit Mode 39 Song Job Mode 48 Utility - Yamaha DTXPRESS | Owner's Manual - Page 28
used in the drum kit and perform settings such as selecting the voice, tuning, reverb level, etc. The DTXPRESS has 48 preset (No. 1-48) drum kits and another 32 user (No. 49-80) drum kits that are used for saving original drum kits created by the user. As in the Trigger Setup, the selected drum kit - Yamaha DTXPRESS | Owner's Manual - Page 29
DTXPRESS parts. Also, MIDI data produced when the DTXPRESS can be transmitted to an external MIDI device and/or computer. Playing the DTXPRESS in this configuration allows you to trigger the external tone generator's voices and when a drum kit display is specified for setting. • Use the [SEL - Yamaha DTXPRESS | Owner's Manual - Page 30
Refer to [About the Song] (P. 32). * Refer to the [Preset Song List] (P. 79). 2. Trigger Setup & Tempo This display is used for selecting the trigger setup and song settings. HINT Press the [SHIFT]+[PAGEt] buttons, in any Drum Kit Play mode display, to jump to the following display with the cursor - Yamaha DTXPRESS | Owner's Manual - Page 31
. For more information on Drum Voice categories, refer to the [Drum Voice List] (P. 68). Drum Kit Play Mode Drum Voice Category Mute Classification K, k Ki (kick) S, s Sn (snare) C, H Cy (cymbal) T, t, P, E, e, L, m Mi (others) HINT Since drum voices for pads (triggers) are not muted you - Yamaha DTXPRESS | Owner's Manual - Page 32
that is written in the song will be transmitted to the DTXPRESS' tone generator to produce the song. ■ Main Song and Drum Kit Play mode, use the [PAGEs]/[PAGEt] buttons to display the "Trigger Setup & Tempo" display shown below. TRIG =1 Medium ƒ=120=--= 4/4=ƒ 2. Use the display shown above to set - Yamaha DTXPRESS | Owner's Manual - Page 33
the beginning. * Before using, set the pad's function to "Pad Song Control" and assign a song to the pad (m Drum Kit Voice Edit mode [2-6. triggered with a stroke on the pad (m Drum Kit Voice Edit mode [2-7. Pad Song] P. 44) * If the Pad Song's tempo or voices are irregular, re-select the Drum Kit - Yamaha DTXPRESS | Owner's Manual - Page 34
=© r ty 3. Use the display shown above to set the following recording conditions the track's previous data. Replace (Rpl): When the song DTXPRESS will return to the Drum Kit Play mode (Drum Kit & Song display). * Recording can also be stopped anytime by pressing the [START/S] button. * If the power - Yamaha DTXPRESS | Owner's Manual - Page 35
edit in the drum kit play mode [Trigger Setup & Tempo]. 2. Press the [TRIG] button to enter the Trigger Setup Edit mode. 3. Use the [PAGE▲], [PAGE▼] buttons to display the list you want to edit. * If the Utility mode's [Jump to Recent Page] parameter (P. 28) is set to "on", the DTXPRESS will display - Yamaha DTXPRESS | Owner's Manual - Page 36
. HH contrler Connect the HH60, HH80, HH80A to Trigger In- put jack 1 to use as a kick pedal. * The volume (velocity) is fixed. * The DT10, DT20 are Yamaha Drum Trigger Sensors. 1-2. Gain, Minimum Velocity This function sets the input sensitivity (Gain) and velocity range (Minimum Velocity) for - Yamaha DTXPRESS | Owner's Manual - Page 37
used to prevent double triggers* and cross talk (mixed input signals between the jacks) for each input jack q. * double trigger Trigger Setup Copy operation is carried out, the trigger setup data will be replaced with the settings of the copy source. q TRIG IN (Trigger Input Number) Sets the trigger - Yamaha DTXPRESS | Owner's Manual - Page 38
2-2. Input Exchange 38 2-3. Trigger Setup Name 38 2-1. Increment/Decrement This sets the pad function that allows the currently selected drum kit number to be increased or 3. Repeat steps 1 and 2 above to create the Trigger Setup name using a maximum of 8 characters. ● The available characters to - Yamaha DTXPRESS | Owner's Manual - Page 39
page you want to edit. * If the Utility Mode's [1- 4. Jump to Recent Page] (P. 52) parameter is set to "on", the DTXPRESS will display the page last edited when entering the Drum Kit Voice Edit Mode. 4. Use the [SEL] buttons to move the cursor to the parameter you want to edit. The parameter - Yamaha DTXPRESS | Owner's Manual - Page 40
Hat Sensitivity 47 5-4. Song Select 47 5-5. Drum Kit Name 47 1. Voice Parameters Sets the voice for each input source of the pad. The Input Source is trigger data that is transmitted by the pads or trigger sensors connected to input jacks 1-10 of the DTXPRESS. When monaural pads TP60/80, KP60/80 - Yamaha DTXPRESS | Owner's Manual - Page 41
"--" will appear and you will not be able to switch. * Use the [1-1. Voice] display to set whether 2 layer or 1 voice will be used. If the same MIDI note number is set to more than one pad within the same drum kit, the lowest numbered Trigger Input Jack will take priority. Regardless of which pad is - Yamaha DTXPRESS | Owner's Manual - Page 42
cannot be carried out. 1-5. Decay, Cutoff Frequency This function sets the drum voice decay, the filter's cutoff frequency and adjusts the tone of each voice that is delivered by each layer w of the input source q. q w KIT IN=pad 1 V=1 Decay= 0 Fc= 0 e r q IN (Input Source) w Layer Number - Yamaha DTXPRESS | Owner's Manual - Page 43
KIT IN=pad 1 q X Fade=0 However, the same as in Voice Parameters, "If the same MIDI note number is set to more than one pad within the same drum kit, the lowest numbered trigger cannot be carried out. KIT IN=pad 1 (Note# in use ) 2-1. Cross Fade This function sets the velocity (volume) cross - Yamaha DTXPRESS | Owner's Manual - Page 44
). * If this function is set to "on", it is recommended that you use the "key=high" setting in [2-3. Alternate Group, Key Assign Drum Kit Play mode, and is controlled from the panel (of MIDI/TO HOST jack). pad song: According to this setting, playback of the pad song will be controlled by the trigger - Yamaha DTXPRESS | Owner's Manual - Page 45
. white: A special short reverb effect. used to change the characteristic of the reverb's sound. 3-2. Reverb Master Return This function sets the signal return level from the reverb effect for every drum kit. By setting the level, you can adjust the reverb effect of the entire DTXPRESS system. KIT - Yamaha DTXPRESS | Owner's Manual - Page 46
MSB) t L (Bank Select LSB) [Range] 0-127 Sets the bank for when the drum kit is switched. The bank will be assigned with the 2 values set in Bank Select MSB and LSB. * Refer to the Voice List and MIDI Data Format, etc. of the external MIDI device you are using for more information on Bank Select MSB - Yamaha DTXPRESS | Owner's Manual - Page 47
Assign the tempo that will be used. If "---" is set, the tempo will not change . 5-5. Drum Kit Name Changes the drum kit name that is currently selected for editing. KIT Common KitName=Acoustic q q KitName (Drum Kit Name) Procedure 1. In the display shown above, use the [SEL] but- tons to - Yamaha DTXPRESS | Owner's Manual - Page 48
select the User Song (No. 97-128) you want to edit in the Drum Kit Play Mode's [Drum Kit & Song] display or [Song & Mute] display. 2. Press the [SONG] ] (P. 52) parameter is set to "on", The DTXPRESS will display the page last edited when entering the Song Job Mode. 4. Use the [SEL] buttons - Yamaha DTXPRESS | Owner's Manual - Page 49
Song that is currently selected will be replaced with data of the copy source. q from (Copy Source) [Range] 1-127 Sets the song that is the copy source. is inaccurate, this function is used to correct the timing. The accuracy for correcting can be assigned using note lengths. SONG Quantize TR=1 - Yamaha DTXPRESS | Owner's Manual - Page 50
for editing). SONG SngName=no name q SngName (Song Name) Procedure 1. Use the [SEL] buttons to move the cursor to the character you want to change on the Repeat steps 1 and 2 above to create the User Song Name using a maximum of 8 characters. ● The available characters to choose from - Yamaha DTXPRESS | Owner's Manual - Page 51
various settings that apply to the DTXPRESS' tone generator. 5. MAP (Drum Map) Group mP. 59) Used to edit the User Drum Map. How to set... 1. settings of the DTXPRESS. There is no store function in this mode. Utility Mode Function List Page 1. SYSTEM Group 52 1-1. Learn Mode 52 1-2. Trigger - Yamaha DTXPRESS | Owner's Manual - Page 52
from pads (the hihat controller too) connected to the DTXPRESS. You will not be able to produce voices or transmit MIDI data. The sequencer and tone generator will function normally. HINT Use this function when you are setting your drum kit with trigger pickup devices, or when you do not want to - Yamaha DTXPRESS | Owner's Manual - Page 53
in the DTXPRESS system data : Data set in the Utility mode (except User Map). user map : User Map data. one drumkit : Data for the currently selected Drum Kit. all drumkit : All User Drum Kit Data. one trigger : Data for the currently selected Trigger Setup. all trigger : All User Trigger Setup data - Yamaha DTXPRESS | Owner's Manual - Page 54
channel 10. Program change messages received or transmitted through channel 10 can be used to switch DTXPRESS drum kits. It is necessary to set the receive parameter to "on" in this display in order to switch the DTXPRESS' drum kits from a song or an external MIDI device. UT MIDI RECEIVE 10PC= on - Yamaha DTXPRESS | Owner's Manual - Page 55
Table Use this function to create a program change table (a list of program change numbers that correspond to drum kits). A program change message received internally from the DTXPRESS or through channel 10 from an external MIDI device will select, according to the program change table, the drum kit - Yamaha DTXPRESS | Owner's Manual - Page 56
* This setting does not affect internal operating data for the hi-hat controller. 2-10. Host Thru Port This enables the DTXPRESS to transmit P, E, e, L, m Sets the voice to be used for the Click Voice selected in step q Click, select a drum voice category. Refer to Drum Kit Voice Edit Mode's [1-1. - Yamaha DTXPRESS | Owner's Manual - Page 57
be displayed. If this is set to "off", the DTXPRESS will produce sound however; key on messages will not be transmitted. * Refer to the preset drum kit's [Drum Voice List] (P. 68) for the /TO HOST jack the external clock will be used If a timing clock (F8) is not received the internal clock will be - Yamaha DTXPRESS | Owner's Manual - Page 58
, but will not sound when the song is stopped. The [CLICK] button can also be used to control on/off operation of the click sound. 4. TG (Tone Generator) Group This sub-mode contains settings for the DTXPRESS' tone generator. This group is divided into the following 4 pages. 4-1. Equalizer (EQ 58 - Yamaha DTXPRESS | Owner's Manual - Page 59
drum kit's pad input. Therefore, when a preset drum kit is selected the User Drum Map will not be used (the preset drum map will be used) so settings currently selected drum kit are already assigned/set. UT MAP N= 0C -2 ( Drumkit Data ) 5-1. Voice This creates a list that assigns a drum voice for - Yamaha DTXPRESS | Owner's Manual - Page 60
Drum Voice List] (P. 68). 5-2. Volume, Pan This function sets the volume w and pan e (the position in the stereo field) for each drum to C to R64. 5-3. Tuning This function sets the pitch for each drum voice assigned to each MIDI note number q. This sets the Reverb Send Level w for each drum voice - Yamaha DTXPRESS | Owner's Manual - Page 61
will be erased and replaced with the settings of the copy source. If you want to keep important user drum map settings, use the bulk dump operation and save the settings to an external device before executing the map copy. q from (Preset Drum Map) Selects the preset drum kit number (1-48) that will - Yamaha DTXPRESS | Owner's Manual - Page 62
MEMO 62 - Yamaha DTXPRESS | Owner's Manual - Page 63
contains lists for the DTXPRESS' internal Voice, Song, Trigger Setup as well as details related to MIDI and Error Messages. Specifications 64 Error Messages 65 Trouble Shooting 66 Drum Voice List 68 GM Keyboard Voice List 72 Preset Drum Kit List 72 Preset Song List 79 Trigger Setup List 79 - Yamaha DTXPRESS | Owner's Manual - Page 64
Tone Generator Maximum polyphony Voices Drum kits Trigger setups Sequencer tracks Song control Main song Pad song Other Sequencer Functions Song Record modes Controls LED buttons Buttons Knobs Display Connections Front Panel Rear Panel Power supply Power Requirement Dimensions (W x H x D) Weight - Yamaha DTXPRESS | Owner's Manual - Page 65
will appear when incorrect settings or operation are detected, of the problem may be that the backup RAM data has been damaged or the backup battery power is low. Contact the nearest Yamaha Service Center or again. At this time, use the bulk dump function to move any songs you wish to keep to - Yamaha DTXPRESS | Owner's Manual - Page 66
Utility mode's [1-2. Trigger Bypass] bypass switch set to "ON"? (m P. 52) ● Is the Drum Kit Voice Edit mode's [1-2. Volume, Pan] (m P. 41) or [5-1. Volume] (m P. 47) volume set to "0"? ● Check the local control setting in the Utility mode. When the local control is set to "off" the DTXPRESS will not - Yamaha DTXPRESS | Owner's Manual - Page 67
Velocity Curve]) ● Are you using a sensor made by a manufacturer other than Yamaha? Depending upon the manufacturer output levels might be too large. ● Change the INPUT ATTENUATION setting on the rear panel. (m P. 9) The DTXPRESS does not receive any switch or trigger signals. ● If you can access - Yamaha DTXPRESS | Owner's Manual - Page 68
Drum Voice List ● Voice Category K : Acoustic Kick k : Electric Kick S : Acoustic Snare s : Electric Snare T : Acoustic Tom t : Electric Tom C : Cymbal H : Hi-Hat P : Percussion E : Effect 1 e : Effect 2 L : Drum Loop m : misc. voices ● : 2-layer voice K : Acoustic Kick 1 2HedMed1 ● 2 2HedMed2 ● 3 - Yamaha DTXPRESS | Owner's Manual - Page 69
● 24 Brsh H 25 AnAirRim ● 26 CapGun ● 27 CapRim ● 28 Dryroom ● 29 Electric 30 HiFive 31 RIMpopr ● 32 Sambie6 ● 33 AnaAir ● 34 AnaBuzz ● 35 AnaBzRim ● ACTomM 73 ACTomL 74 ACTomF 75 Room1 Hi ● 76 Room1Mid ● 77 Room1 Lo ● Drum Voice List 78 Room1Flr ● 79 Room2 Hi ● 80 Room2Mid ● 81 Room2 Lo ● 82 - Yamaha DTXPRESS | Owner's Manual - Page 70
Drum Voice List 48 Distrt F 49 ETMooRH 50 ETMooRM 51 ETMooRL 52 ETMooRXL 53 IndTmH ● 54 IndTmM ● 55 IndTmL ● 56 IndTmF ● 57 TM Revrs 58 Analog 59 T GongE C : - Yamaha DTXPRESS | Owner's Manual - Page 71
22 LoMO LP 23 LoMsolo 24 LPscNoiz 25 HeliLoop 26 StreamLP m : misc. voices 1 Brass 4 2 Brass 5 3 Celesta 4 Chor 516 5 Chor 539 6 Chorus 4 7 GlockenH Drum Voice List 8 GlockenL 9 GlockenM 10 Marimba 11 MTrp 4 12 ORGAN 3 13 SBrass 4 14 SBrass 5 15 sitar599 16 SteelDr3 17 SynPf 3 18 Trb 3 19 Trp 4 20 - Yamaha DTXPRESS | Owner's Manual - Page 72
Drum Kit List No. Name 1 Acoustic 2 NewBeat 3 Rock kit 4 RockDry1 5 RockDry2 6 RockDry3 7 RockDry4 8 BigRevrb 9 Ballade 10 BeBop 11 Andora 12 Room Kit 32 GroovKit ● 33 Bs.@Base ● 34 JungleNY 35 Snapkit 36 JumpBack ● ● : Kits used with the pad songs No. Name 37 MondoKit ● 38 Torqkit ● 39 Mystery ● - Yamaha DTXPRESS | Owner's Manual - Page 73
T 85 Night L K 0 NoAssign C 31 SizzlRck K 0 NoAssign C 36 RidB Rc K 0 NoAssign C 37 China K 0 NoAssign C 1 CrashB K 0 NoAssign Preset Drum Kit List open H 29 HHRoKopn K 0 rimOpen H 29 HHRoKopn K 0 close H 6 H ClsNB1 K 0 rimClose H 5 H ClsMu K 0 footClose H 37 HHFTpdl1 K 0 splash H 44 - Yamaha DTXPRESS | Owner's Manual - Page 74
Preset Drum Kit List No. 9 Ballade Input Voice-1 Voice-2 Source Cat./No./Name Cat./No./Name pad1 K 11 BD 0 NoAssign K 0 NoAssign K 0 NoAssign K 0 NoAssign K 0 NoAssign K 0 NoAssign No. 12 Room Kit Input Voice-1 Voice-2 Source Cat./No./Name Cat./No./Name pad1 K 19 MapleA20 K 0 rim1 K 0 - Yamaha DTXPRESS | Owner's Manual - Page 75
K 29 BD ROOM5 K 0 K 0 NoAssign K 0 S 31 MickCJ8S K 0 S 120 Latinrim K 0 P 81 TimbH K0 NoAssign NoAssign NoAssign NoAssign NoAssign Preset Drum Kit List rim3 P 27 CongaMV K 0 NoAssign pad4 P 82 TimbL K 0 NoAssign rim4 P 80 Timb K 0 NoAssign pad5 P 29 CongaO K 0 NoAssign rim5 P 51 - Yamaha DTXPRESS | Owner's Manual - Page 76
Preset Drum Kit List No. 25 World Input Voice-1 Source Cat./No./Name pad1 P 13 Bongo Mu rim1 P 80 Timb pad2 P 48 Log H rim2 P 39 EthWB pad3 P 29 CongaO - Yamaha DTXPRESS | Owner's Manual - Page 77
24 2HeadHi K 0 NoAssign e 48 JNGSN11 e 8 JNGLSN8 T 19 Jazz Hi Voice-2 Cat./No./Name K 0 NoAssign K 0 NoAssign K 0 NoAssign K 0 NoAssign K 0 NoAssign Preset Drum Kit List rim3 pad4 rim4 pad5 rim5 pad6 rim6 pad7 rim7 open rimOpen close rimClose footClose splash pad9 pad10 K 0 NoAssign K 0 NoAssign - Yamaha DTXPRESS | Owner's Manual - Page 78
Preset Drum Kit List No. 41 GM std 2 Input Voice-1 Source Cat./No./Name pad1 K 19 MapleA20 rim1 K 0 NoAssign pad2 S 98 Steel65 rim2 S 91 OpnRimC pad3 T 6 DRY GM5 rim3 T 6 - Yamaha DTXPRESS | Owner's Manual - Page 79
5 69 Reggae1 70 Reggae2 Drum Kit No. Kit Name 45 GM anla. trigger levels, produces smoother sound A hi-hat controller connected to the trigger input jack "1 KICK" can be used as a kick pedal. Use with DT10/20 drum triggers attached to acoustic drums. Setting for Latin Set Setting for Expansion Set - Yamaha DTXPRESS | Owner's Manual - Page 80
lists the tone generator functions and drum trigger functions. 1.2.1 bank select MSB-0 Sends and receives data. data=0:normal voice data=127:drum /Channel Event Receive] (P. 54) in the utility mode is set to "10PC=off", the DTXPRESS will not receive MIDI channel 10 program change data. 1.5 Pitch - Yamaha DTXPRESS | Owner's Manual - Page 81
jj jj data csum F7 jj jj Indicated by MS7bit, LS7bit. This number derived from the user drum kit number by counting from "0". In the case of the edit buffer, it is 7F 7F (3FFF). 2.2.4 trigger F0 43 7D 0n ss ss 44 54 58 4C("DTXL") 54 52 49 47("TRIG") 00 - Yamaha DTXPRESS | Owner's Manual - Page 82
YAMAHA [ Drum Trigger Module ] Model DTXPRESS MIDI Implementation Chart Function ... Transmitted Recognized Basic Default Channel Changed 1 - 16 1 - 16 1 - 16 1 - 16 Mode Default x 3 Messages x 3 Altered x Note 0 - 127 Number : True voice 0 - 127 0 - 127 0 - - Yamaha DTXPRESS | Owner's Manual - Page 83
60 D DC IN 12V 9 Decay 22, 42, 60 Double Trigger 29, 37 Drum Kit Change (Select) a Drum Kit 16, 19, 30 Create an Original Drum Kit 22, 77 Drum Kit Data 28 Drum Kit Name 23, 47 Drum Kit Play Mode 30 Drum Kit Voice Copy Mode 46 Drum Kit Voice Edit Mode 39 Preset Drum Kit 66 Save a Drum Kit - Yamaha DTXPRESS | Owner's Manual - Page 84
Part (Rhythm Mute 18 Mute Drum Voice 31 Mute Individual Drums 19 N Note ...7 O OUTPUT Jack 9, 12 P Pad 10, 36 Page 4, 28 Pan 22, 41, 46, 49, 60 PHONES Jack 18, 13 Power 8, 9, 13, 16 POWER/VOL 8, 16, 18 Q Quantize 20, 34, 49 R Recording 12, 20, 34 Rejection 37 Repeat Playback 48 Replace - Yamaha DTXPRESS | Owner's Manual - Page 85
rim7 open rimOpen close rimClose footClose splash pad9 pad10 Channel sw pc msb lsb vol pan 1 2 3 4 5 6 7 8 9 10 11 85 12 13 14 15 16 TRIGGER SETUP BLANK CHART Setup Name IN 1 IN 2 IN 3 IN 4 IN 5 IN 6 IN 7 IN 8 IN 9 IN 10 Type Gain Min Vel Inc Dec Input Excng - Yamaha DTXPRESS | Owner's Manual - Page 86
For details of products, please contact your nearest Yamaha or the authorized distributor listed below. Pour plus de détails sur les produits, veuillezvous adresser à Yamaha ou au distributeur le plus proche de vous figurant dans la liste suivante. Die Einzelheiten zu Produkten sind bei Ihrer unten - Yamaha DTXPRESS | Owner's Manual - Page 87
instructions. Failure to follow instructions could void your FCC authorization to use this product in the USA. 3. NOTE: This product has been tested and found to comply with the requirements listed in FCC Regulations, Part 15 for Class "B" digital Yamaha Corporation of America, Electronic Service - Yamaha DTXPRESS | Owner's Manual - Page 88
V372400 Printed in Japan DTX Information http://www.yamaha.co.jp /english/product/drum/dtx /index.html
-
 1
1 -
 2
2 -
 3
3 -
 4
4 -
 5
5 -
 6
6 -
 7
7 -
8
-
9
-
10
-
11
-
12
-
13
-
14
-
15
-
16
-
17
-
18
-
19
-
20
-
21
-
22
-
23
-
24
-
25
-
26
-
27
-
28
-
29
-
30
-
31
-
32
-
33
-
34
-
35
-
36
-
37
-
38
-
39
-
40
-
41
-
42
-
43
-
44
-
45
-
46
-
47
-
48
-
49
-
50
-
51
-
52
-
53
-
54
-
55
-
56
-
57
-
58
-
59
-
60
-
61
-
62
-
63
-
64
-
65
-
66
-
67
-
68
-
69
-
70
-
71
-
72
-
73
-
74
-
75
-
76
-
77
-
78
-
79
-
80
-
81
-
82
-
83
-
84
-
85
-
86
-
87
-
88
 |
 |

DRUM TRIGGER MODULE
Owner’s Manual