Yamaha EL-200 Owner's Manual - Page 32
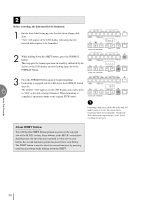
If you make a mistake during recording
 |
View all Yamaha EL-200 manuals
Add to My Manuals
Save this manual to your list of manuals |
Page 32 highlights
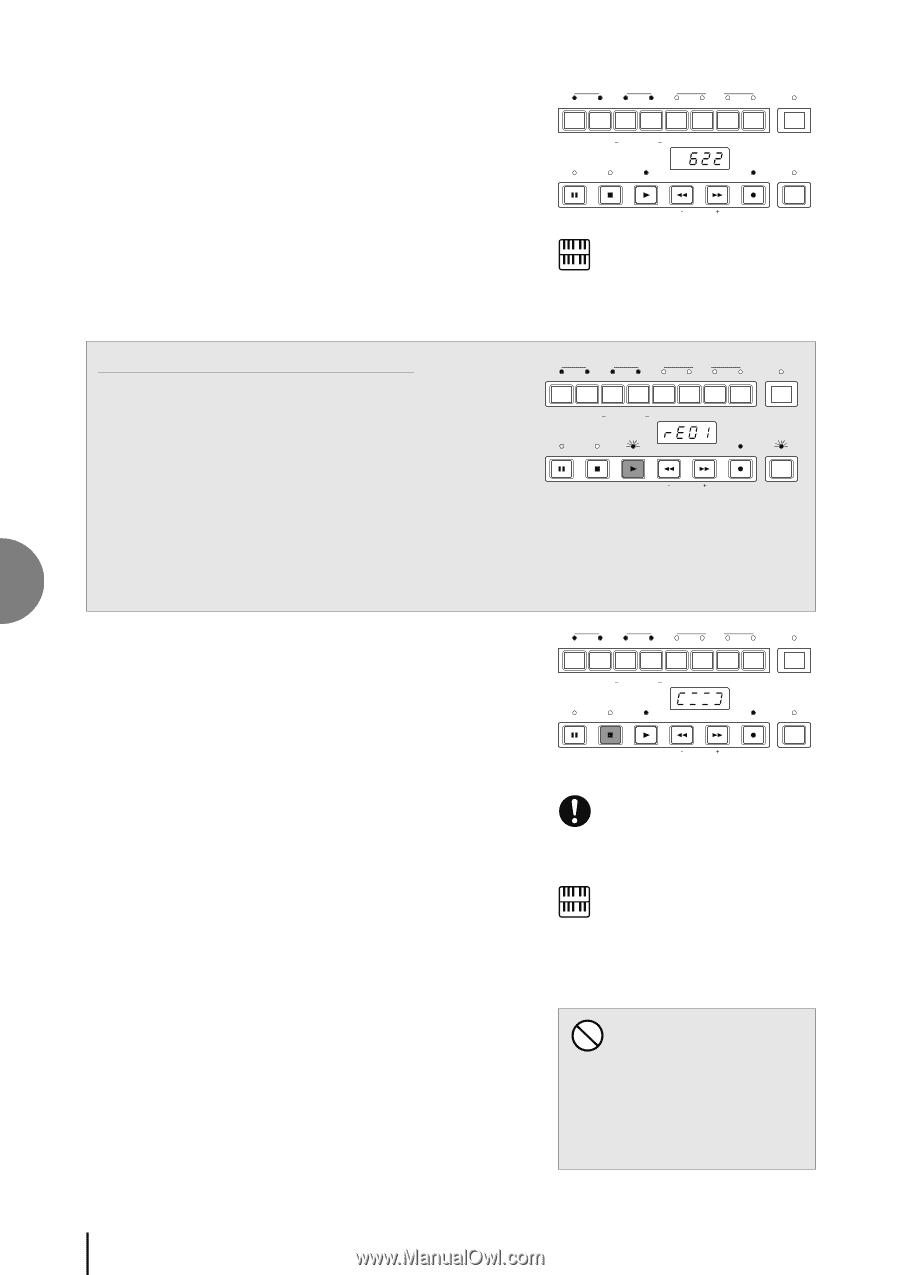
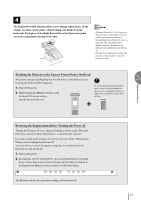
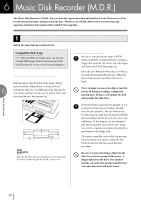
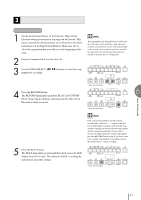
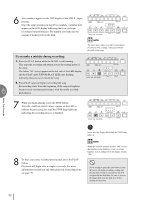
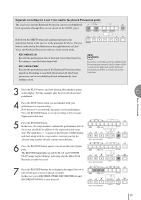
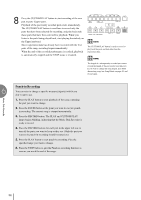
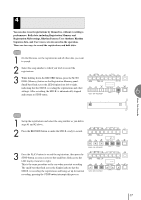
Music Disk Recorder 6 6 After numbers appear on the LED display of the M.D.R., begin playing. Once the setup operation in step #5 is complete, a number will appear on the LED display indicating that you can begin recording your performance. The number also indicates the amount of memory left on the disk. RECORD PLAY UPPER LOWER PEDAL CONTROL UPPER LOWER PEDAL CONTROL SHIFT SONG REPEAT FROM TO SONG COPY SONG DEL. PAUSE STOP PLAY SONG SELECT RECORD CUSTOM PLAY MUSIC DISK RECORDER TEMPO FORMAT NOTE: The short time it takes to set up for recording is recorded as well, causing a short pause before playback of the song. If you make a mistake during recording: 1. Press the PLAY button while the M.D.R. is still running. This stops the recording and returns you to the starting point of the song. The letters "rE" (retry) appear on the left side of the LED display and the PLAY and CUSTOM PLAY LEDs start flashing, indicating that you can re-record the song. 2. Press PLAY again to begin re-recording the song. Re-recording starts from the beginning of the song and replaces the previously recorded performance with the newly recorded performance. RECORD PLAY UPPER LOWER PEDAL CONTROL UPPER LOWER PEDAL CONTROL SHIFT SONG REPEAT FROM TO SONG COPY SONG DEL. PAUSE STOP PLAY SONG SELECT RECORD CUSTOM PLAY MUSIC DISK RECORDER TEMPO FORMAT 7 When you finish playing, press the STOP button. After the small bars flash to draw a square on the LED to indicate the processing for stop, the STOP lamp lights up, indicating the recording process is finished. RECORD PLAY UPPER LOWER PEDAL CONTROL UPPER LOWER PEDAL CONTROL SHIFT SONG REPEAT FROM TO SONG COPY SONG DEL. PAUSE STOP PLAY SONG SELECT RECORD CUSTOM PLAY MUSIC DISK RECORDER TEMPO FORMAT Indicates the M.D.R. is in the stop process. Never eject the floppy disk before the STOP lamp lights up. 8 To hear your newly recorded performance, press the PLAY button. Play back will begin after a couple of seconds. For more information on playback and other playback-related functions, see page 39. NOTE: When the available memory reaches "008" or less, the numbers begin flashing to warn you. If this happens, stop recording before the display reaches "000." Never attempt to press the eject button or turn the power off during recording, reading and playing back. Doing so can damage the disk and possibly the disk drive. Be sure to remove the floppy disk from the disk drive before turning off the power. 32
-
 1
1 -
2
-
3
-
4
-
5
-
6
-
7
-
8
-
9
-
10
-
11
-
12
-
13
-
14
-
15
-
16
-
17
-
18
-
19
-
20
-
21
-
22
-
23
-
24
-
25
-
26
-
 27
27 -
 28
28 -
 29
29 -
 30
30 -
 31
31 -
 32
32 -
 33
33 -
 34
34 -
 35
35 -
 36
36 -
 37
37 -
38
-
39
-
40
-
41
-
42
-
43
-
44
-
45
-
46
-
47
-
48
-
49
-
50
-
51
-
52
-
53
-
54
-
55
-
56
-
57
-
58
-
59
-
60
-
61
-
62
-
63
-
64
-
65
-
66
-
67
-
68
-
69
-
70
-
71
-
72
-
73
-
74
-
75
-
76
 |
 |