Yamaha EL-200 Owner's Manual - Page 36
Punch-in Recording, Press the RECORD button. The PLAY and CUSTOM PLAY
 |
View all Yamaha EL-200 manuals
Add to My Manuals
Save this manual to your list of manuals |
Page 36 highlights
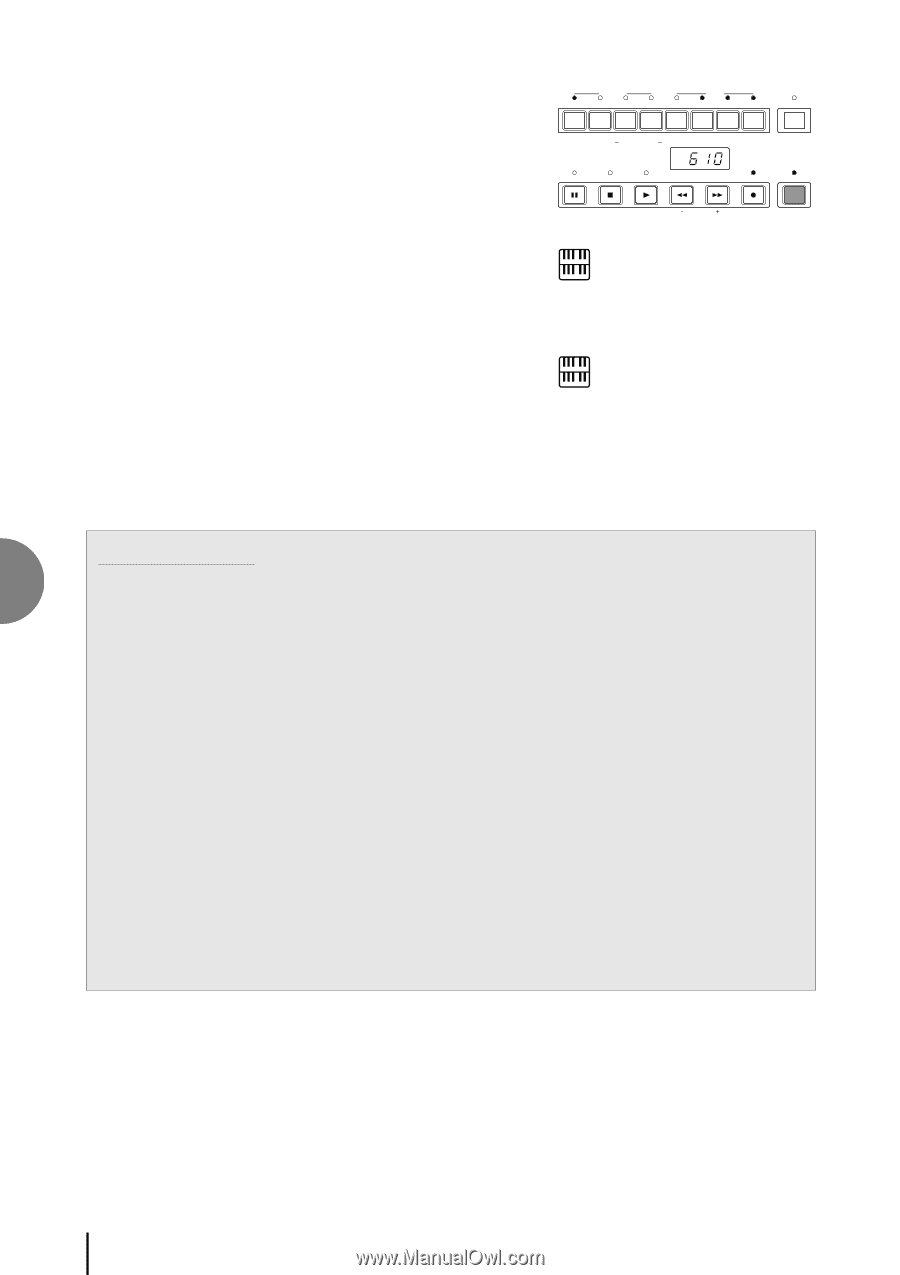
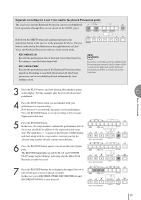
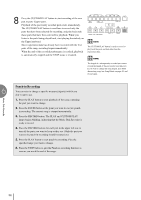
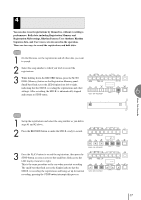
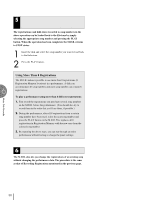
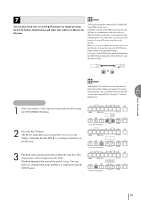
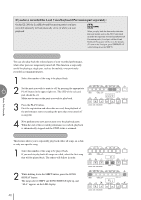
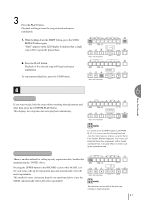
8 Press the CUSTOM PLAY button to start recording of the new part or parts (Upper part). Playback of the previously recorded parts starts immediately. The CUSTOM PLAY button is used here to record only the parts that have been selected for recording, and play back only those parts that have been selected for playback. While you listen to the parts being played back, start playing the melody on the Upper keyboard. Since registration data has already been recorded with the first parts of the song, recording begins immediately. When the end of the recorded performance is reached, playback is automatically stopped and the STOP status is resumed. RECORD PLAY UPPER LOWER PEDAL CONTROL UPPER LOWER PEDAL CONTROL SHIFT SONG REPEAT FROM TO SONG COPY SONG DEL. PAUSE STOP PLAY SONG SELECT RECORD CUSTOM PLAY MUSIC DISK RECORDER TEMPO FORMAT NOTE: The CUSTOM PLAY button is used to record or play back the parts and data other than the registration data. NOTE: The length of a subsequently recorded part cannot exceed the length of the previously recorded parts. If you want to change the song length, first delete the existing song (see Song Delete on page 45) and record again. Punch-in Recording 6 You can retry to change a specific measure(s)/part(s) which you don't want to use. Music Disk Recorder 1. Press the PLAY button to start playback of the song containing the part you want to change. 2. Press the PAUSE button at the point you want to execute punchin recording. The current song is stopped momentarily. 3. Press the RECORD button. The PLAY and CUSTOM PLAY lamps begins blinking, indicating that the Music Disk Recorder is ready to record. 4. Press the RECORD buttons for each part in the upper left row to turn off the parts you want to keep as they are. (Only the part you want to do punch-in recording should be turned on.) 5. Press the PLAY button to start punch-in recording. Play the specified range you want to change. 6. Press the STOP button to quit the Punch-in recording function as soon as you reach the end of the range. 36
-
 1
1 -
2
-
3
-
4
-
5
-
6
-
7
-
8
-
9
-
10
-
11
-
12
-
13
-
14
-
15
-
16
-
17
-
18
-
19
-
20
-
21
-
22
-
23
-
24
-
25
-
26
-
27
-
28
-
29
-
30
-
 31
31 -
 32
32 -
 33
33 -
 34
34 -
 35
35 -
 36
36 -
 37
37 -
 38
38 -
 39
39 -
 40
40 -
 41
41 -
42
-
43
-
44
-
45
-
46
-
47
-
48
-
49
-
50
-
51
-
52
-
53
-
54
-
55
-
56
-
57
-
58
-
59
-
60
-
61
-
62
-
63
-
64
-
65
-
66
-
67
-
68
-
69
-
70
-
71
-
72
-
73
-
74
-
75
-
76
 |
 |