Yamaha YPP-200 Owner's Manual - Page 23
Using the User Song Recorder, Recording - pedal
 |
View all Yamaha YPP-200 manuals
Add to My Manuals
Save this manual to your list of manuals |
Page 23 highlights
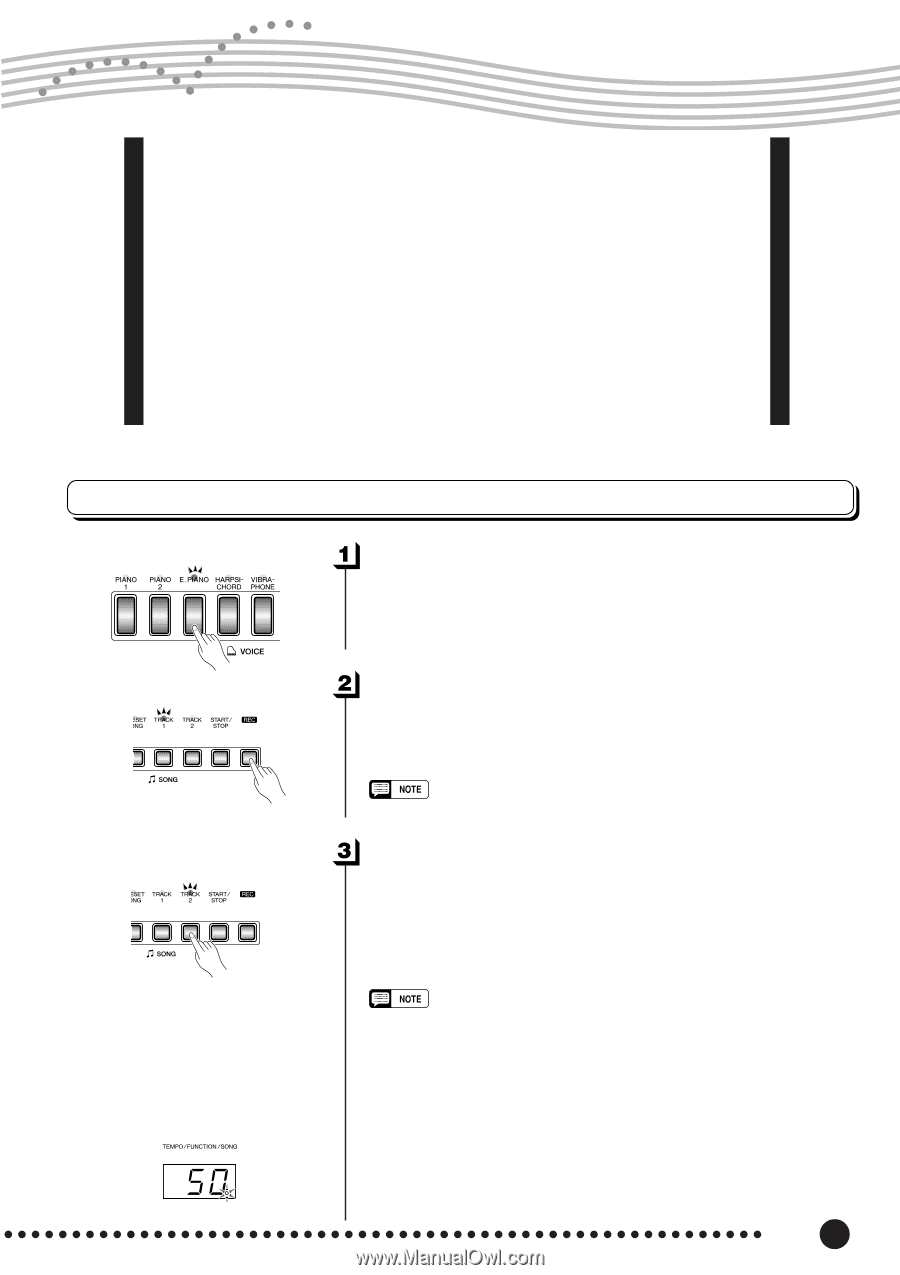
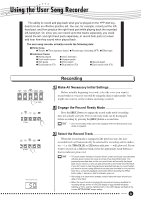
Using the User Song Recorder The ability to record and play back what you've played on the YPP-200 keyboard can be an effective practice aid. You can, for example, record just the lefthand part, and then practice the right-hand part while playing back the recorded left-hand part. Or, since you can record up to two tracks separately, you could record the left- and right-hand parts separately, or record both parts of a duet and hear how they sound when played back. The user song recorder actually records the following data: I Entire Song G Tempo G Time signature (beat) G Reverb type (including OFF) G Effect type I Individual Tracks G Notes played G Dual mode voices G Soft pedal G Dual balance (F3) G Voice selection G Damper pedal G Effect depth G Dual detune (F3) G Reverb depth G Dual octave shift (F3) Recording Make All Necessary Initial Settings Before actually beginning to record, select the voice you want to record with (or voices if you will be using the dual or split mode). You might also want to set the volume and tempo controls. Engage the Record Ready Mode Press the [REC] button to engage the record ready mode (recording does not actually start yet). The record ready mode can be disengaged before recording by pressing the [REC] button a second time. • The record ready mode cannot be engaged while the demo/preset song mode is engaged. Select the Record Track When the record mode is engaged in the previous step, the lastrecorded track will automatically be selected for recording and its indicator - i.e. the TRACK [1] or [2] button indicator - will glow red. If you want to record on a different track, press the appropriate track button so that its indicator glows red. • The track button indicators of tracks which contain previously recorded data will glow green (unless the track is turned off as described below). The previously-recorded data on the non-record track will normally be played back as you record, so you can play along with a previously-recorded track. If you don't want to hear the previously recorded track as you record (when you want to record a song different from what you recorded on the previous track etc.,), press the playback track button before pressing the [REC] button (step 1, above) so that its indicator goes out. • Recording on a track which already contains data will erase all previous data on that track. • When the record mode is engaged the amount of memory available for recording will be shown on the LED display in approximate kilobytes (starting at "50"), and the rightmost dot on the LED display will flash at the current METRONOME tempo setting. YPP-200 23
-
 1
1 -
2
-
3
-
4
-
5
-
6
-
7
-
8
-
9
-
10
-
11
-
12
-
13
-
14
-
15
-
16
-
17
-
 18
18 -
 19
19 -
 20
20 -
 21
21 -
 22
22 -
 23
23 -
 24
24 -
 25
25 -
 26
26 -
 27
27 -
 28
28 -
29
-
30
-
31
-
32
-
33
-
34
-
35
-
36
-
37
-
38
-
39
-
40
-
41
-
42
-
43
-
44
-
45
-
46
-
47
-
48
-
49
-
50
-
51
-
52
 |
 |