ZyXEL N220 User Guide
ZyXEL N220 Manual
 |
View all ZyXEL N220 manuals
Add to My Manuals
Save this manual to your list of manuals |
ZyXEL N220 manual content summary:
- ZyXEL N220 | User Guide - Page 1
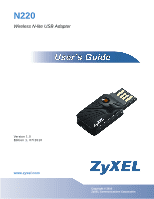
N220 Wireless N-lite USB Adapter Version 1.0 Edition 1, 07/2010 www.zyxel.com www.zyxel.com Copyright © 2010 ZyXEL Communications Corporation - ZyXEL N220 | User Guide - Page 2
- ZyXEL N220 | User Guide - Page 3
Audience This manual is intended for people who want to configure the N220 using the ZyXEL utility. Tips for Reading User's Guides On-Screen When reading a ZyXEL User's Guide On-Screen, keep the following in mind: • If you don't already have the latest version of Adobe Reader, you can download it - ZyXEL N220 | User Guide - Page 4
About This User's Guide Customer Support Should problems arise that cannot be solved by using this manual, please contact your vendor for customer service. Please have the following information ready when you contact the vendor. • Product model and serial number. • Date that you received your device - ZyXEL N220 | User Guide - Page 5
may be referred to as the "N220", the "device", the "system" or the "product" in this User's Guide. • Product labels, screen names, field labels and field choices are all in bold font. • A key stroke is denoted by square brackets and uppercase text, for example, [ENTER] means the "enter" or "return - ZyXEL N220 | User Guide - Page 6
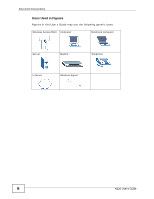
Document Conventions Icons Used in Figures Figures in this User's Guide may use the following generic icons. Wireless Access Point Computer Notebook computer Server Modem Telephone Internet Wireless Signal 6 N220 User's Guide - ZyXEL N220 | User Guide - Page 7
Do NOT install, use, or service this device during a thunderstorm. There is a remote risk of electric shock from lightning. • Connect ONLY suitable ) whenever working with the device's hardware or connections. • ONLY qualified service personnel should service or disassemble N220 User's Guide 7 - ZyXEL N220 | User Guide - Page 8
Safety Warnings 8 N220 User's Guide - ZyXEL N220 | User Guide - Page 9
Contents Overview Introduction and Configuration 15 Getting Started ...17 Tutorial ...23 Wireless LANs ...37 Station Mode ...49 AP Mode ...75 Maintenance ...85 Troubleshooting and Specifications 89 Troubleshooting ...91 Product Specifications ...95 Appendices and Index ...99 N220 User's Guide 9 - ZyXEL N220 | User Guide - Page 10
Contents Overview 10 N220 User's Guide - ZyXEL N220 | User Guide - Page 11
21 1.5.1 Enabling Windows Wireless Configuration 21 1.5.2 Accessing the ZyXEL Utility 21 Chapter 2 Tutorial ...23 2.1 Overview ...23 2.1.1 What You Can Do in This Tutorial 23 2.1.2 What You Need to Know 23 2.1.3 Before You Begin ...24 2.2 Connecting to an AP using Wi-Fi Protected Setup (WPS 24 - ZyXEL N220 | User Guide - Page 12
WPS: PBC (Push Button Configuration 69 4.6.2 WPS: PIN - Use this Device's PIN 69 4.6.3 WPS: PIN - Use the PIN from the AP or Wireless Router 70 4.7 Security Settings in Windows Vista 71 4.7.1 Using PEAP in Vista 72 4.7.2 Using TLS in Vista ...73 Chapter 5 AP Mode...75 12 N220 User's Guide - ZyXEL N220 | User Guide - Page 13
86 6.3 Uninstalling the ZyXEL Utility 86 6.4 Upgrading the ZyXEL Utility 87 Part II: Troubleshooting and Specifications 89 Chapter 7 Troubleshooting...91 7.1 Power, Hardware Connections, and LEDs 91 7.2 Accessing the ZyXEL Utility 92 7.3 Link Quality ...92 7.4 Problems Communicating with Other - ZyXEL N220 | User Guide - Page 14
Table of Contents Appendix E Legal Information 179 Index...183 14 N220 User's Guide - ZyXEL N220 | User Guide - Page 15
PART I Introduction and Configuration Getting Started (17) Tutorial (23) Wireless LANs (37) Station Mode (49) AP Mode (75) Maintenance (85) 15 - ZyXEL N220 | User Guide - Page 16
16 - ZyXEL N220 | User Guide - Page 17
CHAPTER 1 Getting Started 1.1 Overview The ZyXEL N220 wireless N-lite USB adapter brings you a better Internet experience over existing 802.11 networks. With data rates of up to 150 Mbps, you can enjoy a breathtaking high-speed connection at home or in the office. It is an excellent solution for - ZyXEL N220 | User Guide - Page 18
802.11b/g wireless networks. The N220 is WPS (Wi-Fi Protected Setup) compliant. WPS allows you to easily connect to another WPS-enabled device. The N220 is a USB adapter which connects to an empty USB port on your computer. See your N220's Quick Start Guide for installation instructions, and see - ZyXEL N220 | User Guide - Page 19
You can either set the network type to Infrastructure and connect to an AP or use Ad-Hoc mode and connect to a peer computer (another wireless device in Ad-Hoc mode). 1.3.1 Infrastructure To connect to a network via an access point (AP), set the N220 network type to Infrastructure (see Chapter 4 on - ZyXEL N220 | User Guide - Page 20
wireless clients communicate directly with each other. Note: Wi-Fi Protected Setup (WPS) is not available in ad-hoc mode. Figure 3 Application: Ad-Hoc 1.4 Hardware and Utility Installation Follow the instructions in the Quick Start Guide to install the ZyXEL utility and make hardware connections - ZyXEL N220 | User Guide - Page 21
how to use the Windows wireless configuration tool to manage the N220. To reactivate the ZyXEL utility, double-click the ( ) icon on your desktop or click Start > (All) Programs > Wireless N-lite USB Adapter Utility > Wireless N USB Adapter Utility. 1.5.2 Accessing the ZyXEL Utility Double-click on - ZyXEL N220 | User Guide - Page 22
Chapter 1 Getting Started The ZyXEL utility screens are similar in all Microsoft Windows versions. Screens for Windows XP are shown in this User's Guide. Note: Click the icon (located in the top right corner) to display the online help window. 22 N220 User's Guide - ZyXEL N220 | User Guide - Page 23
This tutorial shows you how to join a wireless infrastructure network using the ZyXEL utility. The wireless client is labeled C and the Access Point is labeled AP. Figure 6 Infrastructure Network 2.1.1 What You Can Do in This Tutorial • Connect securely either to an infrastructure AP using the - ZyXEL N220 | User Guide - Page 24
range of the computer with the N220 installed. 2 Make sure that you have installed the N220's driver and utility on your computer. 3 In the N220's utility, click the Adapter tab, enable WPS and select PBC (Push Button Configuration). In the screen that appears, click Start. 4 Log into the AP's web - ZyXEL N220 | User Guide - Page 25
the N220's utility and the AP's configuration interface. 1 In the N220's Adaptor tab, select WPS and PIN - Use this Device's PIN. Note down the PIN in the screen that appears. 2 Enter the PIN number in the AP's configuration interface. In the NBG334W, use the PIN field in the Network > Wireless LAN - ZyXEL N220 | User Guide - Page 26
Chapter 2 Tutorial 3 Click the Start buttons on both the N220 utility screen and the AP's configuration utility (the WPS Station screen on the NBG334W) within two minutes. The NBG334W authenticates the wireless client and sends the proper configuration settings to the wireless client. This may take - ZyXEL N220 | User Guide - Page 27
Chapter 2 Tutorial The following figure shows you the example of configuring the wireless network and security on the N220 and the AP (ZyXEL's NBG334W in this example) by using the PIN method. N220 User's Guide 27 - ZyXEL N220 | User Guide - Page 28
Chapter 2 Tutorial Figure 8 Example WPS Process: PIN Method You AP WITHIN 2 MINUTES Authentication by PIN SECURITY INFO COMMUNICATION 28 N220 User's Guide - ZyXEL N220 | User Guide - Page 29
know its Service Set IDentity (SSID) and WPA-PSK pre-shared key. In this example, the AP's SSID is "SSID_Example3" and its pre-shared key is "ThisismyWPA-PSKpre-sharedkey". After you install the ZyXEL utility and then insert the wireless client, follow the steps below to connect to a network using - ZyXEL N220 | User Guide - Page 30
use the Back button at any time to return to the previous screen, or the Exit button to return to the Site Survey screen. Figure 10 ZyXEL Utility: Security Settings 5 The Summary window appears. Check your settings and click Save to continue. Figure 11 ZyXEL Utility: Summary 30 N220 User's Guide - ZyXEL N220 | User Guide - Page 31
the web site, check the Troubleshooting section of this User's Guide or contact your network administrator if necessary. 2.3.2 Creating and Using a Profile A profile lets you automatically connect to the same wireless network every time you use the ZyXEL utility. You can also configure different - ZyXEL N220 | User Guide - Page 32
a wireless network that is not in the list. Figure 14 ZyXEL Utility: Add New Profile 3 Give the profile a descriptive name (of up to 32 printable ASCII characters). Select Infrastructure and either manually enter or select the AP's SSID in the Scan Info table and click Select. 32 N220 User's Guide - ZyXEL N220 | User Guide - Page 33
connect (In this example, WPA-PSK). Figure 15 ZyXEL Utility: Profile Security 5 This screen varies depending on the encryption method you selected in the previous screen. In this example, enter the pre-shared key and leave the encryption type at the default setting. Figure 16 ZyXEL Utility: - ZyXEL N220 | User Guide - Page 34
point mode, your N220 allows you to set up your wireless network without using a dedicated AP. See Chapter 5 on page 75 for more information. After you install the ZyXEL Utility and then connect the N220 to your computer, follow the steps below to set up your N220 as an AP. 34 N220 User's Guide - ZyXEL N220 | User Guide - Page 35
of the default Link Info screen displays. Figure 19 ZyXEL Utility - AP Mode 2 Under Status, you can view the current settings on the N220. In the Association List, you can see if any wireless clients have connected to your N220. Figure 20 ZyXEL Utility - AP Mode: Link Info 3 If you want to change - ZyXEL N220 | User Guide - Page 36
Chapter 2 Tutorial 36 N220 User's Guide - ZyXEL N220 | User Guide - Page 37
a server is known as the "client". Each client is designed to work with one or more specific kinds of servers, and each server requires a specific kind of client. Wireless adapters are clients that connect to a network server through an AP. Authentication Authentication is the process of confirming - ZyXEL N220 | User Guide - Page 38
with other devices (such as the printer) or with the Internet Every wireless network must follow these basic guidelines. • Every device in the same wireless network must use the same SSID. The SSID is the name of the wireless network. It stands for Service Set IDentity. 38 N220 User's Guide - ZyXEL N220 | User Guide - Page 39
packets transmitted between the N220 and the AP or other wireless stations to keep network communications private. Both the wireless stations and the access points must use the same WEP key for data encryption and decryption. There are two ways to create WEP keys in your N220. N220 User's Guide 39 - ZyXEL N220 | User Guide - Page 40
of this feature by writing down the four automatically generated WEP keys from the Security Settings screen of the ZyXEL utility and entering them manually as the WEP keys in the other WLAN adapter(s). • Enter the WEP keys manually. Your N220 allows you to configure up to four 64-bit or 128 - ZyXEL N220 | User Guide - Page 41
by using Temporal Key Integrity Protocol ( quickly set up a wireless network with strong security, without having to configure security settings manually. Each WPS connection works between two devices. Both devices must support WPS (check each device's documentation to make sure). N220 User's Guide - ZyXEL N220 | User Guide - Page 42
the other device. The registrar sends the network name (SSID) and security key through an secure connection to the enrollee. If you need to make sure that WPS worked, check the list of associated wireless clients in the AP's configuration utility. If you see the wireless client in the list, WPS was - ZyXEL N220 | User Guide - Page 43
connected to the wireless client, try to connect to the Internet. If you can connect, WPS was successful. If you cannot connect, check the list of associated wireless clients in the AP's configuration utility. If you see the wireless client in the list, WPS was successful. N220 User's Guide - ZyXEL N220 | User Guide - Page 44
registrar creates a secure EAP (Extensible Authentication Protocol) tunnel and sends the network name (SSID) and the WPAPSK or WPA2-PSK pre-shared key to the enrollee. Whether WPA-PSK or WPA2-PSK is used depends on the standards supported by the devices. If the registrar is 44 N220 User's Guide - ZyXEL N220 | User Guide - Page 45
3 Wireless LANs already part of a network, it sends the existing information. If not, it generates the SSID and WPA(2)-PSK randomly. The following figure shows a WPS-enabled client (installed in a notebook computer) connecting to a WPS-enabled access point. Figure 24 How WPS works ACTIVATE - ZyXEL N220 | User Guide - Page 46
1 ENROLLEE REGISTRAR CLIENT 1 SECURITY INFO AP1 In step 2, you add another wireless client to the network. You know that Client 1 supports registrar mode, but it is better to use AP1 for the WPS handshake with the new client since you must connect to the access point anyway in order to use the - ZyXEL N220 | User Guide - Page 47
1 REGISTRAR EXISTING CONNECTION AP1 CLIENT 2 SECURITY INFO ENROLLEE AP1 3.4.4 Limitations of WPS WPS has some limitations of which you should be aware. • WPS works in Infrastructure networks only (where an AP and a wireless client communicate). It does not work in Ad-Hoc networks (where there - ZyXEL N220 | User Guide - Page 48
Chapter 3 Wireless LANs configuration interface of the registrar device to discover the key the network is using (if the device supports this feature). Then, you can enter the key into the non-WPS device and join the network as normal (the non-WPS device must also support WPA-PSK or WPA2-PSK). • - ZyXEL N220 | User Guide - Page 49
you how to configure your N220 using the ZyXEL utility in Windows. Note: Some features available in Windows XP or Windows 2000 are not available in Windows Vista. 4.1.1 What You Can Do in This Section • On the Link Info screen, you can see your current connection details, monitor signal strength and - ZyXEL N220 | User Guide - Page 50
WPA-PSK or WPA2-PSK. 4.1.3 Before You Begin • Make sure the ZyXEL utility is already installed. See the Quick Start Guide for more. 4.2 ZyXEL Utility Screen Summary This section describes the ZyXEL utility screens. Figure 28 ZyXEL Utility Menu Summary The following table describes the menus. Table - ZyXEL N220 | User Guide - Page 51
wireless and security settings. Adapter Use this screen to configure preamble type, enable power saving and use WiFi Protected Setup (WPS). 4.3 The Link Info Screen When the ZyXEL utility starts, the Link Info screen displays, showing the current configuration and connection status of your N220 - ZyXEL N220 | User Guide - Page 52
shows the quality of wireless connection. This refers to the percentage of packets transmitted successfully. If there are too many wireless stations in a wireless network, collisions may occur which could result in a loss of messages even though you have high signal strength. 52 N220 User's Guide - ZyXEL N220 | User Guide - Page 53
displays the current data transmission rate in kilobits per second (Kbps). Receive This field displays the current data reception rate in kilobits per second (Kbps). N220 User's Guide 53 - ZyXEL N220 | User Guide - Page 54
of each wireless device. Click Scan to search for available wireless devices within transmission range. Click Connect to associate to the selected wireless device. Click an entry in the Available Network List table to display the information of the selected wireless device. 54 N220 User's Guide - ZyXEL N220 | User Guide - Page 55
.1x) or inactive (DISABLE). MAC address This field displays the MAC address of the wireless device. Surveyed at This field displays the time when the wireless device was scanned. 4.4.1 Security Settings When you configure the N220 to connect to a network with wireless security activated and the - ZyXEL N220 | User Guide - Page 56
, the N220 automatically generates four different WEP keys and displays the first in the key field below. Refer to Section 3.3.1.1.1 on page 39 for more information. Transmit Key Select a default WEP key to use for data encryption. The key displays in the adjacent field. 56 N220 User's Guide - ZyXEL N220 | User Guide - Page 57
Next Exit Note: The values for the WEP keys must be set up exactly the same on all wireless devices in the same wireless LAN. ASCII WEP keys are case sensitive. Click Back to go to the Site Survey screen to select and connect to another network. Click Next to confirm your selections and advance - ZyXEL N220 | User Guide - Page 58
in this screen. Table 10 Security Setting: WPA-PSK key (same as the AP or peer device) of between 8 and 63 case-sensitive ASCII characters (including spaces and symbols) or 64 hexadecimal characters. Click Back to go to the Site Survey screen to select and connect to another network N220 User's Guide - ZyXEL N220 | User Guide - Page 59
Back Next Exit Note: This feature is not available on Windows Vista. Click Back to go to the Site Survey screen to select and connect to another network. Click Next to confirm your selections and advance to the security with various authentication methods in this screen. N220 User's Guide 59 - ZyXEL N220 | User Guide - Page 60
your network administrator for more information. This field is available only when you select TTLS in the EAP Type field. Select a TTLS protocol that the RADIUS server uses. Options are CHAP, MS-CHAP, MS-CHAP-V2 and PAP. Note: This feature is not available on Windows Vista. 60 N220 User's Guide - ZyXEL N220 | User Guide - Page 61
of the wireless device. Channel This field displays the channel number used by the profile. Security This field shows whether data encryption is activated (WEP, WPA, WPA-PSK, WPA2, WPA2-PSK, 802.1x) or inactive (DISABLE). Back Click Back to return to the previous screen. N220 User's Guide 61 - ZyXEL N220 | User Guide - Page 62
, each time you start the N220, the N220 uses the default profile to connect to any available network that has no security enabled. The default profile is a profile that allows you to connect to any SSID that has no security enabled. Click the Profile tab in the ZyXEL utility program to display the - ZyXEL N220 | User Guide - Page 63
is the SSID of the wireless network to which the selected profile associate. To use and activate a previously saved network profile, select a preconfigured profile name in the table and click Connect. To add a new a New Profile Follow the steps below to add a new profile. N220 User's Guide 63 - ZyXEL N220 | User Guide - Page 64
table and click Select, or enter the SSID of the wireless device to which you want to associate in this field manually. Otherwise, enter Any to have the N220 associate to any AP or roam between any infrastructure wireless networks. Network Type Select Infrastructure to associate to an AP. Select - ZyXEL N220 | User Guide - Page 65
table describes the labels in this screen. Table 16 Profile: Wireless Settings LABEL DESCRIPTION Wireless Settings Channel Select a channel number from the drop-down list box. To associate to an ad-hoc network, you must use the same channel as the peer computer. N220 User's Guide 65 - ZyXEL N220 | User Guide - Page 66
box to enable data encryption. If you selected Ad-Hoc network type in the first screen, you can use only WEP encryption method. Otherwise, select DISABLE to allow the N220 to communicate with the access points or other peer wireless computers without any data encryption, and skip to step 5. Figure - ZyXEL N220 | User Guide - Page 67
network profile, click the Activate Now button. Otherwise, click the Activate Later button. You can activate only one profile at a time. Note: Once you activate a profile, the ZyXEL utility will use that profile the next time it is started. Figure 44 Profile: Activate the Profile N220 User's Guide - ZyXEL N220 | User Guide - Page 68
. Select this to enable Wi-fi MultiMedia Quality of Service on the N220. At the time of writing, this field is not available in Windows Vista. WPS (WiFi Protected Setup) Select this to enable Wi-fi Protected Setup on the N220. PBC (Push Button Configuratio n) Select this to use the PBC (Push - ZyXEL N220 | User Guide - Page 69
4 Station Mode Table 17 Adapter (continued) LABEL DESCRIPTION PIN - Use the PIN From the AP or Wireless Router Select this to use the PIN (Personal Identification Number) WPS mode. Use this option when you want to enter the PIN from another WPSenabled device in the N220. When you select this - ZyXEL N220 | User Guide - Page 70
in the Adapter screen. The start WPS on the other WPS-enabled device within two minutes. 4.6.3 WPS: PIN - Use the PIN from the AP or Wireless Router This screen allows you to use the WPS Personal Identification Number mode, by entering the PIN from another WPS-enabled device into the N220's utility - ZyXEL N220 | User Guide - Page 71
Enter the PIN from your AP or wireless router in this field before you click Start. Start Click this to start WPS. You must start WPS on the other WPS-enabled device within two minutes. 4.7 Security Settings in Windows Vista When you use the N220 in Windows Vista, the procedure for setting up WPA - ZyXEL N220 | User Guide - Page 72
1x security using PEAP in Windows Vista. 1 Either select the AP to which you want to connect in the Site Survey screen network to which you want to connect. Figure 50 Vista Security: Enter Credentials Note: If you are not sure what to enter, contact your network administrator. 72 N220 User's Guide - ZyXEL N220 | User Guide - Page 73
disappears and the N220 tries to connect to the network. The ZyXEL utility's Link Info screen displays, showing the connection status (see Section 4.3 on page 51). If the Link Info screen displays an active connection, you have successfully completed the procedure. 4.7.2 Using TLS in Vista Take the - ZyXEL N220 | User Guide - Page 74
screen disappears and the N220 tries to connect to the network. The ZyXEL utility's Link Info screen displays, showing the connection status (see Section 4.3 on page 51). If the Link Info screen displays an active connection, you have successfully completed the procedure. 74 N220 User's Guide - ZyXEL N220 | User Guide - Page 75
This section shows you how to configure your N220 in AP Mode using the Windows version of the ZyXEL Utility. Note: Some features available in Windows XP or Windows 2000 are not available in Windows Vista. AP Mode allows you to set up a wireless network without using a pre-existing AP. The following - ZyXEL N220 | User Guide - Page 76
Before You Begin Make sure the ZyXEL Utility is already installed. See the Quick Start Guide for more. To bridge your wired and wireless network using the N220, the following requirements must be met: • The N220 must be installed on a computer connected to the wired network. • Either bridge the two - ZyXEL N220 | User Guide - Page 77
table describes the menus. Table 20 ZyXEL Utility Menu Summary TAB DESCRIPTION Link Info Use this screen to see your current connection status, configuration and data rate statistics. Configuration Use this screen to configure wireless LAN settings. MAC Filter Use this screen to configure - ZyXEL N220 | User Guide - Page 78
clients that are currently connected to the N220. denotes a wireless client without wireless security. denotes a wireless client with wireless security enabled. MAC Address This field displays the MAC addresses of a wireless client that is currently connected to the N220. Refresh Click Refresh - ZyXEL N220 | User Guide - Page 79
check box and an Ethernet adapter (network interface card (NIC)) on your computer from the drop-down list box. This allows you to connect your wireless network to the specified wired network. Security type Save Cancel Note: This feature is not supported in Windows 2000. Select a security type for - ZyXEL N220 | User Guide - Page 80
you configure the N220 to act as an AP and wireless security is activated, the Configuration screen varies according to the encryption method used by your network. 5.4.1.1 Disable This option indicates that no security services are enabled. Anyone within range of your AP can connect to it without - ZyXEL N220 | User Guide - Page 81
continued) LABEL DESCRIPTION Key 1-4 Select this option if you want to manually enter a transmit key. Enter the key in the field provided. If you select 64 Bits in the WEP field. Enter either 10 hexadecimal digits in the encryption type (TKIP or AES) for data encryption. N220 User's Guide 81 - ZyXEL N220 | User Guide - Page 82
from connecting to the N220 (Reject all). The MAC address is assigned at the factory and consists of six pairs of hexadecimal characters, for example, 00:A0:C5:00:00:02. You need to know the MAC address of the device(s) to configure this screen. Figure 60 The MAC Filter Screen 82 N220 User's Guide - ZyXEL N220 | User Guide - Page 83
Reject all to block access to the N220, MAC addresses not listed will be allowed to access the N220. Select Allow all to permit access to the N220, MAC addresses not listed will be denied access to the N220. Specify the MAC address(es) of the wireless station(s) that is allowed or denied association - ZyXEL N220 | User Guide - Page 84
Chapter 5 AP Mode 84 N220 User's Guide - ZyXEL N220 | User Guide - Page 85
to an operating system at the core (or "kernel") level. Doing so could irreparably damage your installation. 6.1.3 Before You Begin • Disconnect the N220 if you are going to uninstall or upgrade the ZyXEL utility, save your work in any other open programs, and then close them. N220 User's Guide 85 - ZyXEL N220 | User Guide - Page 86
take note of your current wireless configurations. 1 Click Start > (All) Programs > Wireless N-lite USB Adapter Utility > Uninstall Wireless N-lite USB Adapter Utility. 2 When prompted, click OK or Yes to remove the driver and the utility software. Figure 62 Uninstall: Confirm 86 N220 User's Guide - ZyXEL N220 | User Guide - Page 87
when prompted. 4 Disconnect the N220 from your computer. 5 Double-click on the setup program for the new utility to start the ZyXEL utility installation. 6 Insert the N220 and check the version numbers in the About screen to make sure the new utility is installed properly. N220 User's Guide 87 - ZyXEL N220 | User Guide - Page 88
Chapter 6 Maintenance 88 N220 User's Guide - ZyXEL N220 | User Guide - Page 89
PART II Troubleshooting and Specifications Troubleshooting (91) Product Specifications (95) 89 - ZyXEL N220 | User Guide - Page 90
90 - ZyXEL N220 | User Guide - Page 91
the ZyXEL Utility • Link Quality • Problems Communicating with Other Computers 7.1 Power, Hardware Connections, and LEDs The N220 does not turn on. None of the LEDs turn on. 1 Make sure the N220 is correctly installed (refer to your Quick Start Guide). 2 Restart the computer to which the N220 is - ZyXEL N220 | User Guide - Page 92
Chapter 7 Troubleshooting 7.2 Accessing the ZyXEL Utility I cannot access the ZyXEL Utility 1 Make sure the N220 is properly inserted and the LEDs are on. Refer to the Quick Start Guide for information on how to properly connect the N220. 2 Use the Device Manager to check for possible hardware - ZyXEL N220 | User Guide - Page 93
Chapter 7 Troubleshooting 7.4 Problems Communicating with Other Computers The computer with the N220 installed cannot communicate with the other computer(s). In Infrastructure Mode • Make sure that the AP and the associated computers are turned on and working properly. • Make sure the N220 computer - ZyXEL N220 | User Guide - Page 94
Chapter 7 Troubleshooting 94 N220 User's Guide - ZyXEL N220 | User Guide - Page 95
Product Name N220 Wireless N-lite USB Adapter Interface USB 2.0 Standards 10 - 90% (non-condensing) 5V Power Saving Mode Current Consumption Device Weight Device Dimensions RADIO SPECIFICATIONS Yes Transmit: - ZyXEL N220 | User Guide - Page 96
64dBm HT40 at -62dBm WIRELESS STANDARDS IEEE 802.11b Operation Frequency Operation Channels Dynamically shifts between 11, 5.5, 2, and 1 Mbps network speed. 2.412GHz~2.472GHz N. 54, 48, 36, 24, 18, 12, 9 and 6 Mbps network speed. 2.412GHz~2.472GHz N. America &Taiwan 2.412GHz~ 2.462GHz 1-11 Euro - ZyXEL N220 | User Guide - Page 97
Windows Vista (32- and 64-bit) Windows XP (32- and 64-bit) Windows 2000 Mac OS X (10.3/10.4/10.5) WIRELESS FEATURES Wireless Security WEP 64bit, 128bit, WPA, WPA-PSK, WPA2, WPA2-PSK 802.1x (EAP-TLS, EAP-TTLS, EAP-PEAP), WPS. Note: EAP-TTLS is not supported in Windows Vista N220 User's Guide - ZyXEL N220 | User Guide - Page 98
Specifications Table 27 Product Specifications (continued) Wireless QoS Wi-Fi Multi Media (WMM) Wi-Fi Protected Setup (WPS) Push button configuration Use device's PIN Other Use AP or Router's PIN WMM power-saving support Compatible with Windows Zero Configuration 98 N220 User's Guide - ZyXEL N220 | User Guide - Page 99
PART III Appendices and Index Note: The appendices provide general information. Some details may not apply to your N220. Setting Up Your Computer's IP Address (101) Wireless LANs (131) Windows Wireless Management (147) Wireless for Windows 7 (173) Legal Information (179) Index (183) 99 - ZyXEL N220 | User Guide - Page 100
100 - ZyXEL N220 | User Guide - Page 101
it to be able to communicate with the other devices on your network. Windows Vista/XP/2000, Mac OS 9/OS X, and all versions of UNIX/LINUX include the software components you need to use TCP/IP on your computer. If you manually assign IP information instead of using a dynamic IP, make sure that your - ZyXEL N220 | User Guide - Page 102
Appendix A Setting Up Your Computer's IP Address 1 Click Start > Control Panel. Figure 64 Windows XP: Start Menu 2 In the Control Panel, click the Network Connections icon. Figure 65 Windows XP: Control Panel 102 N220 User's Guide - ZyXEL N220 | User Guide - Page 103
3 Right-click Local Area Connection and then select Properties. Figure 66 Windows XP: Control Panel > Network Connections > Properties 4 On the General tab, select Internet Protocol (TCP/IP) and then click Properties. Figure 67 Windows XP: Local Area Connection Properties N220 User's Guide 103 - ZyXEL N220 | User Guide - Page 104
an Alternate DNS server, if that information was provided. 7 Click OK to close the Internet Protocol (TCP/IP) Properties window. 8 Click OK to close the Local Area Connection Properties window. Verifying Settings 1 Click Start > All Programs > Accessories > Command Prompt. 104 N220 User's Guide - ZyXEL N220 | User Guide - Page 105
address and connection information. Windows Vista This section shows screens from Windows Vista Professional. 1 Click Start > Control Panel. Figure 69 Windows Vista: Start Menu 2 In the Control Panel, click the Network and Internet icon. Figure 70 Windows Vista: Control Panel N220 User's Guide 105 - ZyXEL N220 | User Guide - Page 106
: Network and Sharing Center 5 Right-click Local Area Connection and then select Properties. Figure 73 Windows Vista: Network and Sharing Center Note: During this procedure, click Continue whenever Windows displays a screen saying that it needs your permission to continue. 106 N220 User's Guide - ZyXEL N220 | User Guide - Page 107
Appendix A Setting Up Your Computer's IP Address 6 Select Internet Protocol Version 4 (TCP/IPv4) and then select Properties. Figure 74 Windows Vista: Local Area Connection Properties N220 User's Guide 107 - ZyXEL N220 | User Guide - Page 108
DNS server, if that information was provided.Click Advanced. 9 Click OK to close the Internet Protocol (TCP/IP) Properties window. 10 Click OK to close the Local Area Connection Properties window. Verifying Settings 1 Click Start > All Programs > Accessories > Command Prompt. 108 N220 User's Guide - ZyXEL N220 | User Guide - Page 109
> Control Panel > Network Connections, right-click a network connection, click Status and then click the Support tab to view your IP address and connection information. Windows 7 This section shows screens from Windows 7 Enterprise. 1 Click Start > Control Panel. Figure 76 Windows 7: Start Menu 2 In - ZyXEL N220 | User Guide - Page 110
7: Network And Sharing Center 4 Double click Local Area Connection and then select Properties. Figure 79 Windows 7: Local Area Connection Status Note: During this procedure, click Continue whenever Windows displays a screen saying that it needs your permission to continue. 110 N220 User's Guide - ZyXEL N220 | User Guide - Page 111
Appendix A Setting Up Your Computer's IP Address 5 Select Internet Protocol Version 4 (TCP/IPv4) and then select Properties. Figure 80 Windows 7: Local Area Connection Properties N220 User's Guide 111 - ZyXEL N220 | User Guide - Page 112
to you by your network administrator or ISP. You window. 9 Click OK to close the Local Area Connection Properties window. Verifying Settings 1 Click Start > All Programs > Accessories > Command Prompt. 2 In the Command Prompt window, type "ipconfig" and then press [ENTER]. 112 N220 User's Guide - ZyXEL N220 | User Guide - Page 113
are displayed as follows. Figure 82 Windows 7: Internet Protocol Version 4 (TCP/IPv4) Properties Mac OS X: 10.3 and 10.4 The screens in this section are from Mac OS X 10.4 but can also apply to 10.3. 1 Click Apple > System Preferences. Figure 83 Mac OS X 10.4: Apple Menu N220 User's Guide 113 - ZyXEL N220 | User Guide - Page 114
System Preferences window, click the Network icon. Figure 84 Mac OS X 10.4: System Preferences 3 When the Network preferences pane opens, select Built-in Ethernet from the network connection type list, and then click Configure. Figure 85 Mac OS X 10.4: Network Preferences 114 N220 User's Guide - ZyXEL N220 | User Guide - Page 115
Using DHCP from the Configure IPv4 list in the TCP/IP tab. Figure 86 Mac OS X 10.4: Network Preferences > TCP/IP Tab. 5 For statically assigned settings, do the following: • From the Configure IPv4 list, select Manually. • In the IP Address field, type your IP address. • In the Subnet Mask field - ZyXEL N220 | User Guide - Page 116
> Ethernet 6 Click Apply Now and close the window. Verifying Settings Check your TCP/IP properties by clicking Applications > Utilities > Network Utilities, and then selecting the appropriate Network Interface from the Info tab. Figure 88 Mac OS X 10.4: Network Utility 116 N220 User's Guide - ZyXEL N220 | User Guide - Page 117
Address Mac OS X: 10.5 and 10.6 The screens in this section are from Mac OS X 10.5 but can also apply to 10.6. 1 Click Apple > System Preferences. Figure 89 Mac OS X 10.5: Apple Menu 2 In System Preferences, click the Network icon. Figure 90 Mac OS X 10.5: Systems Preferences N220 User's Guide 117 - ZyXEL N220 | User Guide - Page 118
from the list of available connection types. Figure 91 Mac OS X 10.5: Network Preferences > Ethernet 4 From the Configure list, select Using DHCP for dynamically assigned settings. 5 For statically assigned settings, do the following: • From the Configure list, select Manually. • In the IP Address - ZyXEL N220 | User Guide - Page 119
Appendix A Setting Up Your Computer's IP Address • In the Router field, enter the IP address of your N220. Figure 92 Mac OS X 10.5: Network Preferences > Ethernet 6 Click Apply and close the window. N220 User's Guide 119 - ZyXEL N220 | User Guide - Page 120
interface from the Info tab. Figure 93 Mac OS X 10.5: Network Utility Linux: Ubuntu 8 (GNOME) This section shows you how to configure your computer's TCP/IP settings in the GNU Object Model Environment (GNOME) using the Ubuntu 8 Linux distribution. The procedure, screens and file locations may - ZyXEL N220 | User Guide - Page 121
Network Settings window opens, click Unlock to open the Authenticate window. (By default, the Unlock button is greyed out until clicked.) You cannot make changes to your configuration unless you first enter your admin password. Figure 95 Ubuntu 8: Network Settings > Connections N220 User's Guide - ZyXEL N220 | User Guide - Page 122
account name and password then click the Authenticate button. Figure 96 Ubuntu 8: Administrator Account Authentication 4 In the Network Settings window, select the connection that you want to configure, then click Properties. Figure 97 Ubuntu 8: Network Settings > Connections 122 N220 User's Guide - ZyXEL N220 | User Guide - Page 123
Setting Up Your Computer's IP Address 5 The Properties dialog box opens. Figure 98 Ubuntu 8: Network Settings > Properties • In the Configuration list, select Automatic Configuration (DHCP) if you and close the Properties dialog box and return to the Network Settings screen. N220 User's Guide 123 - ZyXEL N220 | User Guide - Page 124
fields provided. Figure 99 Ubuntu 8: Network Settings > DNS 8 Click the Close button to apply the changes. Verifying Settings Check your TCP/IP properties by clicking System > Administration > Network Tools, and then selecting the appropriate Network device from the Devices 124 N220 User's Guide - ZyXEL N220 | User Guide - Page 125
shows data if your connection is working properly. Figure 100 Ubuntu 8: Network Tools Linux: openSUSE 10.3 (KDE) This section 10.3 installation. Note: Make sure you are logged in as the root administrator. Follow the steps below to configure your computer IP address in the KDE: N220 User's Guide - ZyXEL N220 | User Guide - Page 126
Up Your Computer's IP Address 1 Click K Menu > Computer > Administrator Settings (YaST). Figure 101 openSUSE 10.3: K Menu > Computer Menu 2 When the Run as Root - KDE su dialog opens, enter the admin password and click OK. Figure 102 openSUSE 10.3: K Menu > Computer Menu 126 N220 User's Guide - ZyXEL N220 | User Guide - Page 127
click the Network Card icon. Figure 103 openSUSE 10.3: YaST Control Center 4 When the Network Settings window opens, click the Overview tab, select the appropriate connection Name from the list, and then click the Configure button. Figure 104 openSUSE 10.3: Network Settings N220 User's Guide 127 - ZyXEL N220 | User Guide - Page 128
Setup 6 Select Dynamic Address (DHCP) if you have a dynamic IP address. Select Statically assigned IP Address if you have a static IP address. Fill in the IP address, Subnet mask, and Hostname fields. 7 Click Next to save the changes and close the Network Card Setup window. 128 N220 User's Guide - ZyXEL N220 | User Guide - Page 129
's IP Address 8 If you know your DNS server IP address(es), click the Hostname/DNS tab in Network Settings and then enter the DNS server information in the fields provided. Figure 106 openSUSE 10.3: Network Settings 9 Click Finish to save your settings and close the window. N220 User's Guide 129 - ZyXEL N220 | User Guide - Page 130
-menu, select Show Connection Information. Figure 107 openSUSE 10.3: KNetwork Manager When the Connection Status - KNetwork Manager window opens, click the Statistics tab to see if your connection is working properly. Figure 108 openSUSE: Connection Status - KNetwork Manager 130 N220 User's Guide - ZyXEL N220 | User Guide - Page 131
(Ad-hoc) WLAN that connects a set of computers with wireless adapters (A, B, C). Any time two or more wireless adapters are within range of each other, they can set up an independent network, which is commonly referred to as an ad-hoc network or Independent Basic Service Set (IBSS). The following - ZyXEL N220 | User Guide - Page 132
connection between APs is called a Distribution System (DS). This type of wireless LAN topology is called an Infrastructure WLAN. The Access Points not only provide communication with the wired network but also mediate wireless network traffic in the immediate neighborhood. 132 N220 User's Guide - ZyXEL N220 | User Guide - Page 133
to communicate. Figure 111 Infrastructure WLAN Channel A channel is the radio frequency(ies) used by wireless devices to transmit and receive data. Channels available depend on your geographical area. You may have range of each other. The following figure illustrates a N220 User's Guide 133 - ZyXEL N220 | User Guide - Page 134
stations (STA) are within range of the access point (AP) or wireless gateway, but out-of-range of each other, so they cannot " . Note: Enabling the RTS Threshold causes redundant network overhead that could negatively affect the throughput performance instead of providing a remedy. N220 User's Guide - ZyXEL N220 | User Guide - Page 135
devices on the network support it, otherwise the N220 uses long preamble. Note: The wireless devices MUST use the same preamble mode in order to communicate. IEEE 802.11g Wireless LAN IEEE 802.11g is fully compatible with the IEEE 802.11b standard. This means an IEEE 802.11b adapter can interface - ZyXEL N220 | User Guide - Page 136
is vital to your network to protect wireless communication between wireless clients, access points and the wired network. Wireless security methods available on the N220 are data encryption, wireless client authentication, restricting access by device MAC address and hiding the N220 identity. The - ZyXEL N220 | User Guide - Page 137
additional accounting and control features. It is supported by Windows XP and a number of network devices. Some advantages of IEEE 802.1x are: • User based identification that allows for roaming. • Support for RADIUS (Remote Authentication Dial In User Service, RFC 2138, 2139) for centralized user - ZyXEL N220 | User Guide - Page 138
point helps a wireless station and a RADIUS server perform authentication. The type of authentication you use depends on the RADIUS server and an intermediary AP(s) that supports IEEE 802.1x. . For EAP-TLS authentication type, you must first have a wired connection to the network and obtain the - ZyXEL N220 | User Guide - Page 139
However, PEAP only supports EAP methods, such as EAP-MD5, EAP-MSCHAPv2 and EAP-GTC (EAP-Generic Token Card), for client authentication. EAP-GTC is implemented only by Cisco. LEAP LEAP (Lightweight Extensible Authentication Protocol) is a Cisco implementation of IEEE 802.1x. N220 User's Guide 139 - ZyXEL N220 | User Guide - Page 140
an external RADIUS server, you should use WPA2-PSK (WPA2-Pre-Shared Key) that only requires a single (identical) password entered into each access point, wireless gateway and wireless client. As long as the passwords match, a wireless client will be granted access to a WLAN. 140 N220 User's Guide - ZyXEL N220 | User Guide - Page 141
wireless clients do not support WPA or WPA2. WEP is less secure than WPA or WPA2. Encryption WPA improves data encryption by using Temporal Key decrypt data on a Wi-Fi network than WEP and difficult for an intruder to break into the network. The encryption mechanisms used for N220 User's Guide 141 - ZyXEL N220 | User Guide - Page 142
runs on an operating system instructing the wireless client how to use WPA. At the time of writing, the most widely available supplicant is the WPA patch for Windows XP, Funk Software's Odyssey client. The Windows XP patch is a free download that adds WPA capability to Windows XP's built-in "Zero - ZyXEL N220 | User Guide - Page 143
). 2 The AP checks each wireless client's password and allows it to join the network only if the password matches. 3 The AP and wireless clients generate a common PMK (Pairwise Master Key). The key itself is not sent over the network, but is derived from the PSK and the SSID. N220 User's Guide 143 - ZyXEL N220 | User Guide - Page 144
for each authentication method or key management protocol type. MAC address filters are not dependent on how you configure these security features. Table 31 Wireless Security Relational Matrix AUTHENTICATION METHOD/ KEY MANAGEMENT PROTOCOL ENCRYPTIO N METHOD ENTER MANUAL KEY IEEE 802.1X Open - ZyXEL N220 | User Guide - Page 145
gain results in a range increase of approximately 5%. Actual results may vary depending on the network environment. Antenna gain is sometimes specified in dBi, which is how much the antenna increases for WLAN There are two types of antennas used for wireless LAN applications. N220 User's Guide 145 - ZyXEL N220 | User Guide - Page 146
Appendix B Wireless LANs • Omni-directional antennas send the RF signal out in all directions on a horizontal plane. The coverage area is torus-shaped ( the coverage area as possible. For directional antennas, point the antenna in the direction of the desired coverage area. 146 N220 User's Guide - ZyXEL N220 | User Guide - Page 147
Wireless Management This appendix shows you how to manage your N220 using the Windows Vista and Windows XP wireless configuration tools. Windows Vista Take the following steps to connect to a wireless network using the Windows Vista wireless configuration tool (WLAN AutoConfig). N220 User's Guide - ZyXEL N220 | User Guide - Page 148
networks. Figure 116 Vista: The Connect To Window The security status of each wireless network displays, as well as an indication of its signal strength. If you use the mouse pointer to hover over a network's entry, additional information about the network displays. 148 N220 User's Guide - ZyXEL N220 | User Guide - Page 149
Appendix C Windows Wireless Management Figure 117 Vista: Additional Information 2 Double-click the network's name to join the network, or select a network and click Connect. Note: If the network to which you want to connect does not display, see the section on setting up a connection manually on - ZyXEL N220 | User Guide - Page 150
, you may be prompted to enter your security key. Figure 118 Vista: Enter Security Key Your computer tries to connect to the wireless network. Figure 119 Vista: Connecting If your computer has connected to the wireless network successfully, the following screen displays. 150 N220 User's Guide - ZyXEL N220 | User Guide - Page 151
the network's name from the list. Connecting to a Network Manually If the wireless network to which you want to connect does not appear in the Connect to window (if your network's SSID is hidden, for example), take the following steps to configure your network connection manually N220 User's Guide - ZyXEL N220 | User Guide - Page 152
Appendix C Windows Wireless Management 1 Click Set up a connection or network at the bottom of the Connect to screen. The following screen displays. Figure 121 Vista: Choose a Connection Option 152 N220 User's Guide - ZyXEL N220 | User Guide - Page 153
C Windows Wireless Management 2 Click Manually connect to a wireless network. The following screen displays. Figure 122 Vista: Connect Manually The following table describes the labels in this screen. Table 32 Vista: Connect Manually LABEL DESCRIPTION Network name Enter your network's SSID - ZyXEL N220 | User Guide - Page 154
connection settings. Otherwise, click Connect to.... In the window that displays, double-click the new network's name to connect to the network. Setting Up An Ad-Hoc Network Take the following steps to set up a wireless connection between two computers in Windows Vista. 154 N220 User's Guide - ZyXEL N220 | User Guide - Page 155
Appendix C Windows Wireless Management 1 Click Start ( ) > Connect To. In the Connect to screen, click Set up a connection or network. The following screen displays. Figure 124 Vista: Set Up An Ad-hoc Network 2 Select Set up a wireless ad hoc (computer-to-computer) network and click Next. The - ZyXEL N220 | User Guide - Page 156
your Internet connection, click the Network and Sharing Center link. Otherwise, click Close. Windows XP Be sure you have the Windows XP service pack 2 installed on your computer. Otherwise, you should at least have the Windows XP service pack 1 already on your computer and download the support patch - ZyXEL N220 | User Guide - Page 157
-click Network Connections. 2 Double-click on the icon for wireless network connection. 3 The status window displays as shown below. Click Properties. Figure 127 Windows XP SP1: Wireless Network Connection Status Figure 128 Windows XP SP2: Wireless Network Connection Status N220 User's Guide 157 - ZyXEL N220 | User Guide - Page 158
screen displays. Click the Wireless Networks tab. Make sure the Use Windows to configure my wireless network settings check box is selected. Figure 129 Windows XP SP1: Wireless Network Connection Properties Figure 130 Windows XP SP2: Wireless Network Connection Properties 158 N220 User's Guide - ZyXEL N220 | User Guide - Page 159
web site for information on starting WZC. Figure 131 Windows XP SP2: WZC Not Available Connecting to a Wireless Network 1 Double-click the network icon for wireless connections in the system tray to open the Wireless Network Connection Status screen. Figure 132 Windows XP SP2: System Tray Icon The - ZyXEL N220 | User Guide - Page 160
XP SP2: Wireless Network Connection Status Windows XP SP1: In the Wireless Network Connection Status screen, click Properties and the Wireless Networks tab to open the Wireless Network Connection Properties screen. Figure 134 Windows XP SP1: Wireless Network Connection Status 160 N220 User's Guide - ZyXEL N220 | User Guide - Page 161
network list. Table 34 Windows XP SP2: Wireless Network Connection ICON DESCRIPTION This denotes that wireless security is activated for the wireless network. This denotes that this wireless network is your preferred network. Ordering your preferred networks is important because the N220 - ZyXEL N220 | User Guide - Page 162
Management Figure 136 Windows XP SP1: Wireless Network Connection Properties 4 4.Windows XP SP2: If the wireless security is activated for the selected wireless network, the Wireless Network Connection screen displays. You must set the related fields in the Wireless Network Connection screen to the - ZyXEL N220 | User Guide - Page 163
following table describes the connection icons. Table 35 Windows XP: Wireless Networks ICON DESCRIPTION This denotes the wireless network is an available wireless network. This denotes the N220 is associated to the wireless network. This denotes the wireless network is not available. Security - ZyXEL N220 | User Guide - Page 164
describes the labels in this screen. Table 36 Windows XP: Wireless (network) properties: Association LABEL DESCRIPTION Network name This field displays the SSID (Service Set IDentifier) of each wireless (SSID) network. Network This field automatically shows the authentication method (Share - ZyXEL N220 | User Guide - Page 165
Appendix C Windows Wireless Management Table 36 Windows XP: Wireless (network) properties: Association (continued) LABEL DESCRIPTION This is a computer-tocomputer (ad hoc) network; wireless access points are not used If this check box is selected, you are connecting to another computer directly - ZyXEL N220 | User Guide - Page 166
may have made. Authentication Properties Select an EAP authentication type in the Wireless (network) properties: Authentication screen and click the Properties button to display the following screen. Protected EAP Properties Figure 141 Windows XP: Protected EAP Properties 166 N220 User's Guide - ZyXEL N220 | User Guide - Page 167
Enable Fast Reconnect Select the check box to automatically reconnect to the network (without re-authentication) if the wireless connection goes down. OK Click OK to save your changes. Cancel Click Cancel to leave this screen without saving any changes you may have made. N220 User's Guide 167 - ZyXEL N220 | User Guide - Page 168
Appendix C Windows Wireless Management Smart Card or other Certificate Properties Figure 142 Windows XP: Smart Card or other Certificate Properties The following table describes the labels in this screen. Table 39 Windows XP: Smart Card or other Certificate Properties LABEL DESCRIPTION Use my - ZyXEL N220 | User Guide - Page 169
Appendix C Windows Wireless Management Ordering the Preferred Networks Follow the steps below to manage your preferred networks. N220 User's Guide 169 - ZyXEL N220 | User Guide - Page 170
. Figure 143 Windows XP SP2: Wireless Networks: Preferred Networks Windows XP SP1: In the Wireless Network Connection Status screen, click Properties and the Wireless Networks tab to open the screen as shown. Figure 144 Windows XP SP1: Wireless Networks: Preferred Networks 170 N220 User's Guide - ZyXEL N220 | User Guide - Page 171
Appendix C Windows Wireless Management 2 Whenever the N220 tries to connect to a new network, the new network is added in the Preferred networks table automatically. Select a network and click Move up or Move down to change it's order, click Remove to delete it or click Properties to view the - ZyXEL N220 | User Guide - Page 172
Appendix C Windows Wireless Management 172 N220 User's Guide - ZyXEL N220 | User Guide - Page 173
Adapter Do the following to enable the wireless adapter of your computer. If you know for a fact that the wireless adapter is already working, you can skip this part and go to Connecting to a Wireless Network. 1 Click Start > Control Panel. Figure 145 Windows 7: Start Menu N220 User's Guide - ZyXEL N220 | User Guide - Page 174
tasks under the Network and Internet category. Figure 146 Windows 7: Control Panel 3 Click Change adapter settings. Figure 147 Windows 7: Network And Sharing Center 4 Right click Wireless Network Connection and select Enable. Figure 148 Windows 7: Wireless Network Connection 174 N220 User's Guide - ZyXEL N220 | User Guide - Page 175
's wireless adapter has been enabled, do the following to connect to a wireless network. 1 Click the wireless adapter icon which appears in the bottom right of your computer monitor. A list of available wireless networks displays. Figure 150 Windows 7: List of Wireless Networks N220 User's Guide - ZyXEL N220 | User Guide - Page 176
Indicator • If the wireless network is secured, you should provide the correct credentials before you can gain access as shown below. Figure 153 Windows 7: Wireless Connection Security You may have to wait several minutes while your computer connects to the wireless network. 176 N220 User's Guide - ZyXEL N220 | User Guide - Page 177
, do the following to check your wireless network connection status. 1 Click Start > Control Panel. Figure 154 Windows 7: Start Menu 2 In the Control Panel, click View network status and tasks under the Network and Internet category. Figure 155 Windows 7: Control Panel N220 User's Guide 177 - ZyXEL N220 | User Guide - Page 178
Appendix D Wireless for Windows 7 3 Check the Connections under View you active networks. If the wireless network name displays and the icon is green, you have successfully connected to the wireless network. Figure 156 Windows 7: Network and Sharing Center 178 N220 User's Guide - ZyXEL N220 | User Guide - Page 179
manual, or otherwise, without the prior written permission of ZyXEL Communications Corporation. Published by ZyXEL Communications Corporation. All rights reserved. Disclaimers ZyXEL does not assume any liability arising out of the application or use of any products, or software N220 User's Guide 179 - ZyXEL N220 | User Guide - Page 180
installation. This device generates, uses, and can radiate radio frequency energy, and if not installed and used in accordance with the instructions Connect the equipment into an outlet on a circuit different from that to which the receiver is connected instruction as documented in this manual. - ZyXEL N220 | User Guide - Page 181
an uncontrolled environment. End users must follow the specific operating instructions for satisfying RF exposure compliance. 注意 ! Notices Changes or has been designed for the WLAN 2.4 GHz network throughout the EC region and Switzerland, with restrictions in France. N220 User's Guide 181 - ZyXEL N220 | User Guide - Page 182
operation of the device. Cet appareil numérique de la classe B est conforme à la norme NMB-003 du Canada. Viewing Certifications 1 Go to http://www.zyxel.com. 2 Select your product on the ZyXEL home page to go to that product's page. 3 Select the certification you wish to view from this page. 182 - ZyXEL N220 | User Guide - Page 183
access point) 133 AP MAC address 51 AP mode configuration 34 Association list 35, 78 authentication 52 authentication type 40 auto 40 open system 40 shared key 40 auto authentication 40 automatic connection 54 automatic network scan 29, 62 N220 User's Guide Index Index B Basic Service Set, See BSS - ZyXEL N220 | User Guide - Page 184
51, 77 LINK LED 19 link quality 52 M MAC 78 MAC filter 82 action 83 manual network connection 29 Mbps 78 Message Integrity Check (MIC) 41, 141 N Network interface card (NIC) 79 network mode 52 network name 51 network overlap 39 network scan 62 Network sharing 76 network type 51, 55 N220 User's Guide - ZyXEL N220 | User Guide - Page 185
Quick Start Guide 20, 92 R radio interference 92 radio specifications 95, 96 RADIUS 40, 41, 137 message types 137 messages 137 shared secret key 138 N220 User's Guide 39, 52, 97 data encryption 39 security settings and Vista 71 sensitivity 96 Service Set Identity (SSID) 29, 38 signal strength 52, 54 - ZyXEL N220 | User Guide - Page 186
57, 81, 141 application example 143 WPS see also Wi-Fi Protected Setup 51 WZC activating 157 network connection 159 not available 159 preferred network 169 security setting 163 system tray icon 159 WZC (Wireless Zero Configuration) 21 Z ZyXEL Utility accessing 21 ZyXEL utility 21 N220 User's Guide - ZyXEL N220 | User Guide - Page 187
accessing 21 driver version number 86 exiting 21 help 22 reactivating 21 status 21 system tray icon 20 upgrading 87 version number 86 Index N220 User's Guide 187
-
 1
1 -
 2
2 -
 3
3 -
 4
4 -
 5
5 -
 6
6 -
 7
7 -
8
-
9
-
10
-
11
-
12
-
13
-
14
-
15
-
16
-
17
-
18
-
19
-
20
-
21
-
22
-
23
-
24
-
25
-
26
-
27
-
28
-
29
-
30
-
31
-
32
-
33
-
34
-
35
-
36
-
37
-
38
-
39
-
40
-
41
-
42
-
43
-
44
-
45
-
46
-
47
-
48
-
49
-
50
-
51
-
52
-
53
-
54
-
55
-
56
-
57
-
58
-
59
-
60
-
61
-
62
-
63
-
64
-
65
-
66
-
67
-
68
-
69
-
70
-
71
-
72
-
73
-
74
-
75
-
76
-
77
-
78
-
79
-
80
-
81
-
82
-
83
-
84
-
85
-
86
-
87
-
88
-
89
-
90
-
91
-
92
-
93
-
94
-
95
-
96
-
97
-
98
-
99
-
100
-
101
-
102
-
103
-
104
-
105
-
106
-
107
-
108
-
109
-
110
-
111
-
112
-
113
-
114
-
115
-
116
-
117
-
118
-
119
-
120
-
121
-
122
-
123
-
124
-
125
-
126
-
127
-
128
-
129
-
130
-
131
-
132
-
133
-
134
-
135
-
136
-
137
-
138
-
139
-
140
-
141
-
142
-
143
-
144
-
145
-
146
-
147
-
148
-
149
-
150
-
151
-
152
-
153
-
154
-
155
-
156
-
157
-
158
-
159
-
160
-
161
-
162
-
163
-
164
-
165
-
166
-
167
-
168
-
169
-
170
-
171
-
172
-
173
-
174
-
175
-
176
-
177
-
178
-
179
-
180
-
181
-
182
-
183
-
184
-
185
-
186
-
187
 |
 |
www.zyxel.com
www.zyxel.com
N220
Wireless N-lite USB Adapter
Copyright © 2010
ZyXEL Communications Corporation
Version 1.0
Edition 1, 07/2010