2007 BMW X5 Owner's Manual - Page 114
2007 BMW X5 Manual
Page 114 highlights
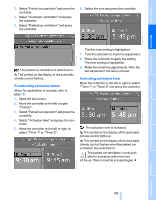
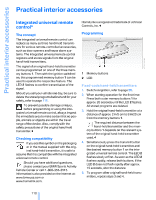
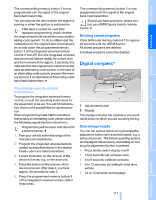
Practical interior accessories Setting compass zones Set the respectively applicable compass zone in your vehicle so that the compass functions properly, refer to the map of the world with compass zones below. To set the compass zones, press the adjustment button for approx. 3-4 seconds. The display indicates the number of the currently set compass zone. To change the zone setting, briefly press the adjusting button repeatedly until the number of the compass zone that applies to your current position is displayed. The compass will be operational again after approx. 10 seconds. Procedure 1. Make sure that there are no large metal objects or overhead power lines in the vicinity of your vehicle and that you have enough space to drive in a circle. 2. Input the currently applicable compass zone. 3. Press the adjustment button for approx. 6-7 seconds to display C. Then drive in a complete circle at least once at a maximum speed of 4 mph/7 km/h. If the calibration is successful, the display C is replaced with the points of the compass. Calibrating digital compass In the following situations, the digital compass must be calibrated: > The wrong cardinal direction appears on the display. > The cardinal direction displayed does not change despite a change in the direction of travel. > Not all cardinal directions are displayed. Setting right/left-hand drive vehicle Your digital compass is already set to right or left-hand drive vehicle to match your vehicle at the factory. 112 Online Edition for Part no. 01 41 0 012 501 - © 08/06 BMW AG
-
 1
1 -
2
-
3
-
4
-
5
-
6
-
7
-
8
-
9
-
10
-
11
-
12
-
13
-
14
-
15
-
16
-
17
-
18
-
19
-
20
-
21
-
22
-
23
-
24
-
25
-
26
-
27
-
28
-
29
-
30
-
31
-
32
-
33
-
34
-
35
-
36
-
37
-
38
-
39
-
40
-
41
-
42
-
43
-
44
-
45
-
46
-
47
-
48
-
49
-
50
-
51
-
52
-
53
-
54
-
55
-
56
-
57
-
58
-
59
-
60
-
61
-
62
-
63
-
64
-
65
-
66
-
67
-
68
-
69
-
70
-
71
-
72
-
73
-
74
-
75
-
76
-
77
-
78
-
79
-
80
-
81
-
82
-
83
-
84
-
85
-
86
-
87
-
88
-
89
-
90
-
91
-
92
-
93
-
94
-
95
-
96
-
97
-
98
-
99
-
100
-
101
-
102
-
103
-
104
-
105
-
106
-
107
-
108
-
 109
109 -
 110
110 -
 111
111 -
 112
112 -
 113
113 -
 114
114 -
 115
115 -
 116
116 -
 117
117 -
 118
118 -
 119
119 -
120
-
121
-
122
-
123
-
124
-
125
-
126
-
127
-
128
-
129
-
130
-
131
-
132
-
133
-
134
-
135
-
136
-
137
-
138
-
139
-
140
-
141
-
142
-
143
-
144
-
145
-
146
-
147
-
148
-
149
-
150
-
151
-
152
-
153
-
154
-
155
-
156
-
157
-
158
-
159
-
160
-
161
-
162
-
163
-
164
-
165
-
166
-
167
-
168
-
169
-
170
-
171
-
172
-
173
-
174
-
175
-
176
-
177
-
178
-
179
-
180
-
181
-
182
-
183
-
184
-
185
-
186
-
187
-
188
-
189
-
190
-
191
-
192
-
193
-
194
-
195
-
196
-
197
-
198
-
199
-
200
-
201
-
202
-
203
-
204
-
205
-
206
-
207
-
208
-
209
-
210
-
211
-
212
-
213
-
214
-
215
-
216
-
217
-
218
-
219
-
220
-
221
-
222
-
223
-
224
-
225
-
226
-
227
-
228
-
229
-
230
-
231
-
232
-
233
-
234
-
235
-
236
-
237
-
238
-
239
-
240
-
241
-
242
-
243
-
244
-
245
-
246
-
247
-
248
-
249
-
250
-
251
-
252
-
253
-
254
-
255
-
256
-
257
-
258
-
259
-
260
-
261
-
262
-
263
-
264
-
265
-
266
-
267
-
268
-
269
-
270
-
271
-
272
 |
 |
