2007 BMW X5 Owner's Manual - Page 118
2007 BMW X5 Manual

Page 118 highlights
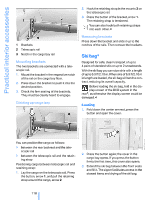
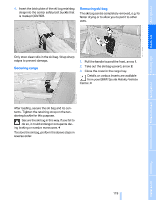
Practical interior accessories Cargo bay Roll-up cover Installing When installing, proceed in the opposite order of removal. Pull out the roll-up cover and hook it into the brackets. Do not place heavy or hard objects on the roll-up cover. If you do so, they may already pose a danger to vehicle occupants during braking or evasive maneuvers. Do not allow the roll-up cover to snap back, otherwise it can be damaged.< 1. Lay on the case on the left-hand side and push it forward, arrow 1. 2. Swing the case toward the inside, refer to arrow 2. 3. Push the case forward at the ends until it engages in the two side brackets. 4. Check whether the case is properly locked in place by pulling it with a sudden movement. Removing 1. Unlock the case with the button, arrow 1. Separation net* 2. Swing the case somewhat to the left, arrow 2, and remove. Hooking in separation net Pull the separation net out of the case by the loop. Grasp the rod on both sides and insert it in the brackets, arrow 1. This is best carried out from the rear seat. Letting down separation net When you no longer require the separation net, grasp the rod on both sides and remove it from the brackets, arrow 2. Then slowly allow the separation net to glide into the case. 116 Online Edition for Part no. 01 41 0 012 501 - © 08/06 BMW AG
-
 1
1 -
2
-
3
-
4
-
5
-
6
-
7
-
8
-
9
-
10
-
11
-
12
-
13
-
14
-
15
-
16
-
17
-
18
-
19
-
20
-
21
-
22
-
23
-
24
-
25
-
26
-
27
-
28
-
29
-
30
-
31
-
32
-
33
-
34
-
35
-
36
-
37
-
38
-
39
-
40
-
41
-
42
-
43
-
44
-
45
-
46
-
47
-
48
-
49
-
50
-
51
-
52
-
53
-
54
-
55
-
56
-
57
-
58
-
59
-
60
-
61
-
62
-
63
-
64
-
65
-
66
-
67
-
68
-
69
-
70
-
71
-
72
-
73
-
74
-
75
-
76
-
77
-
78
-
79
-
80
-
81
-
82
-
83
-
84
-
85
-
86
-
87
-
88
-
89
-
90
-
91
-
92
-
93
-
94
-
95
-
96
-
97
-
98
-
99
-
100
-
101
-
102
-
103
-
104
-
105
-
106
-
107
-
108
-
109
-
110
-
111
-
112
-
 113
113 -
 114
114 -
 115
115 -
 116
116 -
 117
117 -
 118
118 -
 119
119 -
 120
120 -
 121
121 -
 122
122 -
 123
123 -
124
-
125
-
126
-
127
-
128
-
129
-
130
-
131
-
132
-
133
-
134
-
135
-
136
-
137
-
138
-
139
-
140
-
141
-
142
-
143
-
144
-
145
-
146
-
147
-
148
-
149
-
150
-
151
-
152
-
153
-
154
-
155
-
156
-
157
-
158
-
159
-
160
-
161
-
162
-
163
-
164
-
165
-
166
-
167
-
168
-
169
-
170
-
171
-
172
-
173
-
174
-
175
-
176
-
177
-
178
-
179
-
180
-
181
-
182
-
183
-
184
-
185
-
186
-
187
-
188
-
189
-
190
-
191
-
192
-
193
-
194
-
195
-
196
-
197
-
198
-
199
-
200
-
201
-
202
-
203
-
204
-
205
-
206
-
207
-
208
-
209
-
210
-
211
-
212
-
213
-
214
-
215
-
216
-
217
-
218
-
219
-
220
-
221
-
222
-
223
-
224
-
225
-
226
-
227
-
228
-
229
-
230
-
231
-
232
-
233
-
234
-
235
-
236
-
237
-
238
-
239
-
240
-
241
-
242
-
243
-
244
-
245
-
246
-
247
-
248
-
249
-
250
-
251
-
252
-
253
-
254
-
255
-
256
-
257
-
258
-
259
-
260
-
261
-
262
-
263
-
264
-
265
-
266
-
267
-
268
-
269
-
270
-
271
-
272
 |
 |
