2007 BMW X5 Owner's Manual - Page 80
2007 BMW X5 Manual

Page 80 highlights
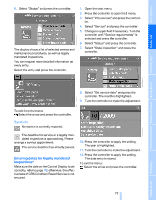
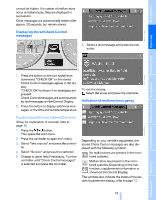
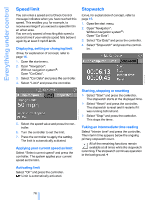
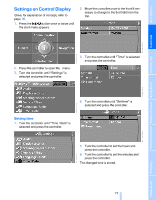
Everything under control Switching on hour signal* You will hear three tones just before each full hour. Select "Hour memo" and press the controller. The hour signal is activated. The setting is stored for the remote control currently in use. Changing date format 1. Select "Date format" and press the controller. 2. Select the desired format and press the controller. The setting is stored for the remote control currently in use. Setting time format 1. Select "Time format" and press the controller. 2. Select the desired format and press the controller. The setting is stored for the remote control currently in use. Brightness of Control Display The brightness is automatically adapted to the ambient lighting conditions. However, you can change the basic setting. 1. Select "Display settings" and press the controller. 2. Change to upper field if necessary. Turn the controller until "Brightness" is selected and press the controller. Setting date 1. Turn the controller until "Time / Date" is selected and press the controller. 2. Select "Date" and press the controller. 3. If necessary, move the controller to the right to select "Display". 3. Select "Set date" and press the controller. The first section of the date display is highlighted, in this case the month. 4. Turn the controller to make the adjustment. 5. Press the controller to apply the setting. The next setting is highlighted. 6. Make the remaining adjustments. After the last adjustment, the date is stored. 4. Turn the controller until the desired setting is selected. The setting is stored for the remote control currently in use. 78 Online Edition for Part no. 01 41 0 012 501 - © 08/06 BMW AG
-
 1
1 -
2
-
3
-
4
-
5
-
6
-
7
-
8
-
9
-
10
-
11
-
12
-
13
-
14
-
15
-
16
-
17
-
18
-
19
-
20
-
21
-
22
-
23
-
24
-
25
-
26
-
27
-
28
-
29
-
30
-
31
-
32
-
33
-
34
-
35
-
36
-
37
-
38
-
39
-
40
-
41
-
42
-
43
-
44
-
45
-
46
-
47
-
48
-
49
-
50
-
51
-
52
-
53
-
54
-
55
-
56
-
57
-
58
-
59
-
60
-
61
-
62
-
63
-
64
-
65
-
66
-
67
-
68
-
69
-
70
-
71
-
72
-
73
-
74
-
 75
75 -
 76
76 -
 77
77 -
 78
78 -
 79
79 -
 80
80 -
 81
81 -
 82
82 -
 83
83 -
 84
84 -
 85
85 -
86
-
87
-
88
-
89
-
90
-
91
-
92
-
93
-
94
-
95
-
96
-
97
-
98
-
99
-
100
-
101
-
102
-
103
-
104
-
105
-
106
-
107
-
108
-
109
-
110
-
111
-
112
-
113
-
114
-
115
-
116
-
117
-
118
-
119
-
120
-
121
-
122
-
123
-
124
-
125
-
126
-
127
-
128
-
129
-
130
-
131
-
132
-
133
-
134
-
135
-
136
-
137
-
138
-
139
-
140
-
141
-
142
-
143
-
144
-
145
-
146
-
147
-
148
-
149
-
150
-
151
-
152
-
153
-
154
-
155
-
156
-
157
-
158
-
159
-
160
-
161
-
162
-
163
-
164
-
165
-
166
-
167
-
168
-
169
-
170
-
171
-
172
-
173
-
174
-
175
-
176
-
177
-
178
-
179
-
180
-
181
-
182
-
183
-
184
-
185
-
186
-
187
-
188
-
189
-
190
-
191
-
192
-
193
-
194
-
195
-
196
-
197
-
198
-
199
-
200
-
201
-
202
-
203
-
204
-
205
-
206
-
207
-
208
-
209
-
210
-
211
-
212
-
213
-
214
-
215
-
216
-
217
-
218
-
219
-
220
-
221
-
222
-
223
-
224
-
225
-
226
-
227
-
228
-
229
-
230
-
231
-
232
-
233
-
234
-
235
-
236
-
237
-
238
-
239
-
240
-
241
-
242
-
243
-
244
-
245
-
246
-
247
-
248
-
249
-
250
-
251
-
252
-
253
-
254
-
255
-
256
-
257
-
258
-
259
-
260
-
261
-
262
-
263
-
264
-
265
-
266
-
267
-
268
-
269
-
270
-
271
-
272
 |
 |
