3Com 3CXFE575CT User Guide
3Com 3CXFE575CT - MHz 10/100 Lan Card Bus Manual
 |
UPC - 662705312057
View all 3Com 3CXFE575CT manuals
Add to My Manuals
Save this manual to your list of manuals |
3Com 3CXFE575CT manual content summary:
- 3Com 3CXFE575CT | User Guide - Page 1
3Com® Megahertz® ® 10/100 LAN CardBus PC Card User Guide http://www.3com.com/ http://www.3com.com/productreg Part No. 09-0XXX-00X Published June 2000 - 3Com 3CXFE575CT | User Guide - Page 2
with, this User Guide. Unless otherwise indicated, 3Com registered trademarks are registered in the United States and may or may not be registered in other countries. 3Com, the 3Com logo, and Megahertz are registered trademarks of 3Com Corporation. Microsoft, Windows, and Windows NT are registered - 3Com 3CXFE575CT | User Guide - Page 3
the 3CCFE575CT LAN CardBus PC Card 6 Connecting the 3CXFE575CT XJACK LAN CardBus PC Card 7 Connecting the 3C3FE575CT LAN CardBus PC Card 8 Disconnecting the Cables 9 2 SETUP FOR WINDOWS 2000 Before You Begin Installation 11 Setup Procedure 11 Confirming Installation 12 Troubleshooting Windows 2000 - 3Com 3CXFE575CT | User Guide - Page 4
28 Troubleshooting Windows NT 4.0 Installations 28 Known Working Configurations 28 Uninstalling the Card 28 6 TROUBLESHOOTING PC Card LEDs 31 31 Diagnostics Help Library 33 A PRODUCT SPECIFICATIONS 3CCFE575CT and 3CXFE575CT LAN CardBus PC Cards 35 3C3FE575CT LAN CardBus PC Card 35 B TECHNICAL SUPPORT - 3Com 3CXFE575CT | User Guide - Page 5
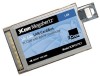
1 INSTALLING THE PC CARD Introduction The 3Com 10/100 LAN CardBus PC Cards (models 3CCFE575CT, 3CXFE575CT, and 3C3FE575CT) connect a notebook to an Ethernet or Fast Ethernet network. All PC Card models are shown below. - 3Com 3CXFE575CT | User Guide - Page 6
1: INSTALLING THE PC CARD User Documentation This guide describes PC Card installation and setup for Windows ® 2000, Windows 98, Windows Millennium Edition, Windows 95, and Windows NT®. Access the User Guide for the latest information on the product. (You must first install the User Guide.) You - 3Com 3CXFE575CT | User Guide - Page 7
the 3CXFE575CT XJACK LAN CardBus PC Card 7 5 Connect the network cable to the network port (3). Connecting the 3CXFE575CT XJACK LAN CardBus PC Card Now you are ready to install the network driver. Go to the chapter for your notebook operating system in this guide. 1 Remove all PC Cards from - 3Com 3CXFE575CT | User Guide - Page 8
on the 3CXFE575CT LAN CardBus PC Card (1). 4 Connect the network cable to the network port (2). Connecting the 3C3FE575CT LAN CardBus PC Card Now you are ready to install the network driver. Go to the chapter for your operating system in this guide. 1 Remove all PC Cards from your notebook - 3Com 3CXFE575CT | User Guide - Page 9
the LAN port. Disconnecting the Cables Now you are ready to install the network driver. Go to the chapter for your notebook operating system in this guide. All cables used with the LAN CardBus PC Card lock in place when connected to the card. To release the cables, squeeze the release clip located - 3Com 3CXFE575CT | User Guide - Page 10
- 3Com 3CXFE575CT | User Guide - Page 11
CD. Setup Procedure 1 Make sure that the CardBus PC Card is inserted and connected to the network, as described earlier. 2 Turn your notebook computer on. Windows will detect the card and install drivers provided with Windows 2000. No reboot is required. NOTE: We recommend that you upgrade - 3Com 3CXFE575CT | User Guide - Page 12
Basic troubleshooting, applicable for all problem situations. Inspect all cables and connections. Check whether your PC Card is fully inserted into the slot. Verify that you have the latest BIOS for your system. If not, check the Web site for your computer and follow the BIOS upgrade instructions - 3Com 3CXFE575CT | User Guide - Page 13
Local Area Connection. 3 FE575C-3Com 10/100 LAN CardBus-Fast Ethernet PC Card and its software and repeat the installation procedures with a fresh installation of the operating system. Possible problems may be indicated if: I The PC Card is not working. I Windows 2000 is not detecting the PC Card - 3Com 3CXFE575CT | User Guide - Page 14
- 3Com 3CXFE575CT | User Guide - Page 15
name and password. I For unattended installation, see the \unattend\win98 directory on your Installation CD. Setup Procedure 1 Install the PC Card as described in "Installing the PC Card". 2 Turn the notebook on. Windows 98 automatically detects the PC Card, displays a New Hardware Found dialog - 3Com 3CXFE575CT | User Guide - Page 16
Basic troubleshooting, applicable for all problem situations. Inspect all cables and connections. Check whether your PC Card is fully inserted into the slot. Verify that you have the latest BIOS for your system. If not, check the Web site for your computer and follow the BIOS upgrade instructions - 3Com 3CXFE575CT | User Guide - Page 17
best course may be to remove the PC Card and its software and repeat the installation procedures with a fresh installation of the operating system. Possible problems may be indicated if: I The PC Card is not working. I Windows 98 is not detecting the PC Card. I The system issues a warning tone at - 3Com 3CXFE575CT | User Guide - Page 18
- 3Com 3CXFE575CT | User Guide - Page 19
fied as 4.00.950 or 4.00.950a. I OSR 2 is identified as 4.00.950b or 4.00.950c. Setup Procedures Windows 95 Version A 1 Insert the PC Card as described in "Installing the PC Card". 2 Turn the notebook on. 3 Double-click My Computer, Control Panel, and then double-click Add New Hardware. 4 Respond to - 3Com 3CXFE575CT | User Guide - Page 20
CardBus-Fast Ethernet Manual Load and click OK to copy the PC Card files to your notebook. If you are prompted for the LAN Installation Disk during installation, make sure that a: is the designated path. If during installation, the 3Com driver cannot be found, enter a:\ to point Windows to the LAN - 3Com 3CXFE575CT | User Guide - Page 21
. If you are prompted for the LAN Installation Disk during installation, make sure that a: is the designated path. If during installation, the 3Com driver cannot be found, enter a:\ to point Windows to the LAN Installation Disk. If prompted, insert the Windows 95 CD. You can specify a location on - 3Com 3CXFE575CT | User Guide - Page 22
22 CHAPTER 4: SETUP FOR WINDOWS 95 Troubleshooting Windows 95 Installations Symptom Solution Basic troubleshooting, applicable for all problem situations. Inspect all cables and connections. Check whether your PC Card if fully inserted into the slot. Verify whether you have the latest BIOS for - 3Com 3CXFE575CT | User Guide - Page 23
best course may be to remove the PC Card and its software and repeat the installation procedures with a fresh installation of the operating system. Possible problems may be indicated if: I The PC Card is not working. I Windows 95 is not detecting the PC Card. I The system issues a warning tone at - 3Com 3CXFE575CT | User Guide - Page 24
- 3Com 3CXFE575CT | User Guide - Page 25
with Card and Services Block software, see the "Installing with Softex" section in this chapter. I For unattended installation, see the \unattend\nt4 directory on your Installation CD. Setup Procedure Setup With No Networking Installed 1 Insert the PC Card as described in "Installing the PC Card - 3Com 3CXFE575CT | User Guide - Page 26
to reboot the notebook, and click Yes. 26 Reinstall your service pack if you had service pack installed prior to installing the PC Card. Windows NT With Networking Installed 1 Install the PC Card as described in "Installing the PC Card". 2 Turn the notebook on. 3 Double-click My Computer, double - 3Com 3CXFE575CT | User Guide - Page 27
drive. 2 Insert the 3Com 10/100 LAN CardBus PC Card into the PC Card slot. Card Executive will attempt, but fail, to find the diskette. 3 When prompted, select Install driver provided with PC Card. 4 Type the following path and click OK: a:\softex The Network Settings window will display. 5 Select - 3Com 3CXFE575CT | User Guide - Page 28
the Adapters tab. FE575C-3Com 10/100 LAN CardBus -Fast Ethernet appears on the list. Troubleshooting Windows NT 4.0 Installations Symptom Solution Basic troubleshooting, applicable for all problem situations. Inspect all cables and connections. Check whether your PC Card if fully inserted into - 3Com 3CXFE575CT | User Guide - Page 29
any of these problems: 1 Remove the PC Card from the PC Card slot. 2 Double-click My Computer, double-click Control Panel, and double-click Network. 3 Select the Adapters tab. 4 Select FE575C-3Com 10/100 LAN CardBus-Fast Ethernet and click Remove. 5 Reboot and reinstall the PC Card. This procedure - 3Com 3CXFE575CT | User Guide - Page 30
- 3Com 3CXFE575CT | User Guide - Page 31
6 TROUBLESHOOTING PC Card LEDs Before the PC Card and cable LEDs can be used for troubleshooting, the PC Card must be connected to the network and the driver must be installed. The LEDs and LED status for the models 3CCFE575CT and 3CXFE575CT are shown below. LED 10 Mbps 100 Mbps On Good 10BASE - 3Com 3CXFE575CT | User Guide - Page 32
32 CHAPTER 6: TROUBLESHOOTING On the 3CXFE575CT card, the LEDs are on the card. - 3Com 3CXFE575CT | User Guide - Page 33
Diagnostics Help Library 33 On the 3C3FE575CT card, the connector lights up to indicate network status. Description Green 10 Mbps information in the DOS Diagnostics help library. To run diagnostics, insert the LAN Installation Disk in your notebook and at the DOS prompt, enter: a:\dosdiag.exe - 3Com 3CXFE575CT | User Guide - Page 34
- 3Com 3CXFE575CT | User Guide - Page 35
3CCFE575CT and 3CXFE575CT LAN CardBus PC Cards Network Interface Physical Dimensions Environmental Operating Range Network Cable Specifications Power Requirements Certification 3CCFE575CT and 3CXFE575CT LAN PC Cards Length Height Width Weight Operating temperature Relative humidity UTP Cable - 3Com 3CXFE575CT | User Guide - Page 36
- 3Com 3CXFE575CT | User Guide - Page 37
KnowledgeBase contains a list of known problems for specific computer models and suggests ways to solve the problems. The URL is: http://knowledgebase.3com.com Frequently Asked This link takes you to the FAQ list for 3Com PC cards. Questions http://support.3com.com/infodeli/tools/nic/fe575ct/family - 3Com 3CXFE575CT | User Guide - Page 38
38 APPENDIX B: TECHNICAL SUPPORT 3Com FTP Site Download drivers, patches, software, and MIBs across the Internet from the 3Com public FTP site. To connect to the 3Com FTP site, enter the following information into your FTP client: I Hostname: ftp.3com.com I Username: anonymous I Password: - 3Com 3CXFE575CT | User Guide - Page 39
Support from 3Com 39 Below is a list of worldwide technical telephone support numbers: Country Asia Pacific Rim Australia Hong 1678 79489 0800 0227788 800 11376 00800 3111206 0800 831416 0800 995014 900 983125 020 795482 0800 55 3072 0800 966197 Latin America Argentina Brazil Chile Colombia Mexico - 3Com 3CXFE575CT | User Guide - Page 40
SUPPORT Returning Products Before returning a product to 3Com for repair, first obtain a Return Materials for Repair Authorization (RMA) number. Products sent to 3Com 800 11376 00800 3111206 0800 831416 0800 995014 900 983125 020 795482 0800 55 3072 0800 966197 Latin America 1 408 326 2927 U.S.A. and - 3Com 3CXFE575CT | User Guide - Page 41
Refer to the manual for specifications on cabling types. FCC DECLARATION OF CONFORMITY We declare under our sole responsibility that the Model: 3CCFE575CT 3CXFE575CT 3C3FE575CT Description: 3Com 10/100 LAN CardBus PC Card 3Com 10/100 LAN CardBus PC Card 3Com 10/100 LAN CardBus PC Card to which - 3Com 3CXFE575CT | User Guide - Page 42
page of the transmission, the date and trouble installing Earth Stations Directive 98/13/EEC. Radio supporting voice telephony services PCMCIA Bus connector to PC SELV Note that only machine, the modem user instructions must also be supplied problems, you should contact your equipment supplier in the - 3Com 3CXFE575CT | User Guide - Page 43
to make automatic calls to the Telecom 111 Emergency Services. The grant of a Telepermit for a device in are dependent on the equipment (PC) associated with this modem. The same number within any 30 minute period for a single manual call initiation The equipment shall go back on-hook for - 3Com 3CXFE575CT | User Guide - Page 44
-
 1
1 -
 2
2 -
 3
3 -
 4
4 -
 5
5 -
 6
6 -
 7
7 -
8
-
9
-
10
-
11
-
12
-
13
-
14
-
15
-
16
-
17
-
18
-
19
-
20
-
21
-
22
-
23
-
24
-
25
-
26
-
27
-
28
-
29
-
30
-
31
-
32
-
33
-
34
-
35
-
36
-
37
-
38
-
39
-
40
-
41
-
42
-
43
-
44
 |
 |

®
3Com
®
Megahertz
®
10/100 LAN CardBus PC Card
User Guide
Part No. 09-0XXX-00X
Published June 2000