3Ware 9550SXU16MLB10 User Guide - Page 115
Moving a Unit from One Controller to Another, Unlocking Drives Con d on a 9000 Series Controller
 |
UPC - 693494971613
View all 3Ware 9550SXU16MLB10 manuals
Add to My Manuals
Save this manual to your list of manuals |
Page 115 highlights
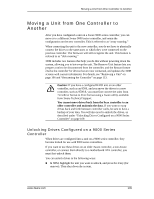
Moving a Unit from One Controller to Another Moving a Unit from One Controller to Another After you have configured a unit on a 3ware 9000 series controller, you can move it to a different 3ware 9000 series controller, and retain the configuration on the new controller. This is referred to as "array roaming." When connecting the unit to the new controller, you do not have to physically connect the drives to the same ports to which they were connected on the previous controller. The firmware will still recognize the unit. This feature is referred to as "disk roaming." 3DM includes two features that help you do this without powering down the system, allowing you to hot-swap the unit. The Remove Unit feature lets you prepare a unit to be disconnected from the controller, and the Rescan feature checks the controller for drives that are now connected, and updates the 3DM screens with current information. For details, see "Removing a Unit" on page 106 and "Rescanning the Controller" on page 113. Caution: If you have a configured RAID unit on an older controller, such as an 8506, and you move the drives to a new controller, such as 9500-8, you must first convert the units from 7xxx/8xxx format to 9xxx format using a 3ware utility available from 3ware Technical Support. You cannot move drives back from the 9xxx controller to an older controller and maintain the data. If you want to swap drives back and forth between controller cards, be sure to have a backup of your data. You will also need to unlock the drives, as described under "Unlocking Drives Configured on a 9000 Series Controller" on page 109. Unlocking Drives Configured on a 9000 Series Controller When drives are configured into a unit on a 9000 series controller, they become locked for use with 9000 series controllers. If you want to use these drives on an older 3ware controller, a non-3ware controller, or connect them directly to a motherboard ATA controller, you must first unlock them. You can unlock drives in the following ways: „ In 3BM, highlight the unit you want to unlock, and press the r key (for remove). Then shut down the system. www.3ware.com 109
-
 1
1 -
2
-
3
-
4
-
5
-
6
-
7
-
8
-
9
-
10
-
11
-
12
-
13
-
14
-
15
-
16
-
17
-
18
-
19
-
20
-
21
-
22
-
23
-
24
-
25
-
26
-
27
-
28
-
29
-
30
-
31
-
32
-
33
-
34
-
35
-
36
-
37
-
38
-
39
-
40
-
41
-
42
-
43
-
44
-
45
-
46
-
47
-
48
-
49
-
50
-
51
-
52
-
53
-
54
-
55
-
56
-
57
-
58
-
59
-
60
-
61
-
62
-
63
-
64
-
65
-
66
-
67
-
68
-
69
-
70
-
71
-
72
-
73
-
74
-
75
-
76
-
77
-
78
-
79
-
80
-
81
-
82
-
83
-
84
-
85
-
86
-
87
-
88
-
89
-
90
-
91
-
92
-
93
-
94
-
95
-
96
-
97
-
98
-
99
-
100
-
101
-
102
-
103
-
104
-
105
-
106
-
107
-
108
-
109
-
 110
110 -
 111
111 -
 112
112 -
 113
113 -
 114
114 -
 115
115 -
 116
116 -
 117
117 -
 118
118 -
 119
119 -
 120
120 -
121
-
122
-
123
-
124
-
125
-
126
-
127
-
128
-
129
-
130
-
131
-
132
-
133
-
134
-
135
-
136
-
137
-
138
-
139
-
140
-
141
-
142
-
143
-
144
-
145
-
146
-
147
-
148
-
149
-
150
-
151
-
152
-
153
-
154
-
155
-
156
-
157
-
158
-
159
-
160
-
161
-
162
-
163
-
164
-
165
-
166
-
167
-
168
-
169
-
170
-
171
-
172
-
173
-
174
-
175
-
176
-
177
-
178
-
179
-
180
-
181
-
182
-
183
-
184
-
185
-
186
-
187
-
188
-
189
-
190
-
191
-
192
-
193
-
194
-
195
-
196
-
197
-
198
-
199
-
200
-
201
-
202
 |
 |
