3Ware 9550SXU16MLB10 User Guide - Page 95
Select RAID Configuration, Enter, arrow keys, Array's Write Cache State, Stripe Size
 |
UPC - 693494971613
View all 3Ware 9550SXU16MLB10 manuals
Add to My Manuals
Save this manual to your list of manuals |
Page 95 highlights
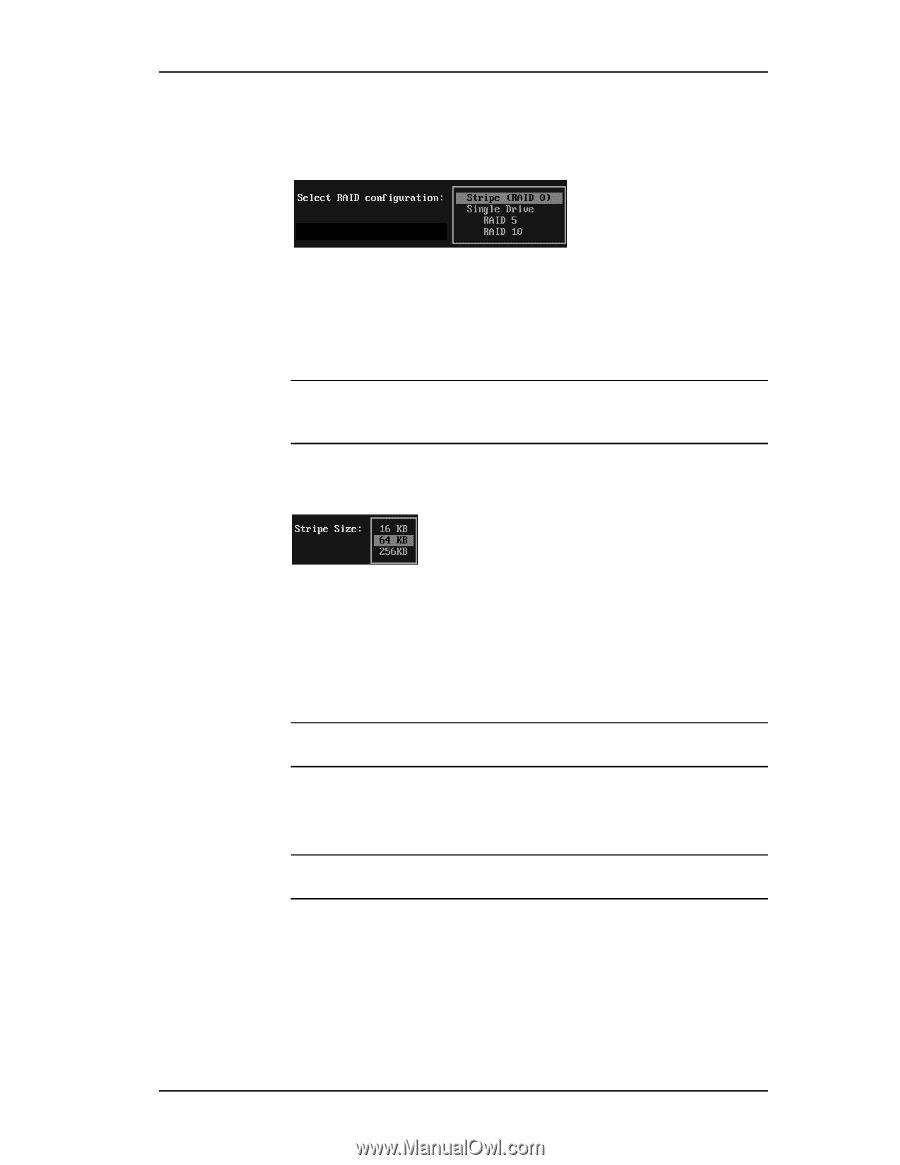
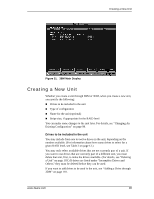
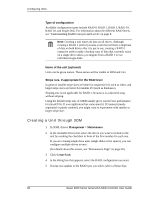
Creating a New Unit 4 Tab to the Select RAID Configuration field and press Enter to display a list of available configurations for the number of drives you selected. Figure 34. List of Configuration Choices for Four Drives 5 Use the arrow keys to select the configuration you want and press Enter. 6 (Optional) Tab to the field Array's Write Cache State and select whether you want the write cache to be enabled or disabled for this unit. Note: You can enable or disable the write cache again later without affecting the configuration. For more information about write cache, see "Enabling and Disabling the Unit Write Cache" on page 95. 7 Tab to the field Stripe Size and select the desired striping size (16, 64, or 256 KB). Figure 35. Stripe Sizes for a RAID 5 8 (Optional) Tab to the field Continue on source error during rebuild. Normally this is left disabled, however if you want any rebuilds of this unit to continue in the event of source errors, you can enable it. For more information, see the discussion of the "Overwrite ECC errors" feature in 3DM, under "Controller Settings Page" on page 53. Note: You can enable or disable this setting later without affecting the configuration. 9 Tab to the OK button and press Enter to confirm creation of the unit. You are returned to the main 3BM screen. Note: The array is not actually created and no data is overwritten until you have finished making all your changes and press F8. www.3ware.com 89
-
 1
1 -
2
-
3
-
4
-
5
-
6
-
7
-
8
-
9
-
10
-
11
-
12
-
13
-
14
-
15
-
16
-
17
-
18
-
19
-
20
-
21
-
22
-
23
-
24
-
25
-
26
-
27
-
28
-
29
-
30
-
31
-
32
-
33
-
34
-
35
-
36
-
37
-
38
-
39
-
40
-
41
-
42
-
43
-
44
-
45
-
46
-
47
-
48
-
49
-
50
-
51
-
52
-
53
-
54
-
55
-
56
-
57
-
58
-
59
-
60
-
61
-
62
-
63
-
64
-
65
-
66
-
67
-
68
-
69
-
70
-
71
-
72
-
73
-
74
-
75
-
76
-
77
-
78
-
79
-
80
-
81
-
82
-
83
-
84
-
85
-
86
-
87
-
88
-
89
-
 90
90 -
 91
91 -
 92
92 -
 93
93 -
 94
94 -
 95
95 -
 96
96 -
 97
97 -
 98
98 -
 99
99 -
 100
100 -
101
-
102
-
103
-
104
-
105
-
106
-
107
-
108
-
109
-
110
-
111
-
112
-
113
-
114
-
115
-
116
-
117
-
118
-
119
-
120
-
121
-
122
-
123
-
124
-
125
-
126
-
127
-
128
-
129
-
130
-
131
-
132
-
133
-
134
-
135
-
136
-
137
-
138
-
139
-
140
-
141
-
142
-
143
-
144
-
145
-
146
-
147
-
148
-
149
-
150
-
151
-
152
-
153
-
154
-
155
-
156
-
157
-
158
-
159
-
160
-
161
-
162
-
163
-
164
-
165
-
166
-
167
-
168
-
169
-
170
-
171
-
172
-
173
-
174
-
175
-
176
-
177
-
178
-
179
-
180
-
181
-
182
-
183
-
184
-
185
-
186
-
187
-
188
-
189
-
190
-
191
-
192
-
193
-
194
-
195
-
196
-
197
-
198
-
199
-
200
-
201
-
202
 |
 |