3Ware CBL-P-SATA Installation Guide - Page 20
Displaying advance details, Creating a disk array - rebuild array
 |
View all 3Ware CBL-P-SATA manuals
Add to My Manuals
Save this manual to your list of manuals |
Page 20 highlights
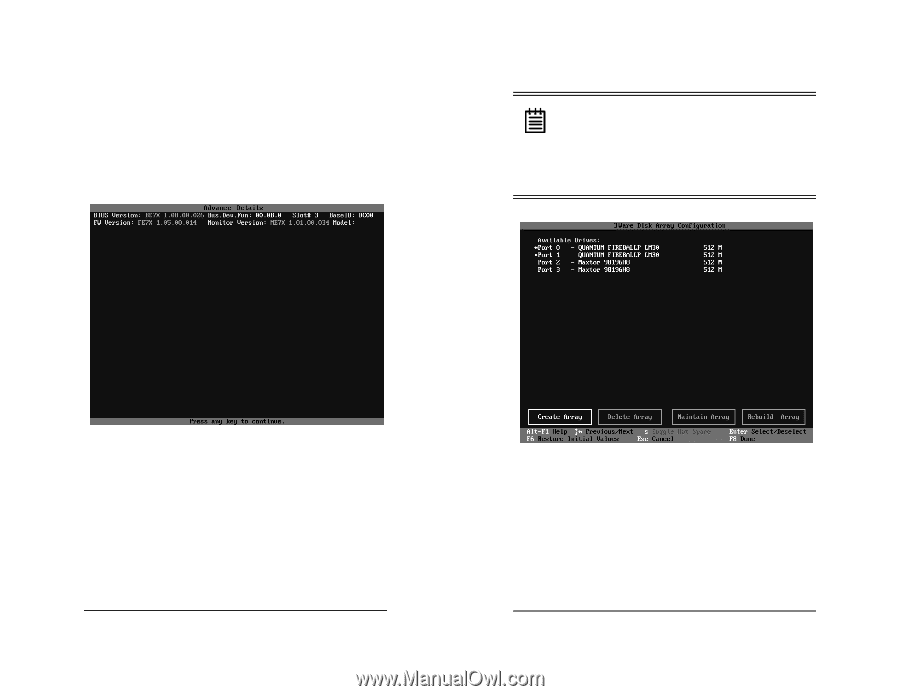
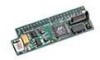
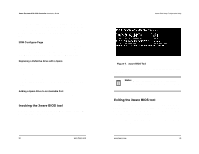
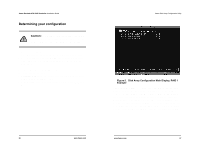
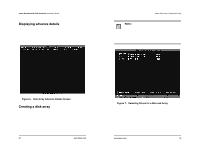
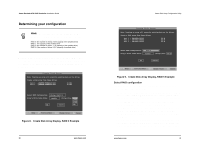
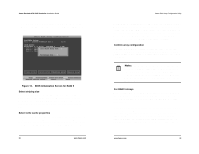
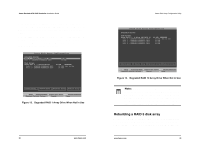
3ware Escalade ATA RAID Controller Installation Guide Displaying advance details Selecting Shift-F5 will show the software versions (BIOS, Firmware, monitor) and slot # of the 3ware card (see Fig u re6). Press Escape to return to the main 3ware Disk Array Configuration screen. 3ware Disk Array Configuration Utility Note: Accelerate keys. Anywhere in the BIOS configuration screen, if a user hits the corresponding accelerate keys, it immediately highlights the appropriate button: Alt-C for "Create Array" Alt-D for "Delete Array" Alt-M for "Maintain Array" Alt-R for "Rebuild Array" Figure 6. Disk Array Advance Details Screen Creating a disk array To create an array, first select the drives to be included by navigating the cursor over each drive and pressing Enter (see Figure 7). An asterisk in the left most column indicates the drive is selected. You may include from two to twelve drives in the array by selecting drives from the Available Drives section. To include drives that are part of an existing disk array you must first delete the array. 28 www.3ware.com Figure 7. Selecting Drives for a Mirrored Array www.3ware.com 29
-
 1
1 -
2
-
3
-
4
-
5
-
6
-
7
-
8
-
9
-
10
-
11
-
12
-
13
-
14
-
 15
15 -
 16
16 -
 17
17 -
 18
18 -
 19
19 -
 20
20 -
 21
21 -
 22
22 -
 23
23 -
 24
24 -
 25
25 -
26
-
27
-
28
-
29
-
30
-
31
-
32
-
33
-
34
-
35
-
36
-
37
-
38
-
39
 |
 |