AIWA CX-NA303 Operating Instructions - Page 15
English
 |
View all AIWA CX-NA303 manuals
Add to My Manuals
Save this manual to your list of manuals |
Page 15 highlights
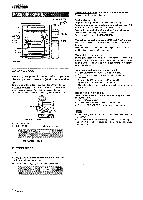
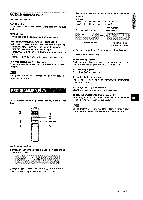
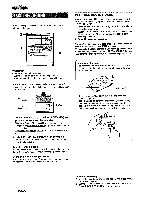
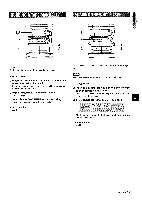
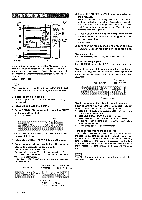
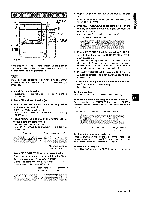
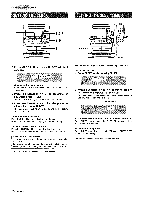
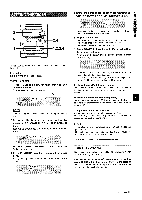
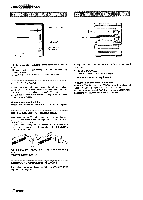
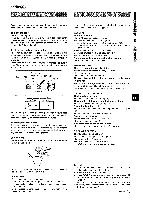
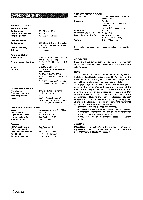
6 Repeat step 5 for the rest of the tracks for side! ~ A. ,,~3il:l:~miij A track whose playing time is longer than the remaining time cannot be programmed. ~~; ~,. ,~,>,,: :.:,8S":':;/ 7 Press EDIT/CHECK while pressing SHIFT on the! ,# remote control to select side B and program the tracks for side B. After confirming B on the display, repeat step 5. Tape side B, (reverse side) In the programmed edit recording function the tracks can be programmed while checking the remaining time on each side of the tape as the tracks are programmed. m The programmed edit recording will not start from a point halfway in the tape. The tape must be recorded on from the beginning of either side. 1 Insert the tape into deck 2. Insert the tape with the side to be recorded on first facing out from the unit. 2 Press CD and load the disc(s). 3 Press EDIT/CHECK twice while pressing SHIFT on the remote control. "EDIT" and "PRGM" are displayed. c When "Al" is displayed, press EDIT/CHECK while pressing SHIFT again. 4 Press numbered buttons on the remote control to designate the tape length. 10 to 99 minutes can be specified. q The -, > or MULTI JOG are also available to designate the tape length. Tape length Tape side A (front side) Maximum recording time for side A 5 Press DISC DIRECT PLAY 1-3 to select a disc. Then, press numbered buttons O-9 and + 10 on the remote control to program a track. Example: To select the 10th track of disc 2, press DISC DIRECT PLAY 2, then press +10 and O. Remaining time on side A Programmed tracks L 8 Press EDIT/CHECK while pressing SHIFT to select side A and press q REC/REC MUTE to start recording. CD play and recording of edited tracks for the first side start simultaneously. When the last track programmed for side A is finished, deck 2 enters the recording stop mode. After entering the recording stop mode, go to step 9. 9 Press EDIT/CHECK while pressing SHIFT on tht? remote control for recording of the second side. B is displayed. 10 Turn over the tape in deck 2 and press q REC/ REC MUTE to start recording. Recording starts. To stop recording Press s , Recording and CD play stop simultaneously. To check the order of the programmed track numbers Before recording, press EDIT/CHECK while pressing SHIFT on the remote control to select side A or B, and press - or N> repeatedly. u Disc number Tape side Program number Track number Programmed track numbers To change the program of each side Press EDIT/CHECK while pressing SHIFT on the remote control to select side A or B, and press 9 CLEAR to clear the program on the selected side. Then program tracks again. To clear the edit program Press s CLEAR twice so that "EDIT" disappears on the dlispla.y. ENGLIS1H4
-
 1
1 -
2
-
3
-
4
-
5
-
6
-
7
-
8
-
9
-
 10
10 -
 11
11 -
 12
12 -
 13
13 -
 14
14 -
 15
15 -
 16
16 -
 17
17 -
 18
18 -
 19
19 -
 20
20 -
21
-
22
-
23
-
24
-
25
-
26
-
27
-
28
-
29
-
30
-
31
-
32
-
33
-
34
-
35
-
36
-
37
-
38
-
39
-
40
-
41
-
42
-
43
-
44
-
45
-
46
-
47
-
48
-
49
-
50
-
51
-
52
-
53
-
54
-
55
-
56
-
57
-
58
-
59
-
60
-
61
-
62
-
63
-
64
 |
 |
