ASRock ALiveSATA2-GLAN RAID Installation Guide - Page 13
Synchronize Mirror Disk
 |
View all ASRock ALiveSATA2-GLAN manuals
Add to My Manuals
Save this manual to your list of manuals |
Page 13 highlights
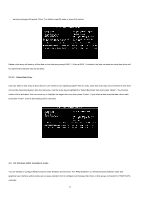
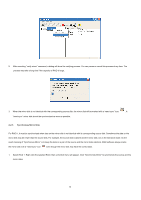
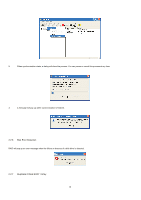
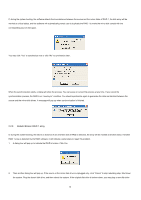
2. After executing "verify mirror" command, a dialog will show the verifying process. You can pause or cancel this process at any time. The process may take a long time if the capacity of RAID is large. 3. When the mirror disk is not identical with the corresponding source disk, the mirror disk will be marked with a "need-sync" icon: . A "need-sync" mirror disk should be synchronized as soon as possible. 2.2.5 Synchronize Mirror Disk For RAID 1, it must be synchronized when data on the mirror disk is not identical with its corresponding source disk. Sometimes the data on the mirror disk may be newer than the source disk. For example, the source disk is absent and the mirror disk runs in the tolerance mode. So the exact meaning of "Synchronize Mirror" is to keep the data on a pair of the source and the mirror disks identical. RAID software always marks the mirror disk with a "need-sync" icon even though the mirror disk may have the correct data. 1. Select RAID 1. Right-click the selected RAID, then a shortcut menu will appear. Click "Synchronize Mirror" to synchronize the source and the mirror disks. 13
-
 1
1 -
2
-
3
-
4
-
5
-
6
-
7
-
 8
8 -
 9
9 -
 10
10 -
 11
11 -
 12
12 -
 13
13 -
 14
14 -
 15
15 -
 16
16 -
 17
17 -
 18
18 -
19
-
20
-
21
-
22
-
23
-
24
-
25
-
26
-
27
 |
 |
