ASRock ALiveSATA2-GLAN RAID Installation Guide - Page 16
Warning: The data on the selected disk drive will be lost.
 |
View all ASRock ALiveSATA2-GLAN manuals
Add to My Manuals
Save this manual to your list of manuals |
Page 16 highlights
then reboot the system. Click "Next" to the next step. 3. Select a disk drive from "Available Disks" and click button to replace the broken-down one, and then click "Next". 4. A warning message will pop up. If you want to rebuild the RAID by using the disk drive that you selected in the previous step, click "Next". Warning: The data on the selected disk drive will be lost. 16
-
 1
1 -
2
-
3
-
4
-
5
-
6
-
7
-
8
-
9
-
10
-
 11
11 -
 12
12 -
 13
13 -
 14
14 -
 15
15 -
 16
16 -
 17
17 -
 18
18 -
 19
19 -
 20
20 -
 21
21 -
22
-
23
-
24
-
25
-
26
-
27
 |
 |

16
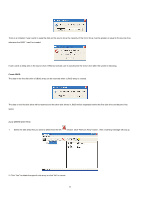
then reboot the system. Click “Next” to the next step.
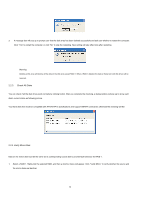
3. Select a disk drive from “Available Disks” and click
button to replace the broken-down one, and then click “Next”.
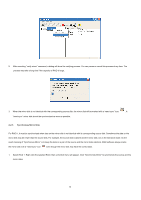
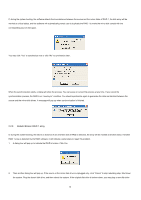
4.
A warning message will pop up. If you want to rebuild the RAID by using the disk drive that you selected in the previous step, click “Next”.
Warning: The data on the selected disk drive will be lost.