Adaptec 3405 User Guide - Page 57
Before You Begin, Creating a Driver Disk, Create Driver Disks for Installing/Updating your OS - bios update
 |
UPC - 760884155028
View all Adaptec 3405 manuals
Add to My Manuals
Save this manual to your list of manuals |
Page 57 highlights
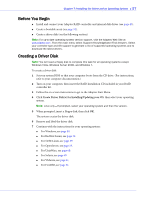
Chapter 7: Installing the Driver and an Operating System ● 57 Before You Begin ● Install and connect your Adaptec RAID controller and internal disk drives (see page 43). ● Create a bootable array (see page 51). ● Create a driver disk (see the following section). Note: For up-to-date operating system version support, visit the Adaptec Web Site at www.adaptec.com. From the main menu select Support>Knowledgebase>Find Answers. Select your controller type and OS support to generate a list of supported operating systems and to download the latest drivers. Creating a Driver Disk Note: You will need a floppy disk to complete this task for all operating systems except Windows Vista, Windows Server 2008, and Windows 7. To create a driver disk: 1 Set your system BIOS so that your computer boots from the CD drive. (For instructions, refer to your computer documentation.) 2 Turn on your computer, then insert the RAID Installation CD included in your RAID controller kit. 3 Follow the on-screen instructions to get to the Adaptec Start Menu. 4 Click Create Driver Disk(s) for Installing/Updating your OS, then select your operating system. Note: Linux only-If prompted, select your operating system and then the version. 5 When prompted, insert a floppy disk, then click OK. The system creates the driver disk. 6 Remove and label the driver disk. 7 Continue with the instructions for your operating system: ● For Windows, see page 58. ● For Red Hat Linux, see page 59. ● For SUSE Linux, see page 59. ● For OpenServer, see page 59. ● For UnixWare, see page 60. ● For Solaris, see page 60 ● For VMware, see page 61. ● For FreeBSD, see page 61.
-
 1
1 -
2
-
3
-
4
-
5
-
6
-
7
-
8
-
9
-
10
-
11
-
12
-
13
-
14
-
15
-
16
-
17
-
18
-
19
-
20
-
21
-
22
-
23
-
24
-
25
-
26
-
27
-
28
-
29
-
30
-
31
-
32
-
33
-
34
-
35
-
36
-
37
-
38
-
39
-
40
-
41
-
42
-
43
-
44
-
45
-
46
-
47
-
48
-
49
-
50
-
51
-
 52
52 -
 53
53 -
 54
54 -
 55
55 -
 56
56 -
 57
57 -
 58
58 -
 59
59 -
 60
60 -
 61
61 -
 62
62 -
63
-
64
-
65
-
66
-
67
-
68
-
69
-
70
-
71
-
72
-
73
-
74
-
75
-
76
-
77
-
78
-
79
-
80
-
81
-
82
-
83
-
84
-
85
-
86
-
87
-
88
-
89
-
90
-
91
-
92
-
93
-
94
-
95
-
96
-
97
-
98
-
99
-
100
-
101
-
102
-
103
-
104
-
105
-
106
-
107
-
108
-
109
-
110
-
111
-
112
-
113
-
114
-
115
-
116
-
117
-
118
-
119
-
120
-
121
-
122
-
123
-
124
-
125
-
126
-
127
-
128
-
129
-
130
-
131
-
132
-
133
-
134
-
135
-
136
-
137
-
138
-
139
-
140
-
141
-
142
-
143
-
144
-
145
-
146
-
147
-
148
-
149
-
150
-
151
-
152
-
153
-
154
-
155
-
156
-
157
-
158
 |
 |