Akai PDP4273M1 Operating Instructions - Page 21
OSD Option Adjustment, 5 OSD Functions
 |
View all Akai PDP4273M1 manuals
Add to My Manuals
Save this manual to your list of manuals |
Page 21 highlights
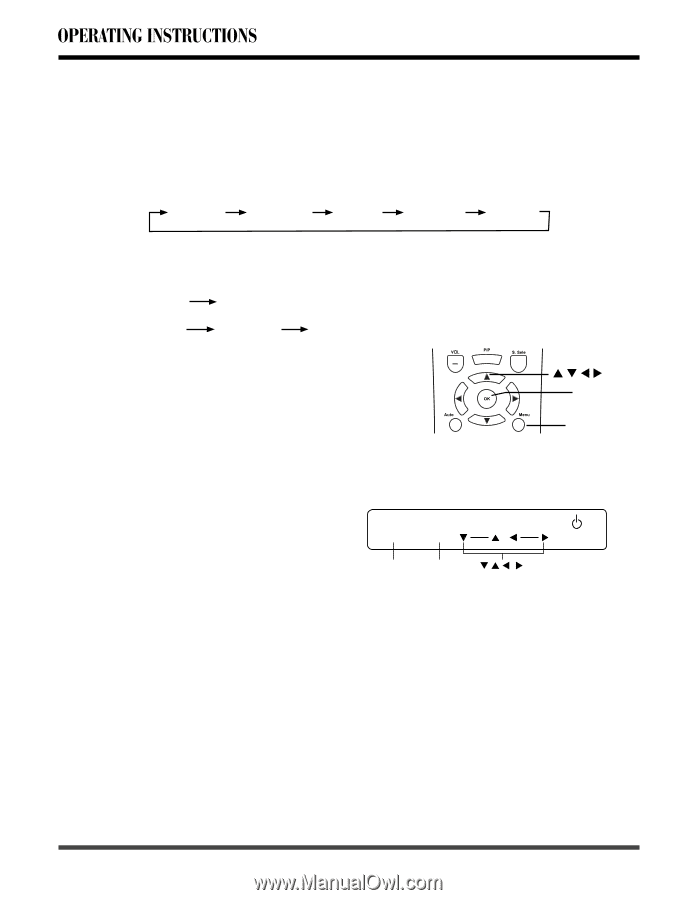
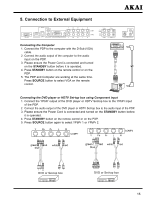
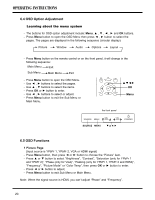
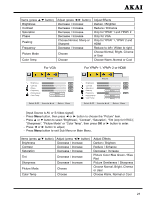
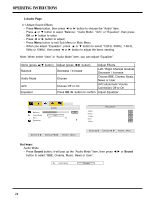
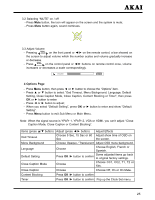
6.4 OSD Option Adjustment Learning about the menu system - The buttons for OSD option adjustment include: Menu and OK buttons. - Press Menu button to open the OSD Menu then press ◄ , ► button to select the pages. The pages are displayed in the following sequence (circular display): Picture Window Audio Options Layout - Press Menu button on the remote control or on the front panel, it will change in the following sequence: Main Menu Exit Sub Menu Main Menu Exit - Press Menu button to open the OSD Menu. - Use ◄ , ► buttons to select the pages. - Use ▲ , ▼ buttons to select the items. - Press OK or ► button to enter. - Use ◄ , ► buttons to select or adjust. - Press Menu button to exit the Sub Menu or Main Menu. OK Menu the front panel SOURCE MENU SEL. SOURCE MENU VOL. STANDBY 6.5 OSD Functions 1 Picture Page [Input source is YPbPr 1, YPbPr 2, VGA or HDMI signal] - Press Menu button, then press ◄ or ► button to choose the "Picture" item. - Press ▲ or ▼ button to select "Brightness", "Contrast", "Saturation (only for YPbPr 1 and YPbPr 2)", "Phase (only for VGA)", "Peaking (only for YPbPr 1, YPbPr 2 and HDMI)", "Frequency", "Picture Mode" or "Color Temp", then press OK or ► button to enter. - Press ◄ or ► button to adjust; - Press Menu button to exit Sub Menu or Main Menu. Note: When the signal source is HDMI, you can't adjust "Phase" and "Frequency". 20
-
 1
1 -
2
-
3
-
4
-
5
-
6
-
7
-
8
-
9
-
10
-
11
-
12
-
13
-
14
-
15
-
 16
16 -
 17
17 -
 18
18 -
 19
19 -
 20
20 -
 21
21 -
 22
22 -
 23
23 -
 24
24 -
 25
25 -
 26
26 -
27
-
28
-
29
-
30
-
31
-
32
-
33
-
34
-
35
-
36
 |
 |