Alpine INE-W927HD Quick Reference Guide - Page 13
Installation, installing at an angle
 |
View all Alpine INE-W927HD manuals
Add to My Manuals
Save this manual to your list of manuals |
Page 13 highlights
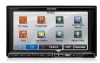
Installation • When making connections to the vehicle's electrical system, be aware of the factory installed components (e.g. on-board computer). Do not tap into these leads to provide power for this unit. When connecting the INE- W927HD to the fuse box, make sure the fuse for the intended circuit of theINE- W927HD has the appropriate amperage. Failure to do so may result in damage to the unit and/or the vehicle. When in doubt, consult your Alpine dealer. • The Display must be completely retracted in the casing when installing. If it is not, problems may occur. 1 Before installing, make sure that the opening and closing of the display will not interfere with operation of the gear shift. Movable Display Owner's manuaf Installation 3 Mounting the Microphone. For safe use, make sure of the following : • location is stable and firm. • driver's view and operations are not obstructed. • microphone is located where the driver's voice can be easily picked up (on the sun visor, etc.). When you speak into the microphone, you should not have to change your driving posture.This may cause a distraction, taking your attention away from safely driving your vehicle. Carefully consider direction and distance while mounting the microphone. Confirm that the driver's voice can be easily picked up at the selected location. Microphone 2 Install at an angle between horizontal and 30°. Note that installing at an angle outside of this range will result in a loss of performance and possibly damage. ,' ...,, ' , I' ' , , ' 1,' ~') ' ' , I ' 'I I I 4 Remove the mounting sleeve from the main unit. This unit Bracket keys "~ (Included) Slide the unit into the mounting sleeve and secure it. 12-EN
-
 1
1 -
2
-
3
-
4
-
5
-
6
-
7
-
 8
8 -
 9
9 -
 10
10 -
 11
11 -
 12
12 -
 13
13 -
 14
14 -
 15
15 -
 16
16 -
 17
17 -
 18
18 -
19
-
20
-
21
-
22
-
23
-
24
-
25
-
26
-
27
-
28
-
29
-
30
-
31
-
32
-
33
-
34
-
35
-
36
-
37
-
38
-
39
-
40
-
41
-
42
-
43
-
44
-
45
-
46
-
47
-
48
-
49
-
50
-
51
-
52
-
53
-
54
-
55
-
56
-
57
-
58
-
59
-
60
-
61
-
62
-
63
-
64
-
65
-
66
-
67
-
68
-
69
-
70
-
71
-
72
-
73
-
74
-
75
-
76
-
77
-
78
-
79
-
80
-
81
-
82
-
83
-
84
-
85
-
86
-
87
-
88
-
89
-
90
-
91
-
92
-
93
-
94
-
95
-
96
-
97
-
98
-
99
-
100
-
101
-
102
-
103
-
104
-
105
-
106
-
107
-
108
-
109
-
110
-
111
-
112
-
113
-
114
-
115
-
116
-
117
-
118
-
119
-
120
-
121
-
122
-
123
-
124
-
125
-
126
-
127
-
128
-
129
-
130
-
131
-
132
-
133
-
134
-
135
-
136
-
137
-
138
-
139
-
140
-
141
-
142
-
143
-
144
-
145
-
146
-
147
-
148
-
149
-
150
-
151
-
152
-
153
-
154
-
155
-
156
-
157
-
158
-
159
-
160
-
161
-
162
-
163
-
164
-
165
-
166
-
167
-
168
-
169
-
170
-
171
-
172
-
173
-
174
-
175
-
176
-
177
-
178
-
179
-
180
-
181
-
182
-
183
-
184
-
185
-
186
-
187
-
188
-
189
-
190
-
191
-
192
-
193
-
194
-
195
-
196
-
197
-
198
-
199
-
200
-
201
-
202
-
203
-
204
-
205
-
206
-
207
-
208
-
209
-
210
-
211
-
212
-
213
-
214
-
215
-
216
-
217
-
218
-
219
-
220
-
221
-
222
-
223
-
224
-
225
-
226
-
227
-
228
-
229
-
230
-
231
-
232
 |
 |
