Apple M8981LL Getting Started - Page 21
Changing the Size of Images on the Screen, Using Your Power Adapter
 |
UPC - 718908481066
View all Apple M8981LL manuals
Add to My Manuals
Save this manual to your list of manuals |
Page 21 highlights
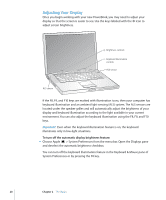
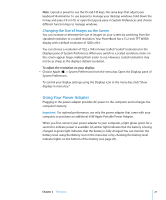
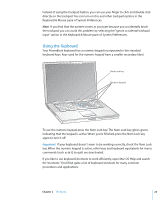
Note: Exposé is preset to use the F9 and F10 keys, the same keys that adjust your keyboard illumination. To use Exposé to manage your desktop windows, hold down the Fn key and press F9 or F10, or open the Exposé pane in System Preferences and choose different function keys to manage windows. Changing the Size of Images on the Screen You can increase or decrease the size of images on your screen by switching from the standard resolution to a scaled resolution. Your PowerBook has a 15.2-inch TFT WXGA display with a default resolution of 1280 x 854. You can choose a resolution of 1152 x 768 or lower (called "scaled" resolutions) in the Displays pane of System Preferences. When you switch to a scaled resolution, items on the screen appear larger, making them easier to see. However, scaled resolutions may not be as sharp as the display's default resolution. To adjust the resolution on your display: m Choose Apple (K) > System Preferences from the menu bar. Open the Displays pane of System Preferences. To control your display settings using the Displays icon in the menu bar, click "Show displays in menu bar." Using Your Power Adapter Plugging in the power adapter provides AC power to the computer and recharges the computer's battery. Important: For optimal performance, use only the power adapter that came with your computer, or purchase an additional 65W Apple Portable Power Adapter. When you first connect your power adapter to your computer, a light glows green for a second to indicate power is available. An amber light indicates that the battery is being charged. A green light indicates that the battery is fully charged. You can monitor the battery level using the Battery icon in the menu bar or by checking the battery level indicator lights on the bottom of the battery (see page 47). Chapter 2 The Basics 21
-
 1
1 -
2
-
3
-
4
-
5
-
6
-
7
-
8
-
9
-
10
-
11
-
12
-
13
-
14
-
15
-
 16
16 -
 17
17 -
 18
18 -
 19
19 -
 20
20 -
 21
21 -
 22
22 -
 23
23 -
 24
24 -
 25
25 -
 26
26 -
27
-
28
-
29
-
30
-
31
-
32
-
33
-
34
-
35
-
36
-
37
-
38
-
39
-
40
-
41
-
42
-
43
-
44
-
45
-
46
-
47
-
48
-
49
-
50
-
51
-
52
-
53
-
54
-
55
-
56
-
57
-
58
-
59
-
60
-
61
-
62
-
63
-
64
-
65
-
66
-
67
-
68
-
69
-
70
-
71
-
72
-
73
-
74
-
75
-
76
-
77
-
78
-
79
-
80
-
81
-
82
-
83
-
84
-
85
-
86
-
87
-
88
-
89
-
90
-
91
-
92
-
93
-
94
-
95
-
96
-
97
-
98
-
99
-
100
-
101
-
102
-
103
-
104
 |
 |
