Apple MC086LL User Guide - Page 8
Registering iPod touch, Setting Up iPod touch Using VoiceOver
 |
UPC - 885909313013
View all Apple MC086LL manuals
Add to My Manuals
Save this manual to your list of manuals |
Page 8 highlights
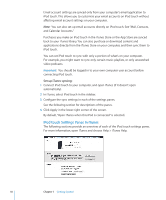
Registering iPod touch Before you can use any of the iPod touch features, you must use iTunes to set up iPod touch. You can also register iPod touch and create an iTunes Store account (not available in some countries) if you don't already have one. Register iPod touch: 1 Download and install the latest version of iTunes from www.itunes.com/download. 2 Connect iPod touch to a USB 2.0 port on your Mac or PC using the cable that came with iPod touch. 3 Follow the onscreen instructions in iTunes to register iPod touch and sync iPod touch with music, video, and other content from your iTunes library, and with your contacts, calendars, and bookmarks on your computer. Setting Up iPod touch Using VoiceOver If you're visually impaired, VoiceOver (available only on Fall 2009 models with 32 GB or more) can help you set up iPod touch without a sighted assistant. VoiceOver describes aloud what appears on the screen, so you can use iPod touch without seeing it. When you connect iPod touch to your computer, iTunes detects whether you're using a compatible screen reader on your computer, such as VoiceOver on a Mac or GW Micro Window-Eyes on a PC, and automatically enables VoiceOver on iPod touch. A sighted user can also enable VoiceOver on iPod touch for you, using Accessibility settings. See "Using VoiceOver" on page 144. Note: VoiceOver isn't available in all languages. 8 Chapter 1 Getting Started
-
 1
1 -
2
-
 3
3 -
 4
4 -
 5
5 -
 6
6 -
 7
7 -
 8
8 -
 9
9 -
 10
10 -
 11
11 -
 12
12 -
 13
13 -
14
-
15
-
16
-
17
-
18
-
19
-
20
-
21
-
22
-
23
-
24
-
25
-
26
-
27
-
28
-
29
-
30
-
31
-
32
-
33
-
34
-
35
-
36
-
37
-
38
-
39
-
40
-
41
-
42
-
43
-
44
-
45
-
46
-
47
-
48
-
49
-
50
-
51
-
52
-
53
-
54
-
55
-
56
-
57
-
58
-
59
-
60
-
61
-
62
-
63
-
64
-
65
-
66
-
67
-
68
-
69
-
70
-
71
-
72
-
73
-
74
-
75
-
76
-
77
-
78
-
79
-
80
-
81
-
82
-
83
-
84
-
85
-
86
-
87
-
88
-
89
-
90
-
91
-
92
-
93
-
94
-
95
-
96
-
97
-
98
-
99
-
100
-
101
-
102
-
103
-
104
-
105
-
106
-
107
-
108
-
109
-
110
-
111
-
112
-
113
-
114
-
115
-
116
-
117
-
118
-
119
-
120
-
121
-
122
-
123
-
124
-
125
-
126
-
127
-
128
-
129
-
130
-
131
-
132
-
133
-
134
-
135
-
136
-
137
-
138
-
139
-
140
-
141
-
142
-
143
-
144
-
145
-
146
-
147
-
148
-
149
-
150
-
151
-
152
-
153
-
154
-
155
-
156
-
157
-
158
-
159
-
160
-
161
-
162
-
163
-
164
-
165
-
166
-
167
-
168
-
169
 |
 |
