Asus AP160R-S User Guide - Page 32
Hardware Setup, upper, lower
 |
View all Asus AP160R-S manuals
Add to My Manuals
Save this manual to your list of manuals |
Page 32 highlights
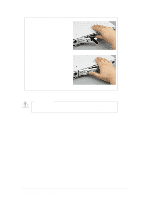
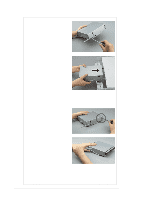
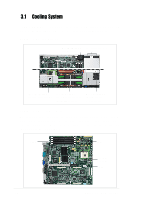
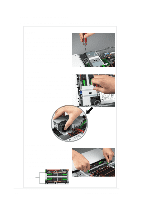
5. Follow steps 1 to 4 to install the other rail. 6. Insert the rails to the holes on the front panel and match the 68-pin connector at the rear of the drive cage with the connector on the front panel. 7. Firmly push the combo drive cage into the chassis until it fits in place. In case you need to replace either the CD-ROM or the floppy drive inside the combo drive cage, follow these steps. 1. Use a Philips (cross) screwdriver to remove the screws the secure the drives to the cage. 2. To remove the CD-ROM drive, insert the end of the screwdriver into the upper hole on the side of the cage and lightly push the drive toward the front. The drive slips out for about an inch. Pull the drive out of the cage. 3. To remove the floppy drive, insert the end of the screwdriver into the lower hole on the side of the cage and lightly push the drive toward the front. When the drive slips out, pull it out of the cage. 32 Chapter 2: Hardware Setup
-
 1
1 -
2
-
3
-
4
-
5
-
6
-
7
-
8
-
9
-
10
-
11
-
12
-
13
-
14
-
15
-
16
-
17
-
18
-
19
-
20
-
21
-
22
-
23
-
24
-
25
-
26
-
 27
27 -
 28
28 -
 29
29 -
 30
30 -
 31
31 -
 32
32 -
 33
33 -
 34
34 -
 35
35 -
 36
36 -
 37
37 -
38
-
39
-
40
-
41
-
42
-
43
-
44
-
45
-
46
 |
 |
