Asus M3N-HT DELUXE User Manual - Page 51
secure the four nuts. DO - deluxe mempipe
 |
View all Asus M3N-HT DELUXE manuals
Add to My Manuals
Save this manual to your list of manuals |
Page 51 highlights
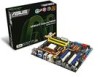
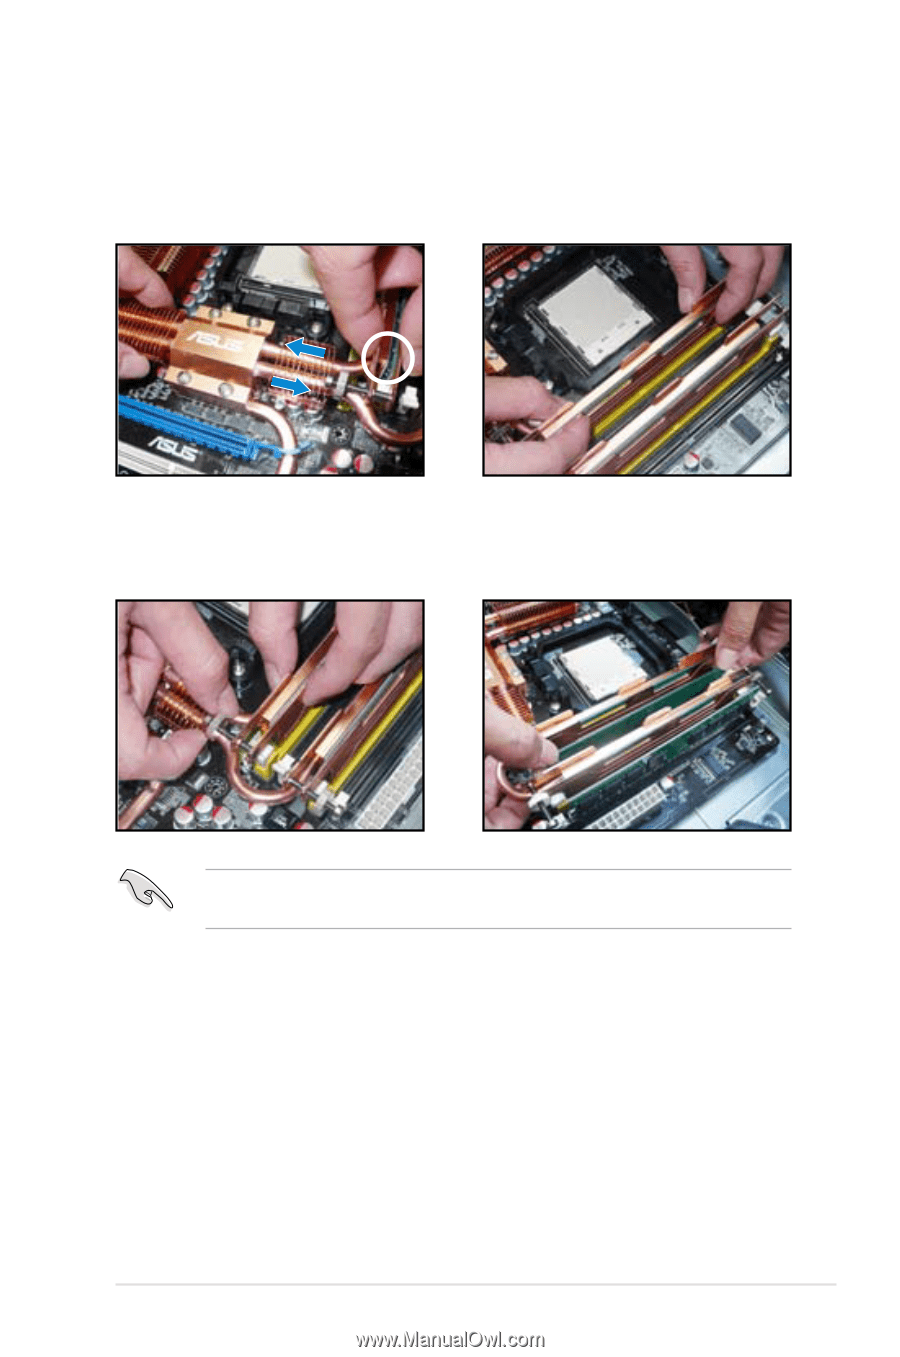
7. Adjust the heatpipe until the heat spreaders contact the memory modules. 8. Firmly press the heat spreaders against the memory modules. 9. Hold the heat spreaders and secure the four nuts. DO NOT overtighten the nuts. 10. Install another two memory modules to sockets DIMM_A2/ B2 if necessary. Install memory modules to sockets DIMM_A2 and DIMM_B2 after the completion of Cool Mempipe installation. ASUS M3N-HT Deluxe Series 2-25
-
 1
1 -
2
-
3
-
4
-
5
-
6
-
7
-
8
-
9
-
10
-
11
-
12
-
13
-
14
-
15
-
16
-
17
-
18
-
19
-
20
-
21
-
22
-
23
-
24
-
25
-
26
-
27
-
28
-
29
-
30
-
31
-
32
-
33
-
34
-
35
-
36
-
37
-
38
-
39
-
40
-
41
-
42
-
43
-
44
-
45
-
 46
46 -
 47
47 -
 48
48 -
 49
49 -
 50
50 -
 51
51 -
 52
52 -
 53
53 -
 54
54 -
 55
55 -
 56
56 -
57
-
58
-
59
-
60
-
61
-
62
-
63
-
64
-
65
-
66
-
67
-
68
-
69
-
70
-
71
-
72
-
73
-
74
-
75
-
76
-
77
-
78
-
79
-
80
-
81
-
82
-
83
-
84
-
85
-
86
-
87
-
88
-
89
-
90
-
91
-
92
-
93
-
94
-
95
-
96
-
97
-
98
-
99
-
100
-
101
-
102
-
103
-
104
-
105
-
106
-
107
-
108
-
109
-
110
-
111
-
112
-
113
-
114
-
115
-
116
-
117
-
118
-
119
-
120
-
121
-
122
-
123
-
124
-
125
-
126
-
127
-
128
-
129
-
130
-
131
-
132
-
133
-
134
-
135
-
136
-
137
-
138
-
139
-
140
-
141
-
142
-
143
-
144
-
145
-
146
-
147
-
148
-
149
-
150
-
151
-
152
-
153
-
154
-
155
-
156
-
157
-
158
-
159
-
160
-
161
-
162
-
163
-
164
-
165
-
166
-
167
-
168
-
169
-
170
-
171
-
172
-
173
-
174
-
175
-
176
-
177
-
178
-
179
-
180
-
181
-
182
-
183
-
184
-
185
-
186
-
187
-
188
-
189
-
190
-
191
-
192
 |
 |
ASUS
M3N-HT Deluxe Series
2-25
7.
Adjust the heatpipe until the
heat spreaders contact the
memory modules.
8.
Firmly press the heat spreaders
against the memory modules.
9.
Hold the heat spreaders and
secure the four nuts. DO NOT
overtighten the nuts.
10.
Install another two memory
modules to sockets DIMM_A2/
B2 if necessary.
Install memory modules to sockets DIMM_A2 and DIMM_B2 after the
completion of Cool Mempipe installation.