Asus N50Vn User Manual - Page 21
Front Side
 |
UPC - 884840349587
View all Asus N50Vn manuals
Add to My Manuals
Save this manual to your list of manuals |
Page 21 highlights
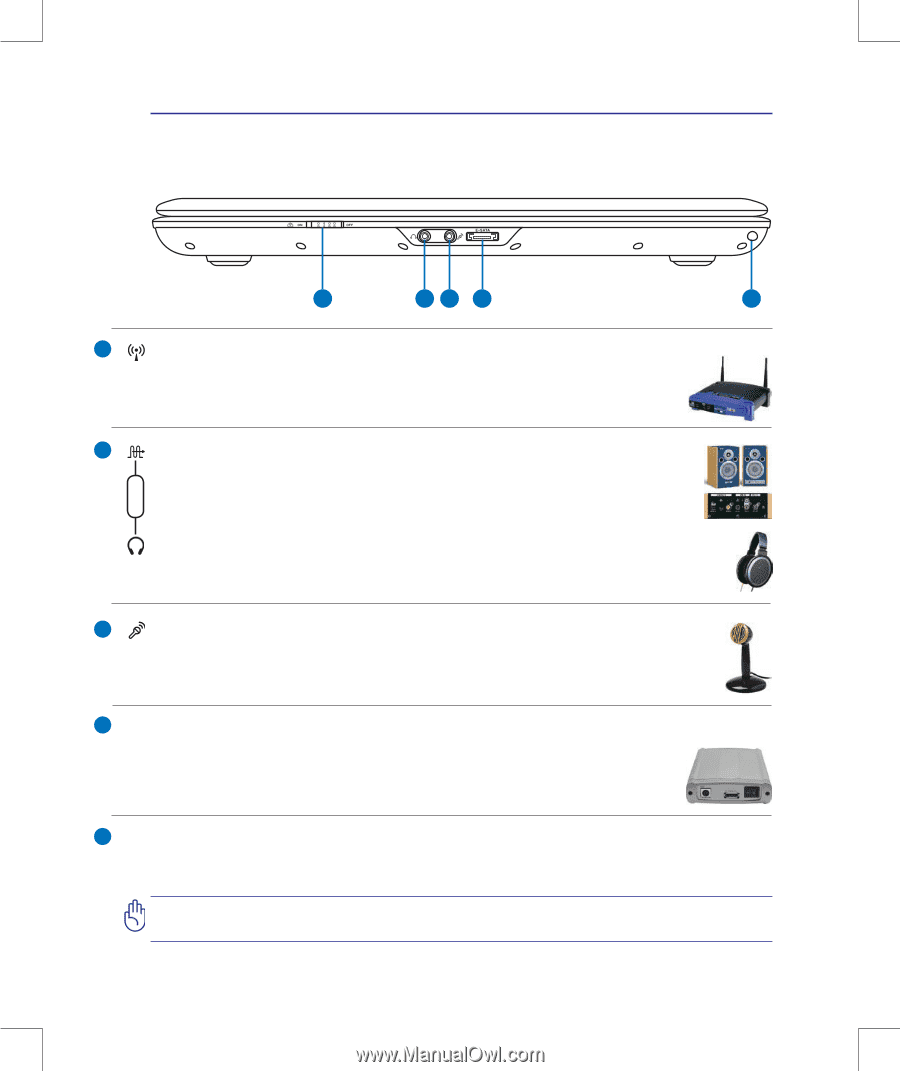
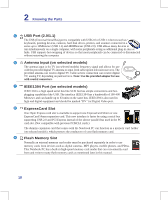
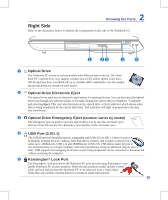
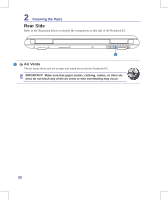
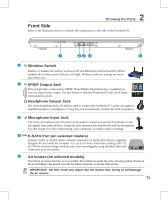
2 Knowing the Parts Front Side Refer to the illustration below to identify the components on this side of the Notebook PC. 1 23 4 5 Combo 1 Wireless Switch Enables or disables the built-in wireless LAN and Bluetooth (selected models). When enabled, the wireless status indicator will light. Windows software settings are necessary before use. 2 SPDIF Output Jack This jack provides connection to SPDIF (Sony/Philips Digital Interface) compliant devices for digital audio output. Use this feature to turn the Notebook PC into a hi-fi home entertainment system. Headphone Output Jack The stereo headphone jack (1/8 inch) is used to connect the Notebook PC's audio out signal to amplified speakers or headphones. Using this jack automatically disables the built-in speakers. 3 Microphone Input Jack The mono microphone jack (1/8 inch) can be used to connect an external microphone or output signals from audio devices. Using this jack automatically disables the built-in microphone. Use this feature for video conferencing, voice narrations, or simple audio recordings. 4 E-SATA E-SATA Port (on selected models) External SATA or eSATA allows external connection of Serial-ATA devices originally designed for use inside the computer. It is up to six times faster than existing USB 2.0, & 1394 for external storage solutions and is also hot pluggable using shielded cables and connectors up to two meters. 5 Air Ionizer (on selected models) The built-in air ionizer functions as an air purifier. The emitted ions purify the air by attracting particles floating in the air and falling to the ground. Press the Air Ionizer instant key to activate this function. IMPORTANT! DO NOT insert any object into the ionizer hole. Doing so will damage the air ionizer. 21
-
 1
1 -
2
-
3
-
4
-
5
-
6
-
7
-
8
-
9
-
10
-
11
-
12
-
13
-
14
-
15
-
 16
16 -
 17
17 -
 18
18 -
 19
19 -
 20
20 -
 21
21 -
 22
22 -
 23
23 -
 24
24 -
 25
25 -
 26
26 -
27
-
28
-
29
-
30
-
31
-
32
-
33
-
34
-
35
-
36
-
37
-
38
-
39
-
40
-
41
-
42
-
43
-
44
-
45
-
46
-
47
-
48
-
49
-
50
-
51
-
52
-
53
-
54
-
55
-
56
-
57
-
58
-
59
-
60
-
61
-
62
-
63
-
64
-
65
-
66
-
67
-
68
-
69
-
70
-
71
-
72
-
73
-
74
-
75
-
76
-
77
-
78
-
79
-
80
-
81
-
82
-
83
-
84
-
85
-
86
-
87
-
88
-
89
-
90
-
91
-
92
-
93
-
94
-
95
-
96
-
97
 |
 |