Asus P3V4X P3V4X User Manual - Page 25
Installing the Universal Retention Mechanism
 |
View all Asus P3V4X manuals
Add to My Manuals
Save this manual to your list of manuals |
Page 25 highlights
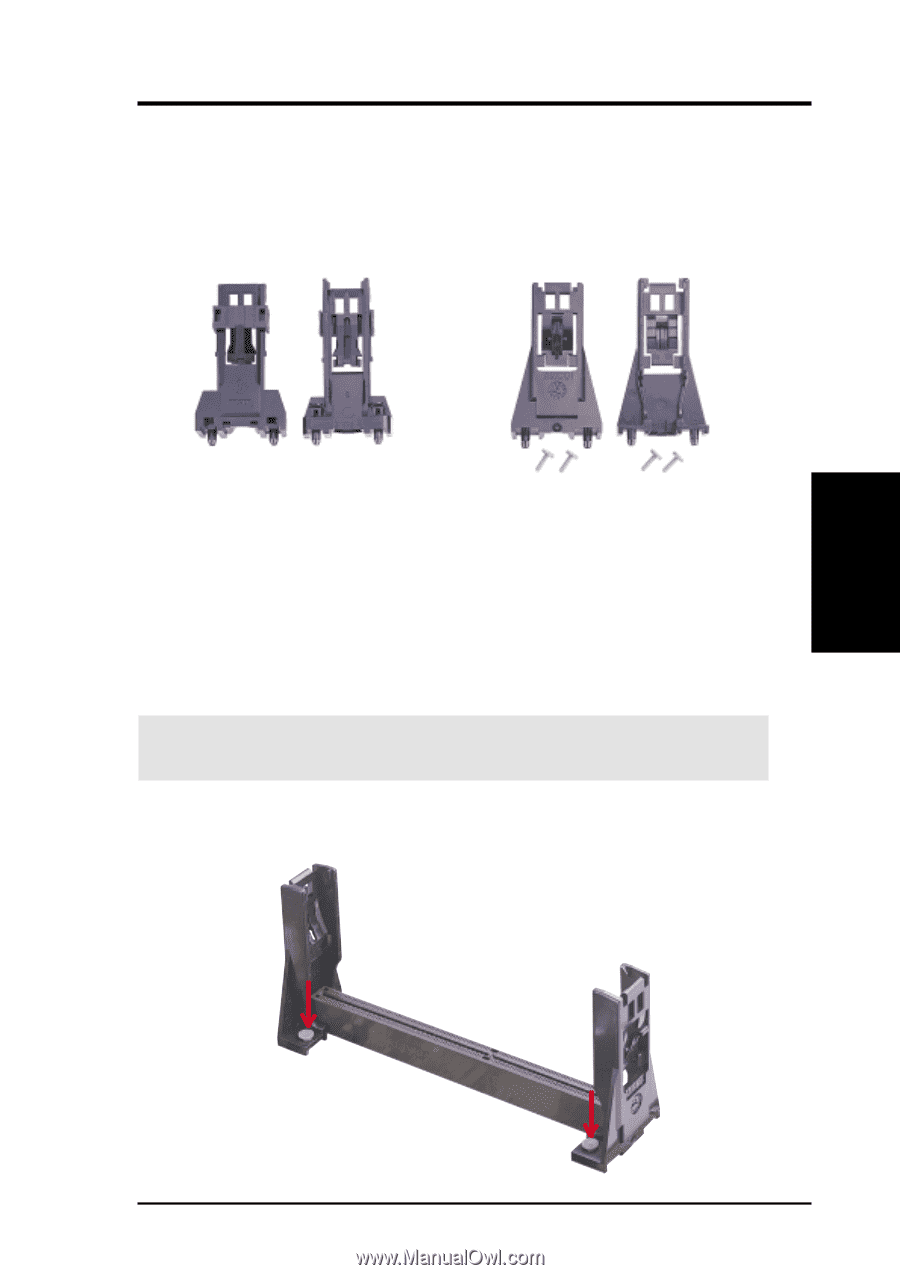
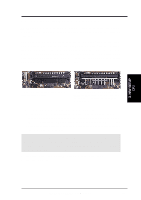
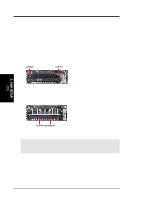
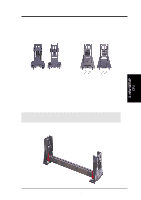
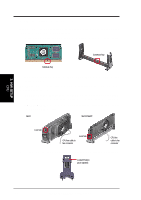
3. HARDWARE SETUP 3.6.3 Installing the Universal Retention Mechanism Your motherboard comes with a set of Universal Retention Mechanism (URM), which supports Pentium III / II and Celeron processors. There are two types of URMs: (A) With Integrated Retainer Pins and (B) With Separate Retainer Pins. URM (A) URM (B) Integrated Retainer Pins Separate Retainer Pins 1. Place the motherboard on the anti-static foam that was shipped with the motherboard. Do not place the motherboard on a hard surface while installing the URM as the black fastener sleeves must protrude through the bottom of the motherboard. 2. Locate the Slot 1 connector on the motherboard. 3. Position the retention mechanism on either side of the Slot 1 connector. 4. Making sure that the top retainer pins are not pushed in, press down on the retention brackets until the black fastener sleeves fit snugly against the board. WARNING! Installing the URM while the retainer pins are pushed in will not only cause the URM to be installed improperly but will also damage the URM. 5. Push the four retainer pins completely down into the black fastener sleeves until the head of each pin is securely seated. 3. H/W SETUP CPU ASUS P3V4X User's Manual 25
-
 1
1 -
2
-
3
-
4
-
5
-
6
-
7
-
8
-
9
-
10
-
11
-
12
-
13
-
14
-
15
-
16
-
17
-
18
-
19
-
 20
20 -
 21
21 -
 22
22 -
 23
23 -
 24
24 -
 25
25 -
 26
26 -
 27
27 -
 28
28 -
 29
29 -
 30
30 -
31
-
32
-
33
-
34
-
35
-
36
-
37
-
38
-
39
-
40
-
41
-
42
-
43
-
44
-
45
-
46
-
47
-
48
-
49
-
50
-
51
-
52
-
53
-
54
-
55
-
56
-
57
-
58
-
59
-
60
-
61
-
62
-
63
-
64
-
65
-
66
-
67
-
68
-
69
-
70
-
71
-
72
-
73
-
74
-
75
-
76
-
77
-
78
-
79
-
80
-
81
-
82
-
83
-
84
-
85
-
86
-
87
-
88
-
89
-
90
-
91
-
92
-
93
-
94
-
95
-
96
 |
 |