Asus P7P55D User Manual - Page 117
Details, txtsetup.oem
 |
UPC - 610839172665
View all Asus P7P55D manuals
Add to My Manuals
Save this manual to your list of manuals |
Page 117 highlights
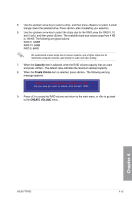
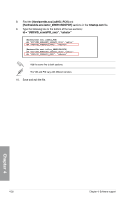
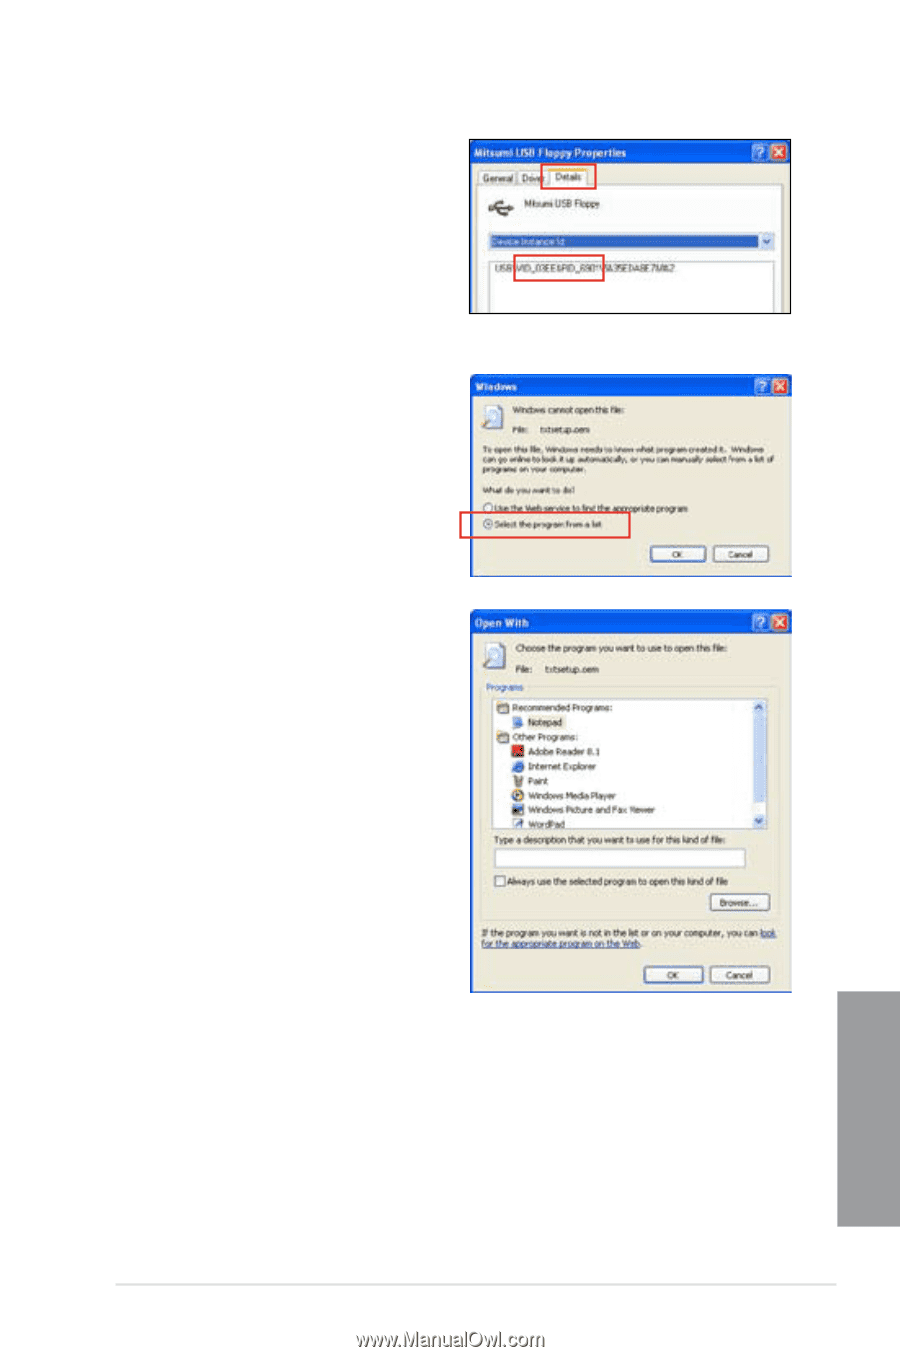
4. Click Details tab. The Vendor ID (VID) and Product ID (PID) are displayed. 5. Browse the contents of the RAID driver disk to locate the file txtsetup.oem. 6. Double-click the file. A window appears, allowing you to select the program for opening the oem file. 7. Use Notepad to open the file. Chapter 4 ASUS P7P55D 4-19
-
 1
1 -
2
-
3
-
4
-
5
-
6
-
7
-
8
-
9
-
10
-
11
-
12
-
13
-
14
-
15
-
16
-
17
-
18
-
19
-
20
-
21
-
22
-
23
-
24
-
25
-
26
-
27
-
28
-
29
-
30
-
31
-
32
-
33
-
34
-
35
-
36
-
37
-
38
-
39
-
40
-
41
-
42
-
43
-
44
-
45
-
46
-
47
-
48
-
49
-
50
-
51
-
52
-
53
-
54
-
55
-
56
-
57
-
58
-
59
-
60
-
61
-
62
-
63
-
64
-
65
-
66
-
67
-
68
-
69
-
70
-
71
-
72
-
73
-
74
-
75
-
76
-
77
-
78
-
79
-
80
-
81
-
82
-
83
-
84
-
85
-
86
-
87
-
88
-
89
-
90
-
91
-
92
-
93
-
94
-
95
-
96
-
97
-
98
-
99
-
100
-
101
-
102
-
103
-
104
-
105
-
106
-
107
-
108
-
109
-
110
-
111
-
 112
112 -
 113
113 -
 114
114 -
 115
115 -
 116
116 -
 117
117 -
 118
118 -
 119
119 -
 120
120 -
 121
121 -
 122
122
 |
 |
ASUS P7P55D
4-19
Chapter 4
4.
Click
Details
tab. The Vendor ID (VID)
and Product ID (PID) are displayed.
5.
Browse the contents of the RAID driver
disk to locate the file
txtsetup.oem
.
6.
Double-click the file. A window appears,
allowing you to select the program for
opening the oem file.
7.
Use Notepad to open the file.