Asus RS161-E2 User Manual - Page 45
Attaching the rails to the rack
 |
UPC - 610839630424
View all Asus RS161-E2 manuals
Add to My Manuals
Save this manual to your list of manuals |
Page 45 highlights
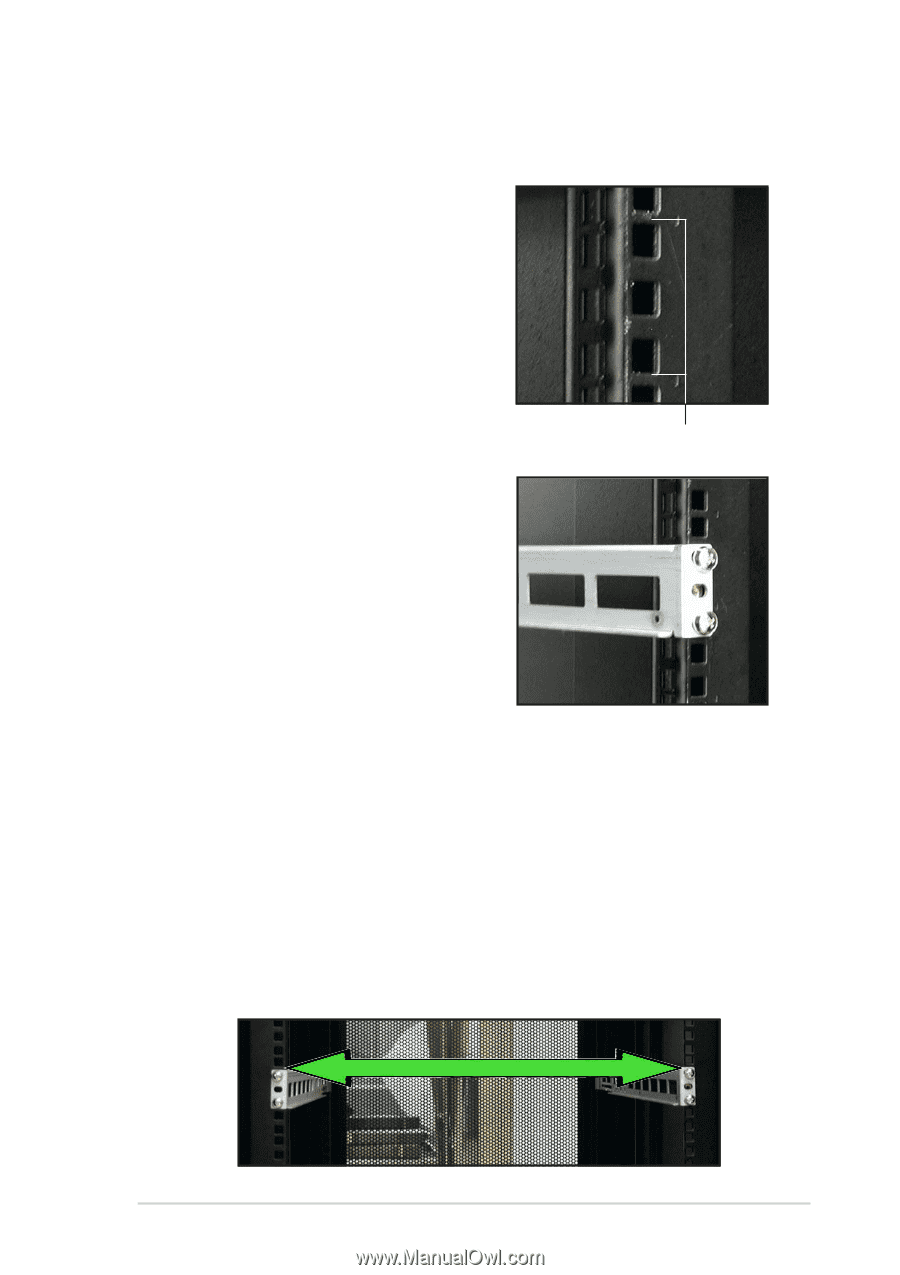
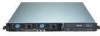
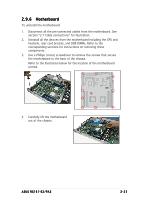
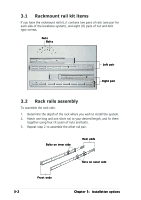
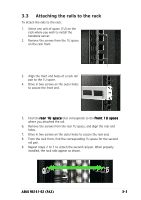
3.3 Attaching the rails to the rack To attach the rails to the rack: 1. Select one unit of space (1U) on the rack where you wish to install the barebone server. 2. Remove the screws from the 1U space on the rack front. 3. Align the front end holes of a rack rail pair to the 1U space. 4. Drive in two screws on the outer holes to secure the front end. 1U space 5. Find the r e a r 1 U s p a c e that corresponds to the f r o n t 1 U s p a c e where you attached the rail. 6. Remove the screws from the rear 1U space, and align the rear end holes. 7. Drive in two screws on the outer holes to secure the rear end. 8. From the rack front, find the corresponding 1U space for the second rail pair. 9. Repeat steps 2 to 7 to attach the second rail pair. When properly installed, the rack rails appear as shown. ASUS RS161-E2 (PA2) 3-3
-
 1
1 -
2
-
3
-
4
-
5
-
6
-
7
-
8
-
9
-
10
-
11
-
12
-
13
-
14
-
15
-
16
-
17
-
18
-
19
-
20
-
21
-
22
-
23
-
24
-
25
-
26
-
27
-
28
-
29
-
30
-
31
-
32
-
33
-
34
-
35
-
36
-
37
-
38
-
39
-
 40
40 -
 41
41 -
 42
42 -
 43
43 -
 44
44 -
 45
45 -
 46
46 -
 47
47 -
 48
48 -
 49
49 -
 50
50 -
51
-
52
-
53
-
54
-
55
-
56
-
57
-
58
-
59
-
60
-
61
-
62
-
63
-
64
-
65
-
66
-
67
-
68
-
69
-
70
-
71
-
72
-
73
-
74
-
75
-
76
-
77
-
78
-
79
-
80
-
81
-
82
-
83
-
84
-
85
-
86
-
87
-
88
-
89
-
90
-
91
-
92
-
93
-
94
-
95
-
96
-
97
-
98
-
99
-
100
-
101
-
102
-
103
-
104
-
105
-
106
-
107
-
108
-
109
-
110
-
111
-
112
-
113
-
114
-
115
-
116
-
117
-
118
-
119
-
120
-
121
-
122
-
123
-
124
 |
 |