Asus RS300-H8-PS12 User Guide - Page 37
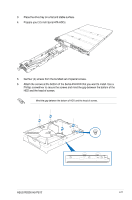
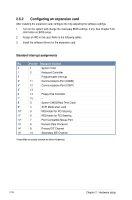
Secure the SDD to the drive tray with, four screws that is bundled.
 |
View all Asus RS300-H8-PS12 manuals
Add to My Manuals
Save this manual to your list of manuals |
Page 37 highlights
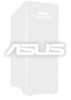
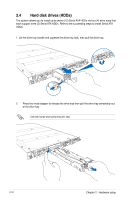
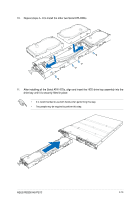
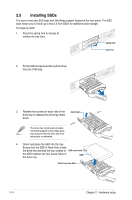
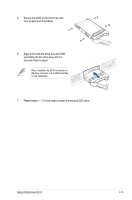
5. Secure the SDD to the drive tray with four screws that is bundled. 6. Align and insert the drive tray and SSD assembly into the drive bay until it is securely fitted in place. When installed, the SATA connector on the drive connects to the SATA interface on the backplane. 7. Repeat steps 1-6 if you want to install the second SSD drive. ASUS RS300-H8-PS12 2-15
-
 1
1 -
2
-
3
-
4
-
5
-
6
-
7
-
8
-
9
-
10
-
11
-
12
-
13
-
14
-
15
-
16
-
17
-
18
-
19
-
20
-
21
-
22
-
23
-
24
-
25
-
26
-
27
-
28
-
29
-
30
-
31
-
 32
32 -
 33
33 -
 34
34 -
 35
35 -
 36
36 -
 37
37 -
 38
38 -
 39
39 -
 40
40 -
 41
41 -
 42
42 -
43
-
44
-
45
-
46
-
47
-
48
-
49
-
50
-
51
-
52
-
53
-
54
-
55
-
56
-
57
-
58
-
59
-
60
-
61
-
62
-
63
-
64
-
65
-
66
-
67
-
68
-
69
-
70
-
71
-
72
-
73
-
74
-
75
-
76
-
77
-
78
-
79
-
80
-
81
-
82
-
83
-
84
-
85
-
86
-
87
-
88
-
89
-
90
-
91
-
92
-
93
-
94
-
95
-
96
-
97
-
98
-
99
-
100
-
101
-
102
-
103
-
104
-
105
-
106
-
107
-
108
-
109
-
110
-
111
-
112
-
113
-
114
-
115
-
116
-
117
-
118
-
119
-
120
-
121
-
122
-
123
-
124
-
125
-
126
-
127
-
128
-
129
-
130
-
131
-
132
-
133
-
134
-
135
-
136
-
137
-
138
-
139
-
140
-
141
-
142
-
143
-
144
-
145
-
146
-
147
-
148
-
149
-
150
-
151
-
152
-
153
-
154
-
155
-
156
-
157
-
158
-
159
-
160
-
161
-
162
-
163
-
164
-
165
-
166
-
167
-
168
-
169
-
170
-
171
-
172
-
173
-
174
-
175
-
176
-
177
-
178
-
179
-
180
-
181
-
182
-
183
-
184
-
185
-
186
-
187
-
188
-
189
-
190
-
191
-
192
 |
 |
2-15
ASUS RS300-H8-PS12
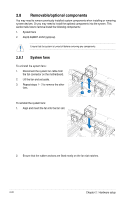
6.
Align and insert the drive tray and SSD
assembly into the drive bay until it is
securely fitted in place.
When installed, the SATA connector on
the drive connects to the SATA interface
on the backplane.
5.
Secure the SDD to the drive tray with
four screws that is bundled.
7.
Repeat steps 1—6 if you want to install the second SSD drive.