Asus RT-N13U User Guide - Page 35
Finish - test
 |
UPC - 610839677054
View all Asus RT-N13U manuals
Add to My Manuals
Save this manual to your list of manuals |
Page 35 highlights
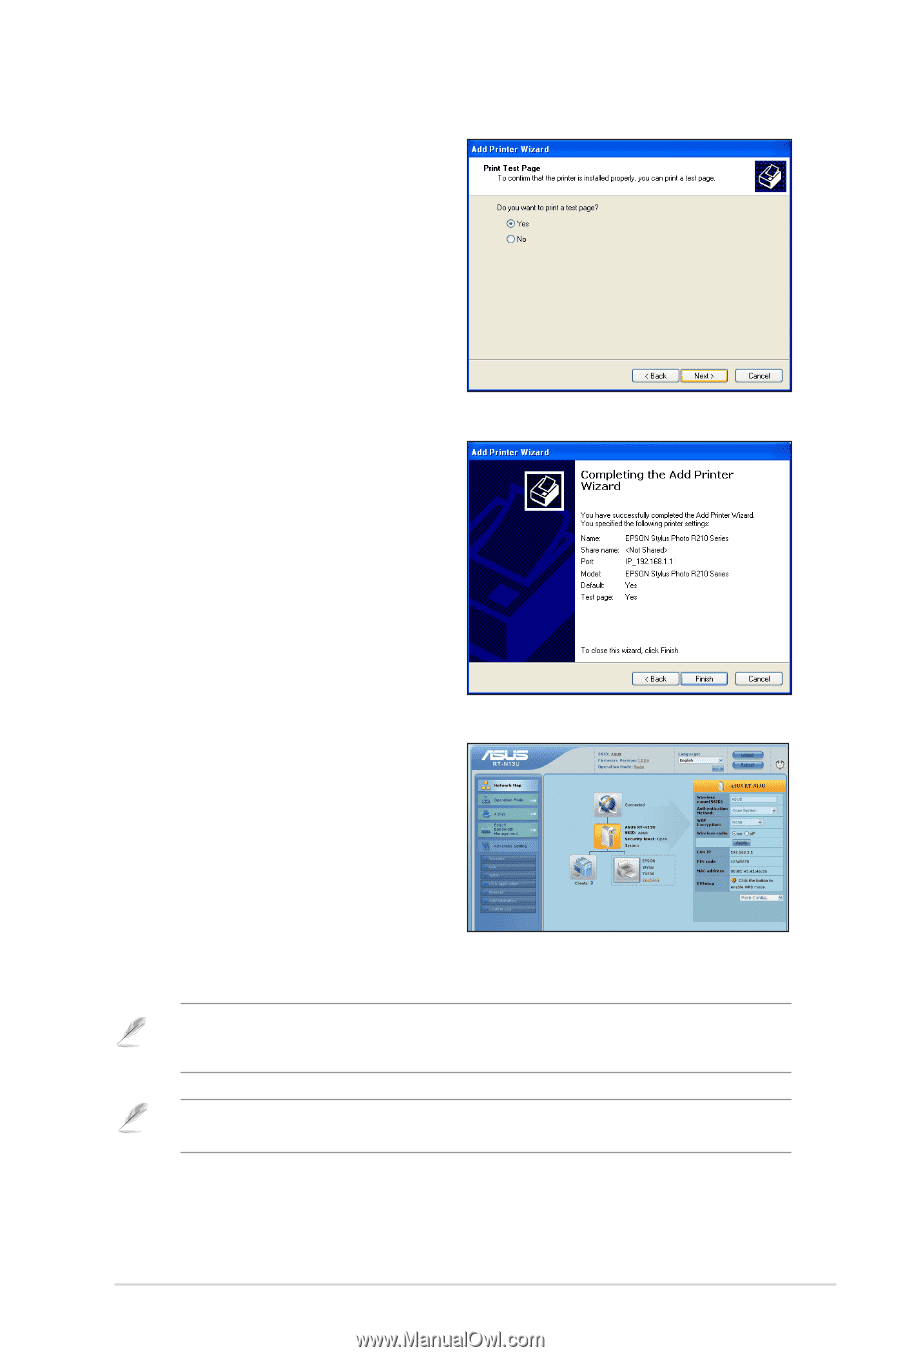
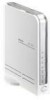
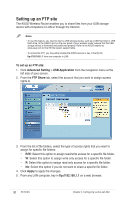
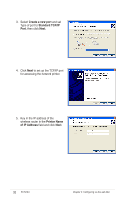
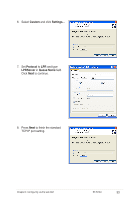
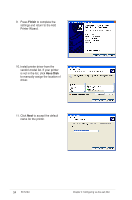
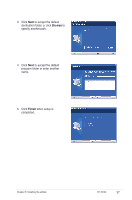
12. Select Yes to print a test page. Click Next to print. 13. The installation is complete. Click Finish to quit the Add Printer Wizard. 14. After connecting your USB printer and installing the printer driver, you can now see the printer name and status on the wireless router's web GUI. Note: If you have already installed the printer locally on your computer, right click the printer icon and select Property > Port tab to add a standard TCP/IP port. Click Add Port then select Standard TCP/IP Port and click New Port button. Refer to steps 5-8 for setting procedures. Note: If you use Windows® 98 or ME which does not support Standard TCP/IP port, you need to use Remote Port which is supported by the ASUS Wireless Router. Chapter 4: Configuring via the web GUI RT-N13U 35
-
 1
1 -
2
-
3
-
4
-
5
-
6
-
7
-
8
-
9
-
10
-
11
-
12
-
13
-
14
-
15
-
16
-
17
-
18
-
19
-
20
-
21
-
22
-
23
-
24
-
25
-
26
-
27
-
28
-
29
-
 30
30 -
 31
31 -
 32
32 -
 33
33 -
 34
34 -
 35
35 -
 36
36 -
 37
37 -
 38
38 -
 39
39 -
 40
40 -
41
-
42
-
43
-
44
-
45
-
46
-
47
-
48
-
49
-
50
-
51
-
52
-
53
-
54
-
55
-
56
-
57
-
58
-
59
-
60
-
61
 |
 |