Beko WDIK752451 Owners Manual - Page 13
Adjusting the feet
 |
View all Beko WDIK752451 manuals
Add to My Manuals
Save this manual to your list of manuals |
Page 13 highlights
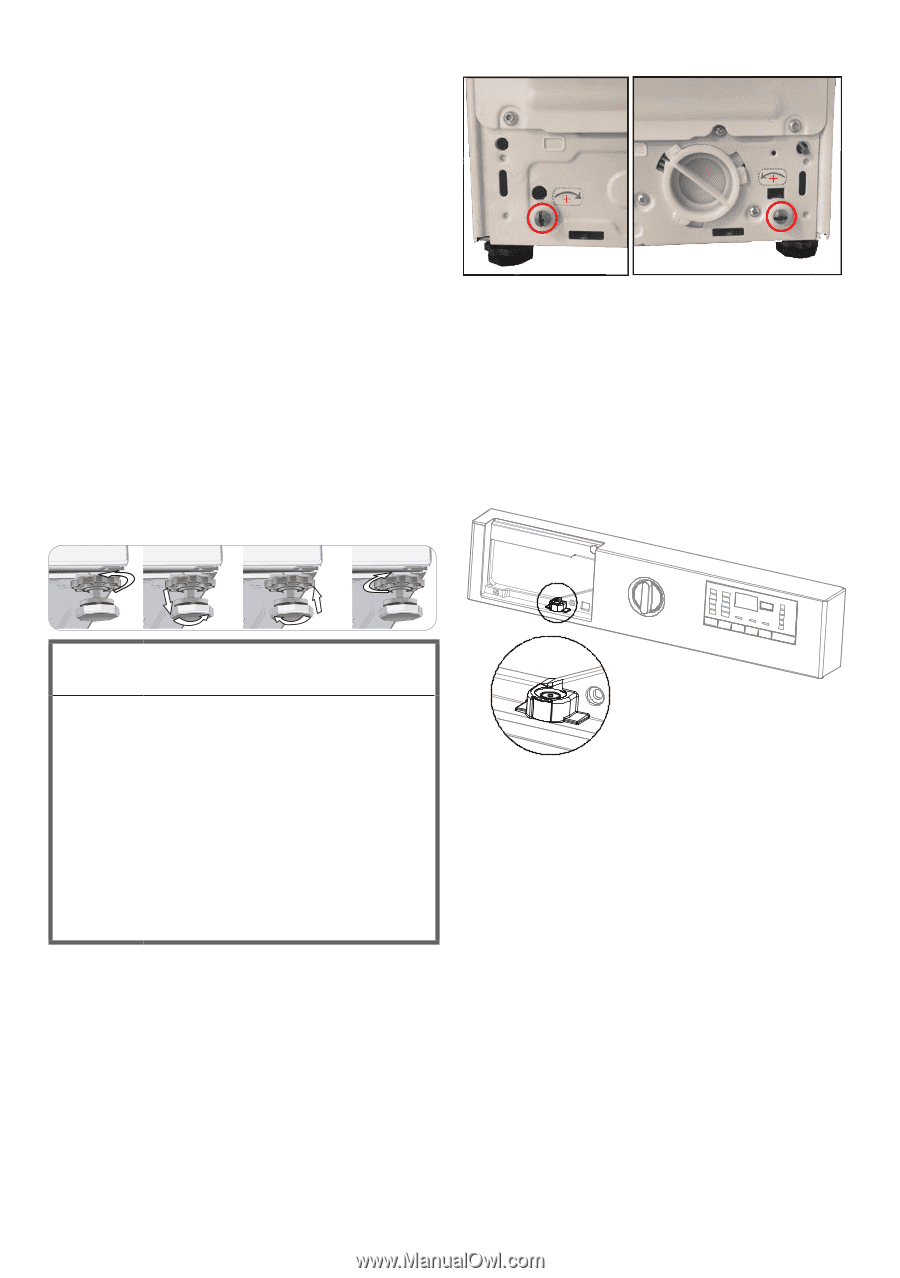
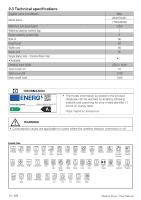
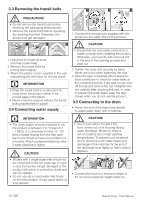
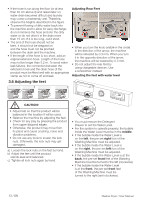
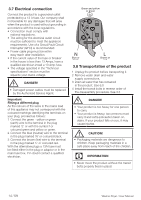
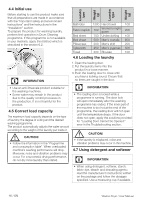
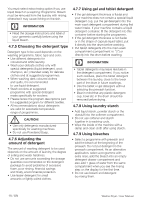
• If the hose is run along the floor (or at less than 40 cm above it) and raised later on, water drain becomes difficult and laundry may come out extremely wet. Therefore, observe the heights described in the figure. • To prevent flowing of dirty water back into the machine and to allow for easy discharge, do not immerse the hose end into the dirty water or do not drive it in the drain more than 15 cm. If it is too long, cut it short. • The end of the hose should not be bent, it should not be stepped on and the hose must not be pinched between the drain and the machine. • If the length of the hose is too short, add an original extension hose. Length of the hose may not be longer than 3.2 m. To avoid water leak failures, the connection between the extension hose and the drain hose of the product must be fitted well with an appropriate clamp as not to come off and leak. Adjusting Rear Feet • When you turn the knob (visible in the circle) in the direction of the arrow, the machine will be elevated by 0.3 mm. When you turn it in the opposite direction of the arrow, the machine will be lowered by 0.3 mm. • Do not adjust the rear feet by using chargeable devices. Use a screwdriver instead. Adjusting the feet with water level 3.6 Adjusting the feet A CAUTION! • Adjust feet so that the product will be balanced in the location it will be used. • Balance the machine by adjusting the feet. • Check for any play by pressing the product from upper diagonal edges. • Otherwise, the product may move from its place and cause crushing, noise and vibration problems. • Do not use any tools to loosen the lock nuts. Otherwise, the lock nuts may get damaged. a) Loosen the lock nuts on the feet by hand. b) Adjust the feet until the product stands level and balanced. c) Tighten all lock nuts again by hand. • You must remove the Detergent Drawer to set the Water Level. • For the system to operate properly, the bubble inside the Water Level must be in the middle. • If the bubble inside the Water Level is on the left, the pre-set right foot of the Washing Machine must be adjusted. • If the bubble inside the Water Level is on the right, the pre-set left foot of the Washing Machine must be adjusted. • If the bubble inside the Water Level is at the back, the pre-set front feet of the Washing Machine must be turned to the left (clockwise). • If the bubble inside the Water Level is at the front, the pre-set front feet of the Washing Machine must be turned to the right (anti-clockwise). 13 / EN Washer-Dryer / User Manual
-
 1
1 -
2
-
3
-
4
-
5
-
6
-
7
-
 8
8 -
 9
9 -
 10
10 -
 11
11 -
 12
12 -
 13
13 -
 14
14 -
 15
15 -
 16
16 -
 17
17 -
 18
18 -
19
-
20
-
21
-
22
-
23
-
24
-
25
-
26
-
27
-
28
-
29
-
30
-
31
-
32
-
33
-
34
-
35
-
36
-
37
-
38
-
39
-
40
-
41
-
42
-
43
-
44
-
45
-
46
-
47
-
48
-
49
-
50
-
51
-
52
-
53
-
54
-
55
-
56
 |
 |