BenQ DC1300 User Manual - Page 16
Downloading photos from camera
 |
View all BenQ DC1300 manuals
Add to My Manuals
Save this manual to your list of manuals |
Page 16 highlights
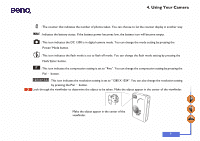
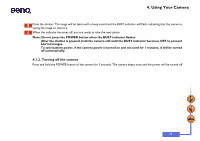
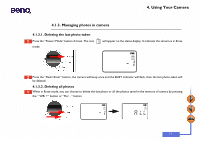
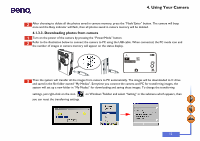
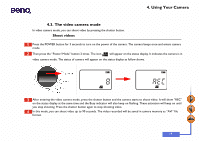
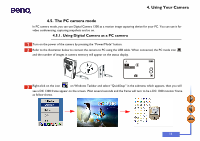
4. Using Your Camera After choosing to delete all the photos saved in camera memory, press the "Flash/ Enter" button. The camera will beep once and the Busy indicator will flash, then all photos saved in camera memory will be deleted. 4.1.3.3. Downloading photos from camera Turn on the power of the camera by pressing the "Power/Mode" button. Refer to the illustration below to connect the camera to PC using the USB cable. When connected, the PC mode icon and the number of images in camera memory will appear on the status display. Then the system will transfer all the images from camera to PC automatically. The images will be downloaded to C drive and saved in the file folder named "My Medias". Everytime you connect the camera and PC for transferring images, the system will set up a new folder in "My Medias" for downloading and saving these images. To change the transferring settings, just right-click on the icon you can reset the transferring settings. on Windows Taskbar and select "Setting" in the submenu which appears, then 12
-
 1
1 -
2
-
3
-
4
-
5
-
6
-
7
-
8
-
9
-
10
-
 11
11 -
 12
12 -
 13
13 -
 14
14 -
 15
15 -
 16
16 -
 17
17 -
 18
18 -
 19
19 -
 20
20 -
 21
21 -
22
-
23
-
24
-
25
-
26
-
27
-
28
-
29
-
30
 |
 |
