Beretta Stampede Old West Beretta Stampede User Manual - Page 21
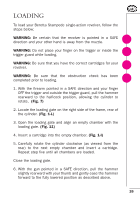
Before Loading
 |
View all Beretta Stampede Old West manuals
Add to My Manuals
Save this manual to your list of manuals |
Page 21 highlights
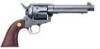
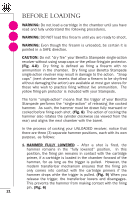
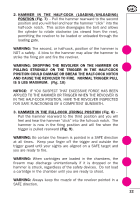
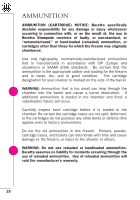
! ! ! 21 BEFORE LOADING WARNING: Do not load a cartridge in the chamber until you have read and fully understand the following procedures. WARNING: DO NOT load this firearm until you are ready to shoot. WARNING: Even though the firearm is unloaded, be certain it is pointed in a SAFE direction. CAUTION: Do not "dry fire" your Beretta Stampede single-action revolver without using snap-caps or the yellow firing-pin protector. (Fig. 4-O) Dry firing is defined as firing a firearm with no ammunition in the chamber. Dry firing your Beretta Stampede single-action revolver may result in damage to the action. "Snap caps" (inert chamber inserts that allow a firearm to be dry-fired without damaging the action) are available at most gun stores for those who wish to practice firing without live ammunition. The yellow firing-pin protector is included with your Stampede. The term "single-action" means that the trigger of your Beretta Stampede performs the "single-action" of releasing the cocked hammer. As such, the hammer must be drawn fully rearward or cocked before firing each shot. (Fig. 8) The action of cocking the hammer also rotates the cylinder clockwise (as viewed from the rear) and aligns the next chamber with the barrel. In the process of cocking your UNLOADED revolver, notice that there are three (3) separate hammer positions, each with its own purpose, as follows: 1. HAMMER FULLY LOWERED - After a shot is fired, the hammer remains in the "fully lowered" position. In this position, the firing pin remains in contact with the cartridge primer, if a cartridge is loaded in the chamber forward of the hammer, for as long as the trigger is pulled. However, the modern transfer-bar mechanism ensures that the firing pin only comes into contact with the cartridge primers if the hammer drops while the trigger is pulled. (Fig. 9) When you release the trigger, the transfer-bar lowers and disengages. This prevents the hammer from making contact with the firing pin. (Fig. 6)
-
 1
1 -
2
-
3
-
4
-
5
-
6
-
7
-
8
-
9
-
10
-
11
-
12
-
13
-
14
-
15
-
 16
16 -
 17
17 -
 18
18 -
 19
19 -
 20
20 -
 21
21 -
 22
22 -
 23
23 -
 24
24 -
 25
25 -
 26
26 -
27
-
28
-
29
-
30
-
31
-
32
-
33
-
34
-
35
-
36
-
37
-
38
-
39
-
40
-
41
-
42
-
43
 |
 |
