Bernina Activa 210 User Guide - Page 12
Inserting the bobbin, Changing the needle
 |
View all Bernina Activa 210 manuals
Add to My Manuals
Save this manual to your list of manuals |
Page 12 highlights
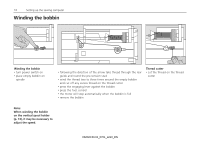
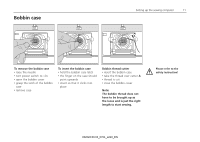
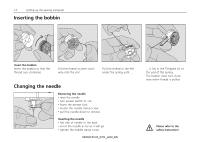
12 Setting up the sewing computer Inserting the bobbin Insert the bobbin Insert the bobbin so that the thread runs clockwise. Pull the thread counter clockwise into the slot. Pull the thread to the left under the spring until ... Changing the needle Removing the needle • raise the needle • turn power switch to «0» • lower the presser foot • loosen the needle clamp screw • pull the needle down to remove Inserting the needle • flat side of needle to the back • insert the needle as far as it will go • tighten the needle clamp screw 032622.50.04_0701_a210_EN ... it lies in the T-shaped slit at the end of the spring. The bobbin must turn clockwise when thread is pulled. Please refer to the safety instruction!
-
 1
1 -
2
-
3
-
4
-
5
-
6
-
 7
7 -
 8
8 -
 9
9 -
 10
10 -
 11
11 -
 12
12 -
 13
13 -
 14
14 -
 15
15 -
 16
16 -
 17
17 -
18
-
19
-
20
-
21
-
22
-
23
-
24
-
25
-
26
-
27
-
28
-
29
-
30
-
31
-
32
-
33
-
34
-
35
-
36
 |
 |
Setting up the sewing computer
12
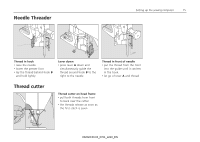
Inserting the bobbin
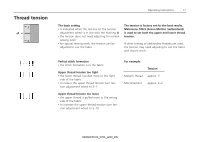
... it lies in the T-shaped slit at
the end of the spring.
The bobbin must turn clock-
wise when thread is pulled.
Insert the bobbin
Insert the bobbin so that the
thread runs clockwise.
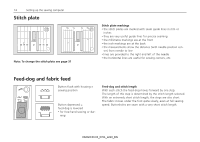
Pull the thread counter clock-
wise into the slot.
Pull the thread to the left
under the spring until ...
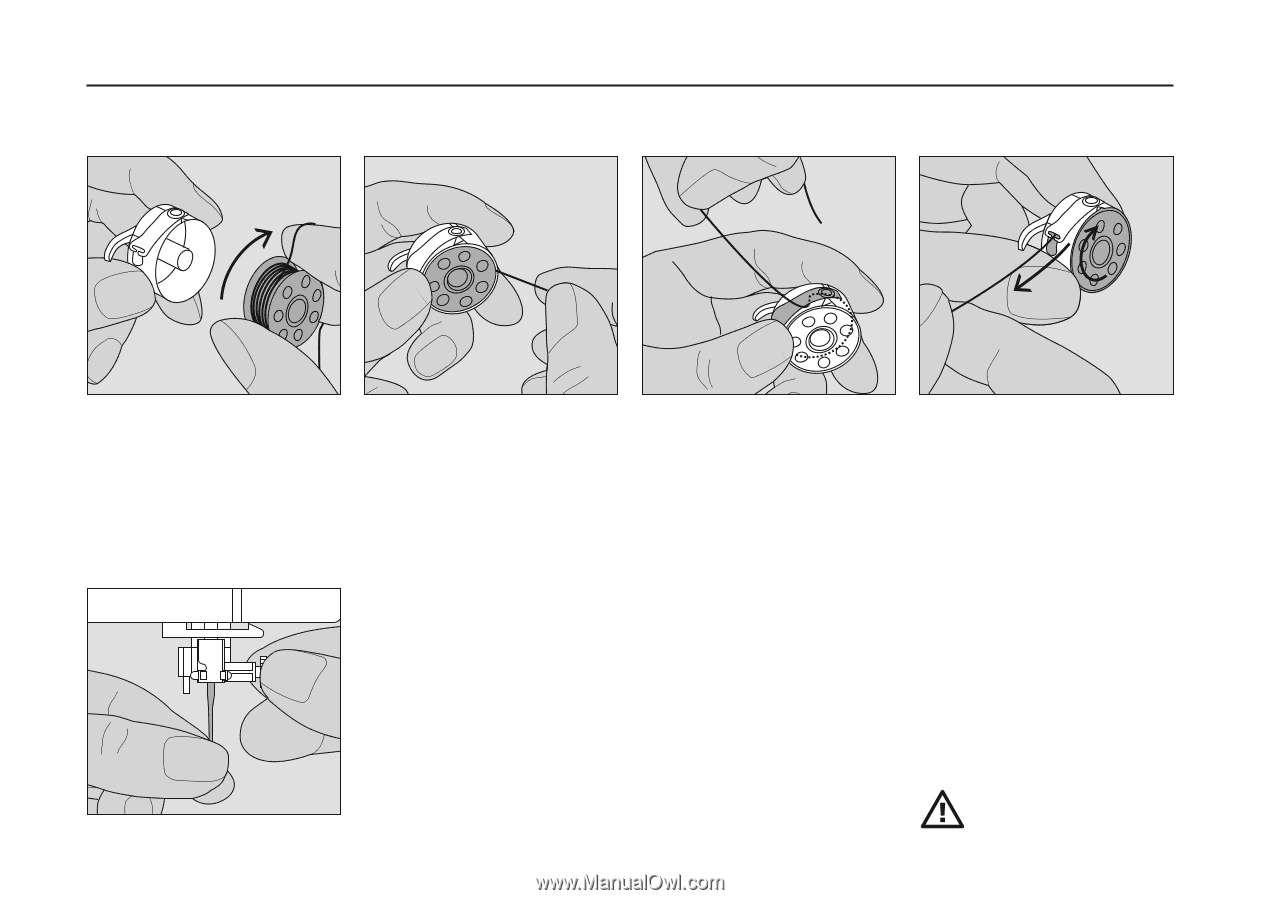
Removing the needle
•
raise the needle
•
turn power switch to «0»
•
lower the presser foot
•
loosen the needle clamp screw
•
pull the needle down to remove
Inserting the needle
•
flat side of needle to the back
•
insert the needle as far as it will go
•
tighten the needle clamp screw
Changing the needle
Please refer to the
safety instruction!
032622.50.04_0701_a210_EN