Brother International ™ QL-720NW Network Users Manual - English - Page 38
Main Window, Menu Bar, Printer, Wired Node Name/Wireless Node Name, Applicable Settings
 |
View all Brother International ™ QL-720NW manuals
Add to My Manuals
Save this manual to your list of manuals |
Page 38 highlights
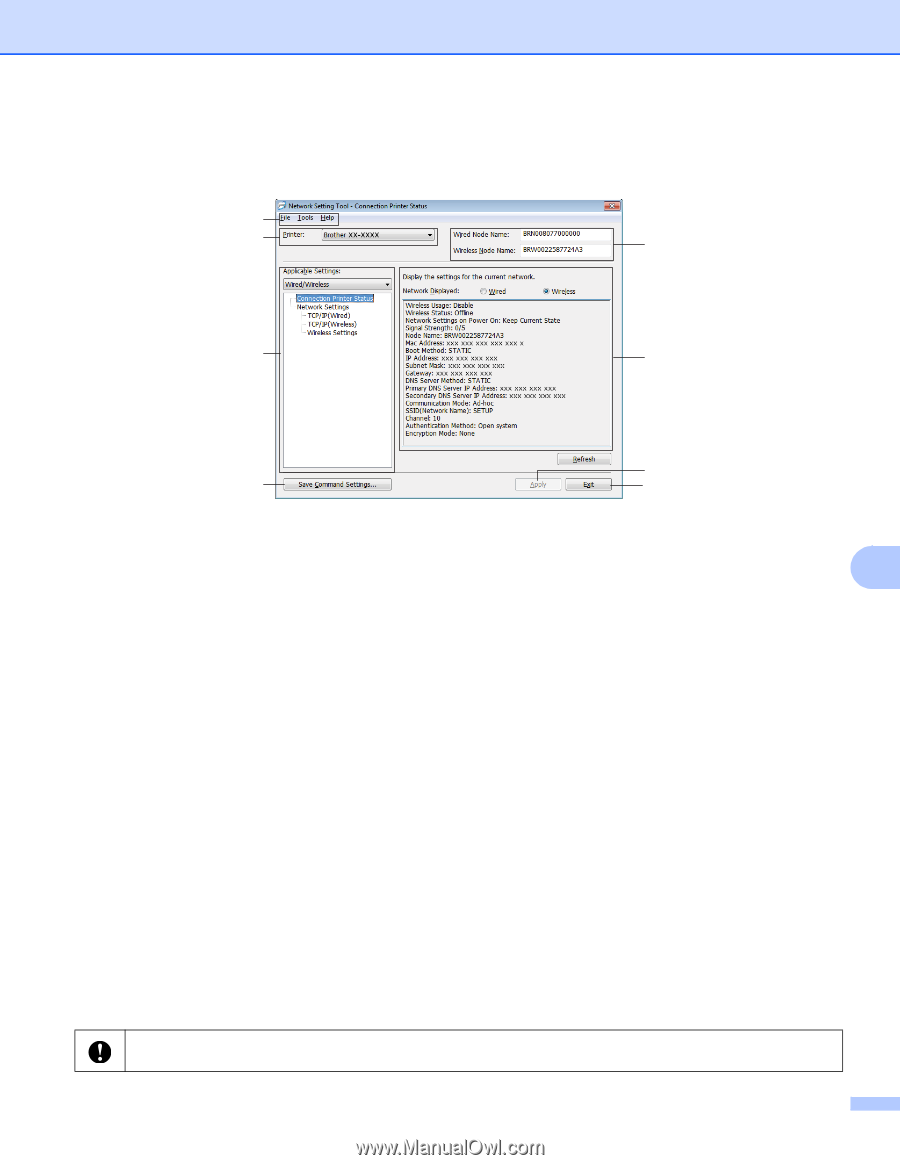
Appendix C Main Window Exact screen contents depend on your printer model. 1 2 C 3 4 5 7 6 8 1 Menu Bar Select the commands contained in each menu from the list. 2 Printer C Select the printer to configure. If only one printer is connected, only that printer is displayed and it is not necessary to select a printer. 3 Wired Node Name/Wireless Node Name Displays the node name. Node names can be edited. 4 Applicable Settings Displays setting items. Select the item that you want to configure. The selected settings that are displayed can be applied to the printer, saved or exported. 5 Settings Display/Change Area Displays the selected item's current setting. Change the settings as necessary using the drop-down list box, direct entry, or other methods. 6 Save Command Settings Saves network settings in PJL command format. The file extension is ".bin". By sending these commands to printers via USB, network settings for printers can be configured in the same way as when settings are made using the Network Setting Tool (uuUser's Guide: Mass Storage). 7 Apply Applies the settings to the printer. By pressing this button you can apply all the settings set on multiple windows at once. 8 Exit Exits the Network Setting Tool. If you close the Network Setting Tool without clicking Apply after changing settings, the settings will not be applied. 33
-
 1
1 -
2
-
3
-
4
-
5
-
6
-
7
-
8
-
9
-
10
-
11
-
12
-
13
-
14
-
15
-
16
-
17
-
18
-
19
-
20
-
21
-
22
-
23
-
24
-
25
-
26
-
27
-
28
-
29
-
30
-
31
-
32
-
 33
33 -
 34
34 -
 35
35 -
 36
36 -
 37
37 -
 38
38 -
 39
39 -
 40
40 -
 41
41 -
 42
42 -
 43
43 -
44
-
45
-
46
-
47
-
48
 |
 |