Brother International HL 2700CN Quick Setup Guide - English - Page 9
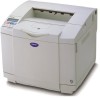
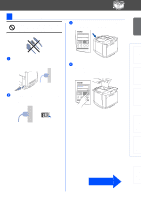
Setting Up Your Printer, Install the Toner Cartridges - opc belt cartridge
 |
UPC - 840356824994
View all Brother International HL 2700CN manuals
Add to My Manuals
Save this manual to your list of manuals |
Page 9 highlights
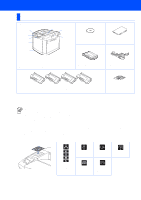
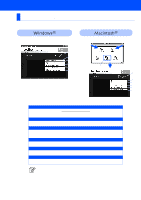
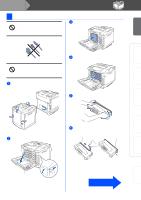
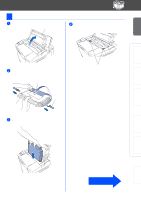
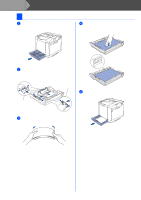
Setting Up Your Printer Windows® USB Windows® Parallel Step 1 Setting Up Your Printer S 1 Install the Toner Cartridges Do NOT connect the interface cable. You will be prompted to connect the interface cable during the driver installation. 3 Remove the protective part. Do NOT touch the green surface of the OPC belt or expose it to direct sunlight or room light for any length of time. 1 Remove the protective parts. 4 Take out all the toner cartridges from the printer. 5 Rock the toner cartridge 3 to 4 times. 2 Open the front cover. 6 Pull off the tape labeled REMOVE, and then remove the orange protective cover. REMOVE tape Protective cover Installing the Driver Windows® Network Macintosh ® USB Macintosh ® Network Fo r Administrators Front cover Go to the next page 7
-
 1
1 -
2
-
3
-
 4
4 -
 5
5 -
 6
6 -
 7
7 -
 8
8 -
 9
9 -
 10
10 -
 11
11 -
 12
12 -
 13
13 -
 14
14 -
15
-
16
-
17
-
18
-
19
-
20
-
21
-
22
-
23
-
24
-
25
-
26
-
27
-
28
-
29
-
30
-
31
-
32
-
33
-
34
-
35
-
36
 |
 |
