Brother International HL-6180DW Quick Setup Guide - English - Page 21
Wireless Network, Windows, Macintosh - user manual
 |
View all Brother International HL-6180DW manuals
Add to My Manuals
Save this manual to your list of manuals |
Page 21 highlights
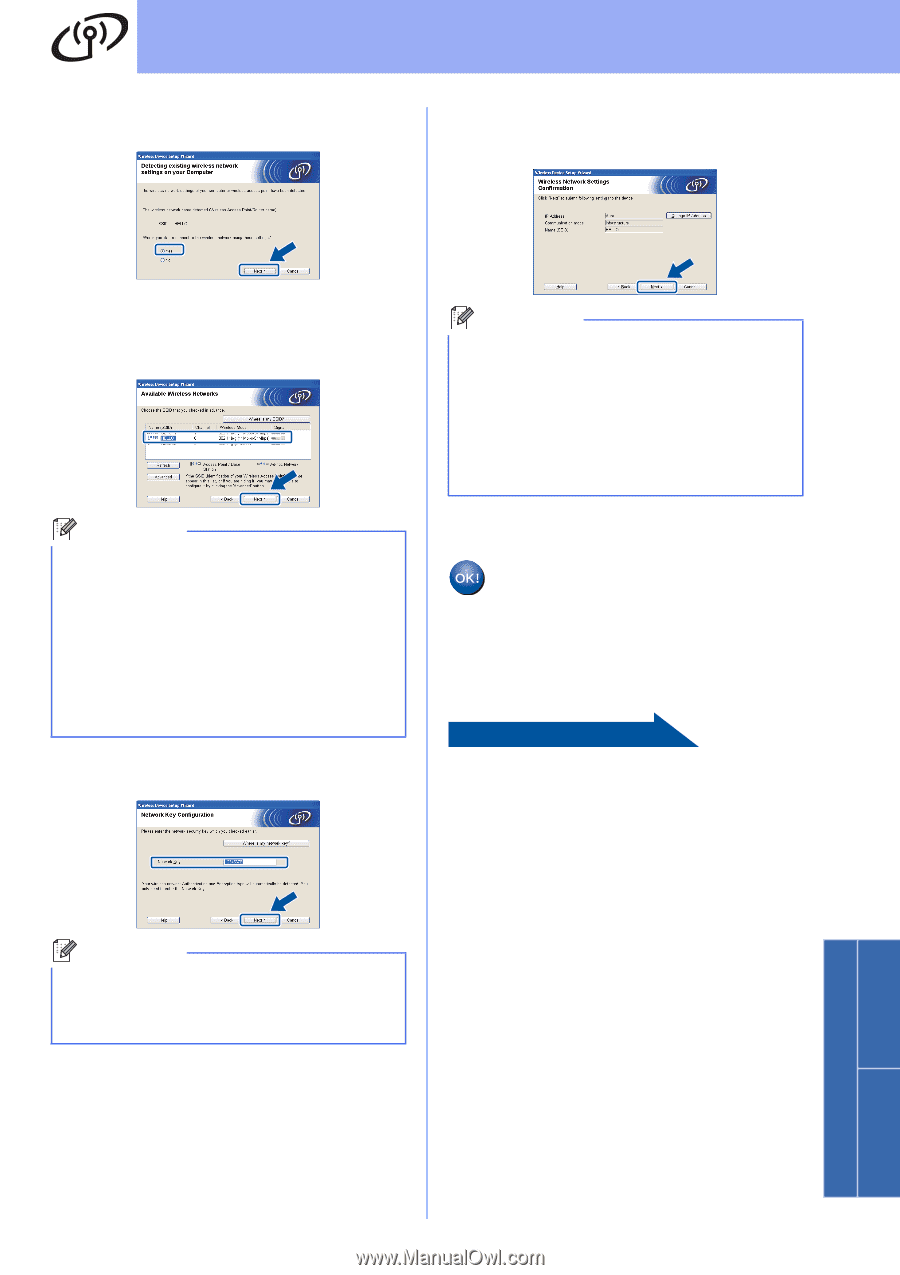
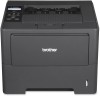
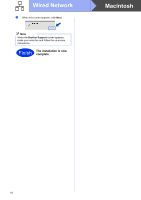
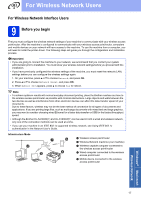
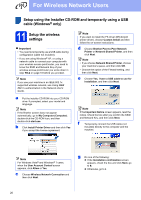
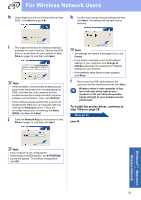
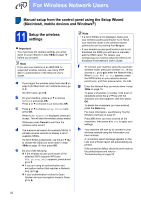
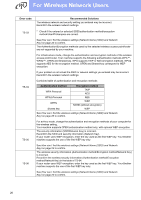
For Wireless Network Users h Check Yes if you want to connect with the listed SSID. Click Next and go to k. k Confirm the wireless network settings and then click Next. The settings will be sent to your machine. i The wizard will search for wireless networks available from your machine. Choose the SSID that you wrote down for your network in step 10-a on page 18, and then click Next. Note • If the list is blank, check that the wireless access point/router has power and is broadcasting the SSID, and then see if the machine and the wireless access point/router are within range for wireless communication. Then, click Refresh. • If your wireless access point/router is set to not broadcast the SSID you can manually add it by clicking the Advanced button. Follow the on-screen instructions for entering the Name (SSID), and then click Next. j Enter the Network Key you wrote down in step 10-a on page 18, and then click Next. Note • The settings will remain unchanged if you click Cancel. • If you want to manually enter the IP address settings of your machine, click Change IP Address and enter the necessary IP address settings for your network. • If the wireless setup failure screen appears, click Retry. l Disconnect the USB cable between the computer and the machine and then click Next. Wireless setup is now complete. A four level indicator at the right of your machine's LCD will show the wireless signal strength of your wireless access point/router. To install the printer driver, continue to step 13-e on page 28. Now go to page 28 Note If your network is not configured for Authentication and Encryption, the ATTENTION! screen will appear. To continue configuration, click OK. Windows® Macintosh Wireless Network 21
-
 1
1 -
2
-
3
-
4
-
5
-
6
-
7
-
8
-
9
-
10
-
11
-
12
-
13
-
14
-
15
-
 16
16 -
 17
17 -
 18
18 -
 19
19 -
 20
20 -
 21
21 -
 22
22 -
 23
23 -
 24
24 -
 25
25 -
 26
26 -
27
-
28
-
29
-
30
-
31
-
32
-
33
-
34
 |
 |