Brother International HL-6180DW Quick Setup Guide - English - Page 24
One push setup using WPS Wi-Fi Protected Setup or AOSS™, Windows, and Macintosh, Con - continue mode
 |
View all Brother International HL-6180DW manuals
Add to My Manuals
Save this manual to your list of manuals |
Page 24 highlights
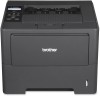
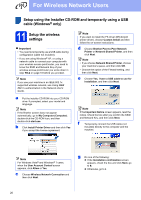
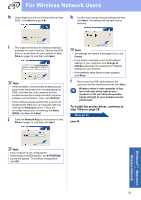
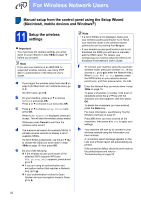
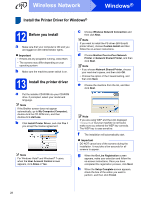
For Wireless Network Users One push setup using WPS (Wi-Fi Protected Setup) or AOSS™ (Windows® and Macintosh) 11 Configure the wireless settings a Confirm your wireless access point/router has the WPS or AOSS™ symbol as shown below. b Place the Brother machine within range of your WPS or AOSS™ access point/router. The range may differ depending on your environment. Refer to the instructions provided with your wireless access point/router. If you began the wireless setup from step 5 on page 5, go to d. All other users, go to c. c On your machine, press a or b to choose Network and press OK. Press a or b to choose WLAN and press OK. d Press a or b to choose WPS/AOSS and press OK. When WLAN Enable? is displayed, press a to accept. This will start the wireless setup wizard. Otherwise press Cancel to exit from the wireless setup wizard. e When Press Key on rtr appears, press the WPS or AOSS™ button on your wireless access point/router. See the user's guide for your wireless access point/router for instructions. And then press a. Note If your wireless access point/router supports WPS (PIN Method) and you want to configure your machine using the PIN (Personal Identification Number) Method, see Configuration using the PIN Method of WPS (Wi-Fi Protected Setup) in the Network User's Guide. f A connection result message appears on the LCD and a WLAN report will automatically be printed. If the connection failed, check the error code on the printed report and refer to Troubleshooting on page 25. Wireless setup is now complete. A four level indicator at the right of your machine's LCD will show the wireless signal strength of your wireless access point/router. To install the printer driver, continue to step 12. For Windows® Users: Now go to page 28 For Macintosh Users: Now go to page 30 This feature will automatically detect which mode (WPS or AOSS™) your wireless access point/router uses to configure your machine. 24
-
 1
1 -
2
-
3
-
4
-
5
-
6
-
7
-
8
-
9
-
10
-
11
-
12
-
13
-
14
-
15
-
16
-
17
-
18
-
 19
19 -
 20
20 -
 21
21 -
 22
22 -
 23
23 -
 24
24 -
 25
25 -
 26
26 -
 27
27 -
 28
28 -
 29
29 -
30
-
31
-
32
-
33
-
34
 |
 |