Brother International KE-436C Instruction Manual - English - Page 12
Installing the switching plate
 |
View all Brother International KE-436C manuals
Add to My Manuals
Save this manual to your list of manuals |
Page 12 highlights
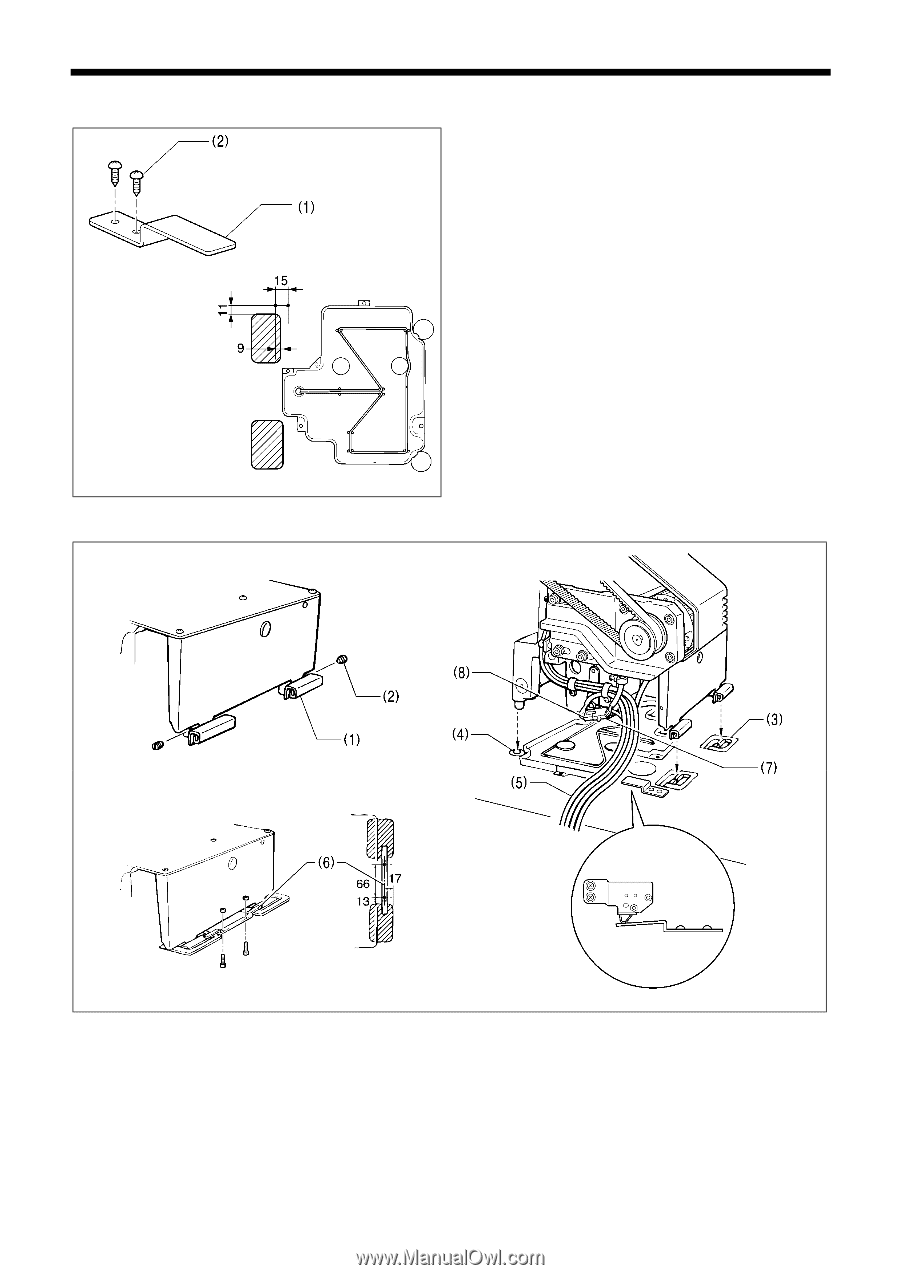
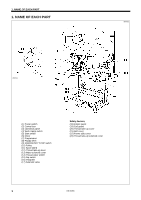
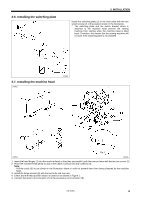
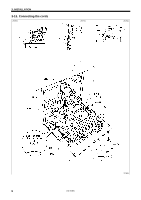
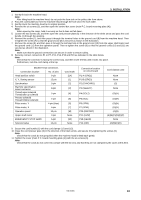
3-6. Installing the switching plate 3. INSTALLATION Install the switching plate (1) to the work table with the two wood screws (2) in the position shown in the illustration. * The switching plate and the switch bracket which is attached to the machine head prevent the sewing machine from starting when the machine head is tilted back. Therefore, this means that the sewing machine will not start if the switching plate is not installed. 2493Q 3-7. Installing the machine head 2494Q Fig. 1 2495Q 2496Q 1. Insert the head hinges (1) into the machine head so that they are parallel, and then secure them with the two set screws (2). 2. Place the machine head gently on top of the rubber cushions (3) and cushions (4). Note: Pull the cords (5) out as shown in the illustration above in order to prevent them from being clamped by the machine head. 3. Install the hinge presser (6) with the two bolts and two nuts. 4. Check that the head position switch is turned on as shown in Figure 1. 5. Connect the motor cord connector (7) to the accessory cord connector (8). KE-436C 6
-
 1
1 -
2
-
3
-
4
-
5
-
6
-
 7
7 -
 8
8 -
 9
9 -
 10
10 -
 11
11 -
 12
12 -
 13
13 -
 14
14 -
 15
15 -
 16
16 -
 17
17 -
18
-
19
-
20
-
21
-
22
-
23
-
24
-
25
-
26
-
27
-
28
-
29
-
30
-
31
-
32
-
33
-
34
-
35
-
36
-
37
-
38
-
39
-
40
-
41
-
42
-
43
-
44
-
45
-
46
-
47
-
48
-
49
-
50
-
51
-
52
-
53
-
54
-
55
-
56
-
57
-
58
-
59
-
60
-
61
-
62
-
63
-
64
-
65
-
66
-
67
-
68
-
69
-
70
-
71
-
72
-
73
 |
 |