Brother International MFC-8680DN Network Users Manual - English - Page 123
Notification, Setup Mail TX, Sender Subject - specifications
 |
View all Brother International MFC-8680DN manuals
Add to My Manuals
Save this manual to your list of manuals |
Page 123 highlights
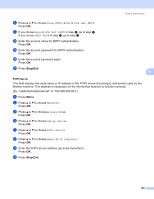
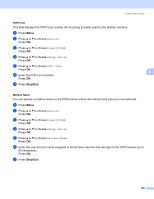
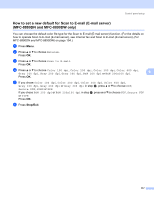
Control panel setup Notification The notification feature allows a confirmation of receipt message to be transmitted to the sending station when the Internet Fax has been received. This feature only works on Internet Fax machines that support the "MDN" specification. a Press Menu. b Press a or b to choose Network. Press OK. c Press a or b to choose E-mail/IFAX. Press OK. d Press a or b to choose Setup Mail RX. Press OK. e Press a or b to choose Notification. 6 Press OK. f Press a or b to choose On, MDN or Off. Press OK. g Press Stop/Exit. Setup Mail TX 6 Sender Subject This field displays the subject that is attached to the Internet fax data being sent from the Brother machine to a computer (default is "Internet Fax Job"). a Press Menu. b Press a or b to choose Network. Press OK. c Press a or b to choose E-mail/IFAX. Press OK. d Press a or b to choose Setup Mail TX. Press OK. e Press a or b to choose Sender Subject. Press OK. f If you want to change the Sender Subject, press 1 to choose Change to change the Sender Subject. Go to step g. If you don't want to change the Sender Subject, press 2 to choose Exit. Go to step h. g Enter the subject information (up to 40 characters). Press OK. h Press Stop/Exit. 6 113
-
 1
1 -
2
-
3
-
4
-
5
-
6
-
7
-
8
-
9
-
10
-
11
-
12
-
13
-
14
-
15
-
16
-
17
-
18
-
19
-
20
-
21
-
22
-
23
-
24
-
25
-
26
-
27
-
28
-
29
-
30
-
31
-
32
-
33
-
34
-
35
-
36
-
37
-
38
-
39
-
40
-
41
-
42
-
43
-
44
-
45
-
46
-
47
-
48
-
49
-
50
-
51
-
52
-
53
-
54
-
55
-
56
-
57
-
58
-
59
-
60
-
61
-
62
-
63
-
64
-
65
-
66
-
67
-
68
-
69
-
70
-
71
-
72
-
73
-
74
-
75
-
76
-
77
-
78
-
79
-
80
-
81
-
82
-
83
-
84
-
85
-
86
-
87
-
88
-
89
-
90
-
91
-
92
-
93
-
94
-
95
-
96
-
97
-
98
-
99
-
100
-
101
-
102
-
103
-
104
-
105
-
106
-
107
-
108
-
109
-
110
-
111
-
112
-
113
-
114
-
115
-
116
-
117
-
 118
118 -
 119
119 -
 120
120 -
 121
121 -
 122
122 -
 123
123 -
 124
124 -
 125
125 -
 126
126 -
 127
127 -
 128
128 -
129
-
130
-
131
-
132
-
133
-
134
-
135
-
136
-
137
-
138
-
139
-
140
-
141
-
142
-
143
-
144
-
145
-
146
-
147
-
148
-
149
-
150
-
151
-
152
-
153
-
154
-
155
-
156
-
157
-
158
-
159
-
160
-
161
-
162
-
163
-
164
-
165
-
166
-
167
-
168
-
169
-
170
-
171
-
172
-
173
-
174
-
175
-
176
-
177
-
178
-
179
-
180
-
181
-
182
-
183
-
184
-
185
-
186
-
187
-
188
-
189
-
190
-
191
-
192
-
193
-
194
-
195
-
196
-
197
-
198
-
199
-
200
-
201
-
202
-
203
-
204
-
205
-
206
-
207
-
208
-
209
-
210
-
211
-
212
-
213
-
214
-
215
-
216
-
217
-
218
-
219
-
220
-
221
-
222
-
223
-
224
-
225
-
226
-
227
-
228
-
229
-
230
-
231
-
232
-
233
-
234
-
235
-
236
-
237
-
238
-
239
-
240
-
241
-
242
-
243
-
244
-
245
-
246
-
247
-
248
 |
 |
