Brother International MFC 8890DW Software Users Manual - English - Page 183
The Scan to OCR function is available for English, French, German, Dutch, Italian, Spanish, Portuguese
 |
UPC - 012502622673
View all Brother International MFC 8890DW manuals
Add to My Manuals
Save this manual to your list of manuals |
Page 183 highlights
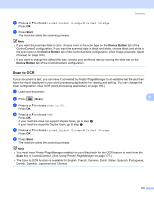
Scanning e Press a or b to choose 1sided, 2sided (L)edge or 2sided (S)edge. Press OK. f Press Start. The machine starts the scanning process. Note • If you want the scanned data in color, choose color in the scan type on the Device Button tab of the ControlCenter2 configuration. If you want the scanned data in black and white, choose black and white in the scan type on the Device Button tab of the ControlCenter2 configuration. (See Image (example: Apple Preview) on page 183.) • If you want to change the default file size, choose your preferred rate by moving the slide bar on the Device Button tab of the ControlCenter2 configuration. Scan to OCR 9 If your document is text, you can have it converted by Presto! PageManager to an editable text file and then have the result displayed in your word processing application for viewing and editing. You can change the Scan configuration. (See OCR (word processing application) on page 185.) a Load your document. b Press (Scan). 9 c Press a or b to choose Scan to PC. Press OK. d Press a or b to choose OCR. Press OK. If your machine does not support Duplex Scan, go to step f. If your machine supports Duplex Scan, go to step e. e Press a or b to choose 1sided, 2sided (L)edge or 2sided (S)edge. Press OK. f Press Start. The machine starts the scanning process. Note • You must have Presto! PageManager installed on your Macintosh for the OCR feature to work from the Scan key or ControlCenter2. (See Using Presto! PageManager on page 177.) • The Scan to OCR function is available for English, French, German, Dutch, Italian, Spanish, Portuguese, Danish, Swedish, Japanese and Chinese. 175
-
 1
1 -
2
-
3
-
4
-
5
-
6
-
7
-
8
-
9
-
10
-
11
-
12
-
13
-
14
-
15
-
16
-
17
-
18
-
19
-
20
-
21
-
22
-
23
-
24
-
25
-
26
-
27
-
28
-
29
-
30
-
31
-
32
-
33
-
34
-
35
-
36
-
37
-
38
-
39
-
40
-
41
-
42
-
43
-
44
-
45
-
46
-
47
-
48
-
49
-
50
-
51
-
52
-
53
-
54
-
55
-
56
-
57
-
58
-
59
-
60
-
61
-
62
-
63
-
64
-
65
-
66
-
67
-
68
-
69
-
70
-
71
-
72
-
73
-
74
-
75
-
76
-
77
-
78
-
79
-
80
-
81
-
82
-
83
-
84
-
85
-
86
-
87
-
88
-
89
-
90
-
91
-
92
-
93
-
94
-
95
-
96
-
97
-
98
-
99
-
100
-
101
-
102
-
103
-
104
-
105
-
106
-
107
-
108
-
109
-
110
-
111
-
112
-
113
-
114
-
115
-
116
-
117
-
118
-
119
-
120
-
121
-
122
-
123
-
124
-
125
-
126
-
127
-
128
-
129
-
130
-
131
-
132
-
133
-
134
-
135
-
136
-
137
-
138
-
139
-
140
-
141
-
142
-
143
-
144
-
145
-
146
-
147
-
148
-
149
-
150
-
151
-
152
-
153
-
154
-
155
-
156
-
157
-
158
-
159
-
160
-
161
-
162
-
163
-
164
-
165
-
166
-
167
-
168
-
169
-
170
-
171
-
172
-
173
-
174
-
175
-
176
-
177
-
 178
178 -
 179
179 -
 180
180 -
 181
181 -
 182
182 -
 183
183 -
 184
184 -
 185
185 -
 186
186 -
 187
187 -
 188
188 -
189
-
190
-
191
-
192
-
193
-
194
-
195
-
196
-
197
-
198
-
199
-
200
-
201
-
202
-
203
-
204
-
205
-
206
-
207
-
208
-
209
-
210
-
211
-
212
-
213
-
214
-
215
-
216
-
217
-
218
-
219
-
220
-
221
-
222
-
223
-
224
-
225
-
226
-
227
-
228
-
229
 |
 |
