Brother International MFC-9840CDW Users Manual - English - Page 140
See Software User's, different. The machine may not be able to reproduce the colors - toner life end
 |
UPC - 012502618744
View all Brother International MFC-9840CDW manuals
Add to My Manuals
Save this manual to your list of manuals |
Page 140 highlights
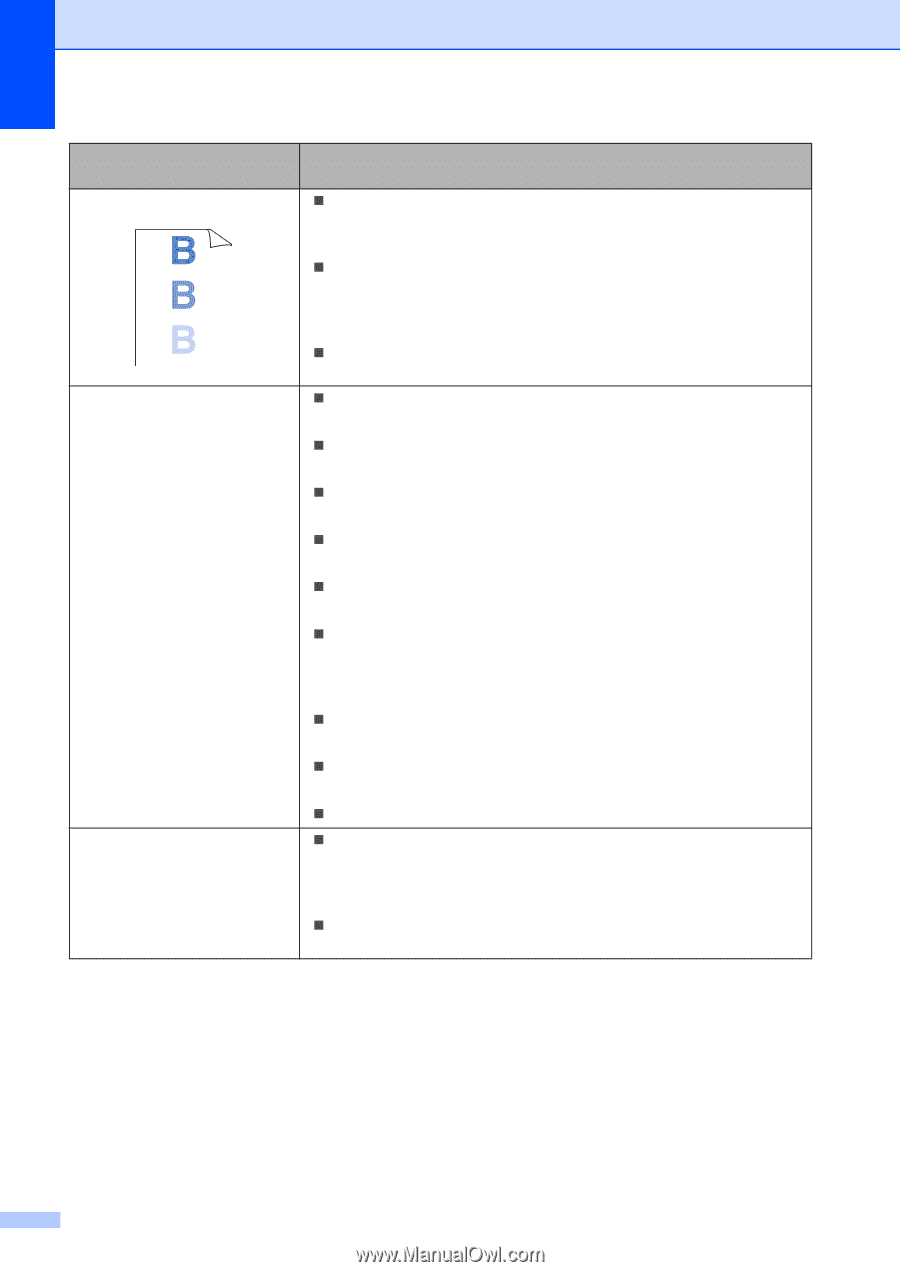
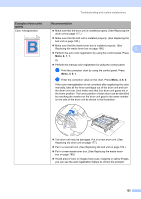
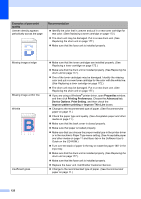
Examples of poor print quality Ghost The color of your printouts are not what you expected. All one color Recommendation „ Make sure that you use paper that meets our specifications. Roughsurfaced paper or thick paper may cause the problem. (See Acceptable paper and other media on page 11.) „ Make sure that you choose the proper media type in the printer driver or in the machine's Paper Type menu setting. (See Acceptable paper and other media on page 11 and Basic tab in the Software User's Guide on the CD-ROM.) „ The drum unit may be damaged. Put in a new drum unit. (See Replacing the drum unit on page 177.) „ Make sure that the toner cartridges are installed properly. (See Replacing a toner cartridge on page 172.) „ Make sure that the toner cartridges are not empty. (See Toner life end message on page 172.) „ Make sure that the drum unit is installed properly. (See Replacing the drum unit on page 177.) „ Make sure that the belt unit is installed properly. (See Replacing the belt unit on page 183.) „ Perform the calibration. Press Menu, 4, 6. (See Software User's Guide on the CD-ROM.) „ Adjust the color by using the custom setting in the printer driver. Colors the machine can print and colors you see on a monitor are different. The machine may not be able to reproduce the colors on your monitor. „ Make sure that you use paper that meets our specifications. (See Acceptable paper and other media on page 11.) „ The drum unit may be damaged. Put in a new drum unit. (See Replacing the drum unit on page 177.) „ Put in a new belt unit. (See Replacing the belt unit on page 183.) „ Clean the corona wires of the drum unit for the color causing the problem. (See Cleaning the corona wires on page 158.) If the print quality has not improved, put in a new drum unit. (See Replacing the drum unit on page 177.) „ The drum unit may be damaged. Put in a new drum unit. (See Replacing the drum unit on page 177.) 124
-
 1
1 -
2
-
3
-
4
-
5
-
6
-
7
-
8
-
9
-
10
-
11
-
12
-
13
-
14
-
15
-
16
-
17
-
18
-
19
-
20
-
21
-
22
-
23
-
24
-
25
-
26
-
27
-
28
-
29
-
30
-
31
-
32
-
33
-
34
-
35
-
36
-
37
-
38
-
39
-
40
-
41
-
42
-
43
-
44
-
45
-
46
-
47
-
48
-
49
-
50
-
51
-
52
-
53
-
54
-
55
-
56
-
57
-
58
-
59
-
60
-
61
-
62
-
63
-
64
-
65
-
66
-
67
-
68
-
69
-
70
-
71
-
72
-
73
-
74
-
75
-
76
-
77
-
78
-
79
-
80
-
81
-
82
-
83
-
84
-
85
-
86
-
87
-
88
-
89
-
90
-
91
-
92
-
93
-
94
-
95
-
96
-
97
-
98
-
99
-
100
-
101
-
102
-
103
-
104
-
105
-
106
-
107
-
108
-
109
-
110
-
111
-
112
-
113
-
114
-
115
-
116
-
117
-
118
-
119
-
120
-
121
-
122
-
123
-
124
-
125
-
126
-
127
-
128
-
129
-
130
-
131
-
132
-
133
-
134
-
 135
135 -
 136
136 -
 137
137 -
 138
138 -
 139
139 -
 140
140 -
 141
141 -
 142
142 -
 143
143 -
 144
144 -
 145
145 -
146
-
147
-
148
-
149
-
150
-
151
-
152
-
153
-
154
-
155
-
156
-
157
-
158
-
159
-
160
-
161
-
162
-
163
-
164
-
165
-
166
-
167
-
168
-
169
-
170
-
171
-
172
-
173
-
174
-
175
-
176
-
177
-
178
-
179
-
180
-
181
-
182
-
183
-
184
-
185
-
186
-
187
-
188
-
189
-
190
-
191
-
192
-
193
-
194
-
195
-
196
-
197
-
198
-
199
-
200
-
201
-
202
-
203
-
204
-
205
-
206
-
207
-
208
-
209
-
210
-
211
-
212
-
213
-
214
-
215
-
216
-
217
-
218
-
219
-
220
-
221
-
222
-
223
-
224
-
225
-
226
-
227
-
228
-
229
-
230
-
231
-
232
-
233
-
234
-
235
-
236
-
237
-
238
-
239
-
240
-
241
-
242
-
243
-
244
-
245
-
246
-
247
-
248
-
249
-
250
-
251
-
252
-
253
-
254
-
255
-
256
-
257
-
258
-
259
-
260
-
261
-
262
-
263
-
264
-
265
 |
 |