Brother International MFC-J895DW Reference Guide - Page 12
Scan, Before Scanning, Scan from Your Computer, Scan Using the Scan Button on the Machine
 |
View all Brother International MFC-J895DW manuals
Add to My Manuals
Save this manual to your list of manuals |
Page 12 highlights
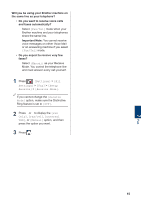
5 Scan 5 Scan Before Scanning Before attempting to scan, confirm the following: • Make sure you have installed the Brother software and drivers. • Make sure the USB or network cable is connected correctly, or that you are connected to the network using your wireless access point/router. Scan from Your Computer There are several ways you can use your computer to scan photos and documents on your Brother machine. Use the software applications provided by Brother, or use your favorite scanning application. For more detailed information, see the Online User's Guide: Scan from Your Computer (Windows®) or Scan from Your Computer (Mac). Scan Using the Scan Button on the Machine 4 Do one of the following: • To change the settings, press [Options] or [Set at Device], and then go to the next step. • Press [Start] to start scanning without changing additional settings. The machine starts scanning. If using the machine's scanner glass, follow the LCD instructions to complete the scanning job. To use the [Options] or [Set at Device] settings, a computer with ControlCenter4 (Windows®) or Brother iPrint&Scan (Mac) installed must be connected to the machine. 5 Change the scan settings you want to change, such as scan type, resolution, file type and document size, if needed. When finished press [OK]. 6 Press [Start]. The machine starts scanning. If using the machine's scanner glass, follow the LCD instructions to complete the scanning job. 1 Load your document. 2 Press [Scan] > [to PC] > [to File]. 3 If the machine is connected over the network, press a or b to display the computer where you want to send data, and then press the computer name. If the LCD prompts you to enter a PIN, use the LCD to enter the four-digit PIN for the computer, and then press [OK]. 11
-
 1
1 -
2
-
3
-
4
-
5
-
6
-
 7
7 -
 8
8 -
 9
9 -
 10
10 -
 11
11 -
 12
12 -
 13
13 -
 14
14 -
 15
15 -
 16
16 -
 17
17 -
18
-
19
-
20
-
21
-
22
-
23
-
24
-
25
-
26
-
27
 |
 |
