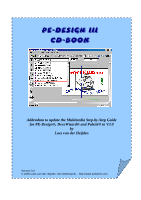
Brother International PE-DESIGN Ver.4 3 2 PE-DESIGN Ver.3.0 CD-BOOK - Page 5
Setting > Size
 |
View all Brother International PE-DESIGN Ver.4 3 2 manuals
Add to My Manuals
Save this manual to your list of manuals |
Page 5 highlights
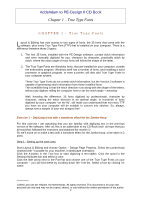
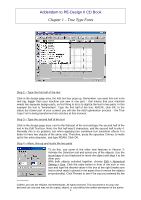
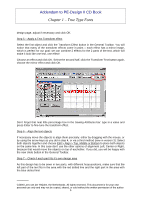
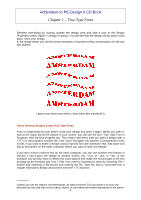
Addendum to PE-Design II CD Book Chapter 1 - True Type Fonts Step 2 - Type the first half of the text Click in the design page area; the Edit text box pops up. Remember: you want this text to be real big, bigger than your machine can sew in one part - that means that your machine needs two separate design-parts, so first thing to do is to digitize the text in two parts. In this example the text is "Amsterdam". Type the first half of the text: AMSTE, click OK. In the status bar (lower part of your screen) you will see the stitch generation process - the True Type Font is being transformed into stitches at this moment. Step 3 - Type the second half of the text Click in the design page area, next to the first part of the text and type the second half of the text in the Edit Text box. Note: the first half was 5 characters, and the second half is only 4. Normally this is no problem, but when applying two combined text transform effects it is better to have two objects of the same size. Therefore, press the spacebar 3 times, to make up for the extra character, and type RDAM. Click OK. Step 4 - Move, line-up and resize the two parts To do this, use some of the other new features in Version 3: Activate the Selection tool and select one of the objects. Use the arrow keys of your keyboard to move the object and align it to the other part. With both objects selected together, choose Edit > Numerical Setting > Size. Click the radio button in front of the inch or mm size and type the desired value in the box at the right (make sure that a check mark is placed in the aspect-box to resize the objects proportionally). Click Preview to see if the size you entered fits the 2000 Loes van der Heijden, the Netherlands. All rights reserved. This document is for your own personal use only and may not be copied, shared, or sold without the written permission of the author 4
-
 1
1 -
 2
2 -
 3
3 -
 4
4 -
 5
5 -
 6
6 -
 7
7 -
 8
8 -
 9
9 -
 10
10 -
 11
11 -
12
-
13
-
14
-
15
-
16
 |
 |
