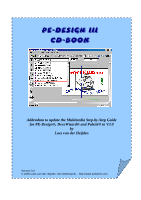
Brother International PE-DESIGN Ver.4 3 2 PE-DESIGN Ver.3.0 CD-BOOK - Page 6
Step 5 - Apply a Text Transform effect
 |
View all Brother International PE-DESIGN Ver.4 3 2 manuals
Add to My Manuals
Save this manual to your list of manuals |
Page 6 highlights
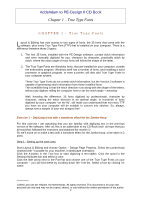
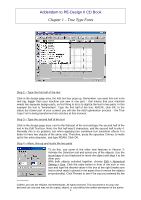
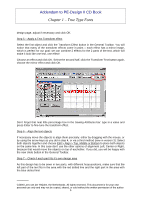
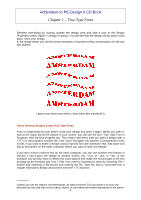
Addendum to PE-Design II CD Book Chapter 1 - True Type Fonts design page, adjust if necessary and click OK. Step 5 - Apply a Text Transform effect Select the first object and click the Transform Effect button in the General Toolbar. You will notice that many of the transform effects come in pairs - each effect has a mirror image, which is perfect for our goal: we can combine 2 effects for the 2 parts of the text, which will make it look like one text, one effect! Choose an effect and click OK. Select the second half, click the Transform Text button again, choose the mirror effect and click OK. Don't forget that neat little percentage box in the Sewing Attributes bar: type in a value and press Enter to fine-tune the transform effect. Step 6 - Align the text objects If necessary move the objects to align them precisely: either by dragging with the mouse, or by using the arrow keys as you did in step 4, or via a third method (new in version 3): Select both objects together and choose Edit > Align > Top, Middle or Bottom to place both objects on the same line. In this case don't use the other options of alignment Left, Center or Right, because that would move the objects on top of eachother. If you did, you will be happy with the new Undo button in the General Toolbar. Step 7 - Check if each part fits it's own design area As this design has to be sewn in two parts, with different hoop-positions, make sure that the left part of the text fits in the area with the red dotted line and the right part in the area with the blue dotted line! _________ ©2000 Loes van der Heijden, the Netherlands. All rights reserved. This document is for your own personal use only and may not be copied, shared, or sold without the written permission of the author 5
-
 1
1 -
 2
2 -
 3
3 -
 4
4 -
 5
5 -
 6
6 -
 7
7 -
 8
8 -
 9
9 -
 10
10 -
 11
11 -
 12
12 -
13
-
14
-
15
-
16
 |
 |
