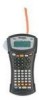
Brother International PT 1650 Users Manual - English - Page 27
Entering a bar code, Setting bar code parameters - label machine
 |
UPC - 012502607366
View all Brother International PT 1650 manuals
Add to My Manuals
Save this manual to your list of manuals |
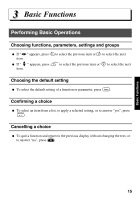
Page 27 highlights
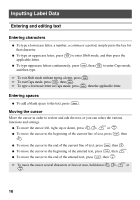
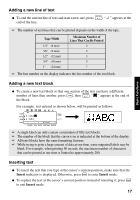
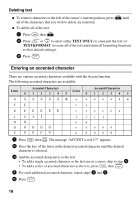
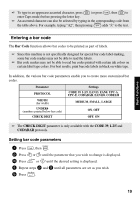
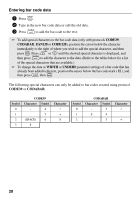
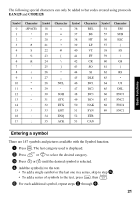
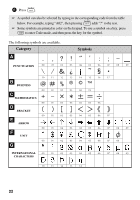
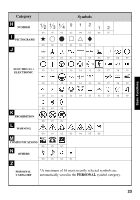
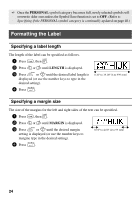
Basic Functions ☞ To type in an uppercase accented character, press h (or press g, then h to enter Caps mode) before pressing the letter key. ☞ An accented character can also be selected by typing in the corresponding code from the table above. For example, typing "A2", then pressing n adds "Ä" to the text. Entering a bar code The Bar Code function allows bar codes to be printed as part of labels. ☞ Since this machine is not specifically designed for special bar code label-making, some bar code readers may not be able to read the labels. ☞ Bar code readers may not be able to read bar codes printed with certain ink colors on certain label tape colors. For best results, print barcode labels in black on white tape. In addition, the various bar code parameters enable you to create more customized bar codes. Parameter PROTOCOL WIDTH (bar width) UNDER# (numbers printed below bar code) CHECK DIGIT Settings CODE 39, I-2/5, EAN13, EAN8, UPC-A, UPC-E, CODABAR, EAN128, CODE128 MEDIUM, SMALL, LARGE ON, OFF OFF, ON ☞ The CHECK DIGIT parameter is only available with the CODE 39, I-2/5 and CODABAR protocols. Setting bar code parameters 1 Press g, then c. 2 Press l or r until the parameter that you wish to change is displayed. 3 Press u or d until the desired setting is displayed. 4 Repeat steps 2 and 3 until all parameters are set as you wish. 5 Press n. 19
-
 1
1 -
2
-
3
-
4
-
5
-
6
-
7
-
8
-
9
-
10
-
11
-
12
-
13
-
14
-
15
-
16
-
17
-
18
-
19
-
20
-
21
-
 22
22 -
 23
23 -
 24
24 -
 25
25 -
 26
26 -
 27
27 -
 28
28 -
 29
29 -
 30
30 -
 31
31 -
 32
32 -
33
-
34
-
35
-
36
-
37
-
38
-
39
-
40
-
41
-
42
-
43
-
44
-
45
-
46
-
47
-
48
-
49
-
50
-
51
-
52
-
53
-
54
-
55
-
56
-
57
-
58
-
59
-
60
-
61
-
62
-
63
-
64
-
65
-
66
-
67
-
68
-
69
-
70
-
71
-
72
-
73
-
74
-
75
-
76
-
77
-
78
-
79
-
80
-
81
-
82
-
83
-
84
-
85
-
86
-
87
-
88
-
89
-
90
-
91
-
92
-
93
-
94
-
95
-
96
-
97
-
98
-
99
-
100
-
101
-
102
-
103
-
104
-
105
-
106
-
107
-
108
-
109
-
110
-
111
-
112
-
113
-
114
-
115
-
116
-
117
-
118
-
119
-
120
-
121
-
122
-
123
-
124
-
125
-
126
-
127
-
128
-
129
-
130
-
131
-
132
-
133
-
134
-
135
-
136
-
137
-
138
-
139
-
140
-
141
-
142
-
143
-
144
-
145
-
146
-
147
-
148
-
149
-
150
-
151
-
152
-
153
-
154
-
155
-
156
-
157
-
158
-
159
-
160
-
161
-
162
-
163
 |
 |
