Brother International XL 5500 Users Manual - English - Page 34
Adjusting Buttonholes, Sewing Buttons
 |
View all Brother International XL 5500 manuals
Add to My Manuals
Save this manual to your list of manuals |
Page 34 highlights
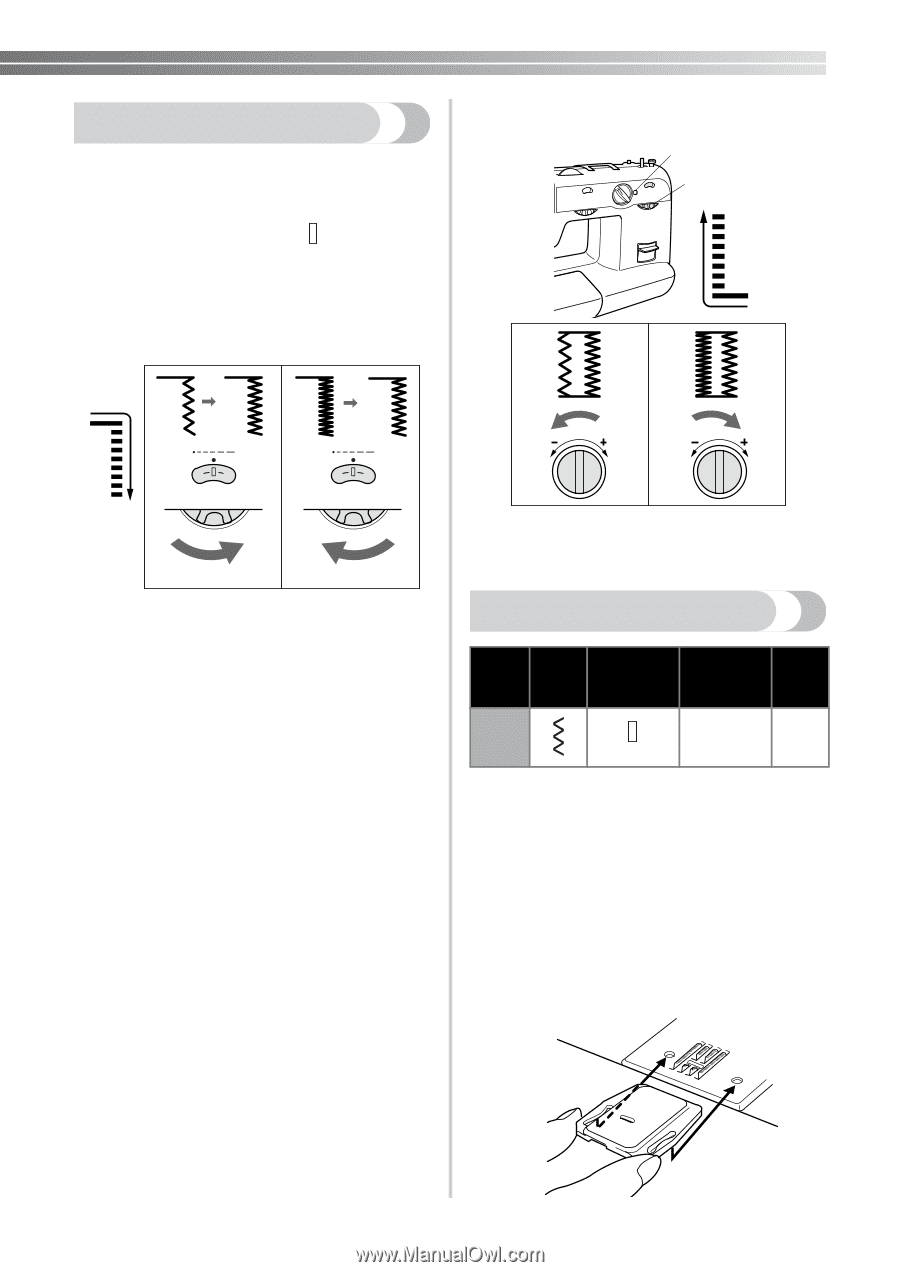
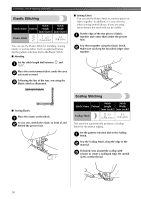
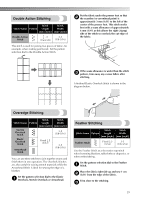
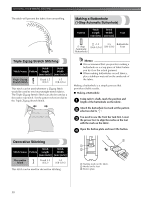
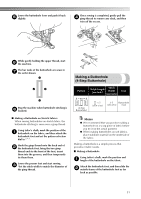
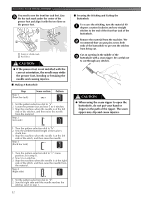
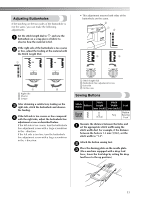
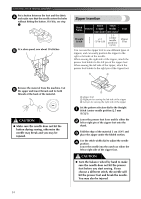
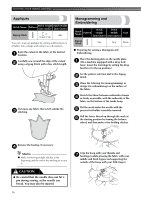
Adjusting Buttonholes If the stitching on the two sides of the buttonhole is not the same, you can make the following adjustments. Set the stitch length dial to " " and sew the 1 buttonhole on a scrap piece of fabric to observe how the material is fed. If the right side of the buttonhole is too coarse 2 or fine, adjust the feeding of the material with the Stitch Length Dial. 1 • This adjustment ensures both sides of the buttonhole are the same. 2 1 3 4 4 10 10 2 2 2 2 3 2 3 10 1 Right side 2 Shorter 3 Longer After obtaining a satisfactory feeding on the 3 right side, stitch the buttonhole and observe the feeding. If the left side is too coarse or fine compared 4 with the right side, adjust the buttonhole fine adjustment screw as described below. If the left side is too coarse, turn the buttonhole fine adjustment screw with a large screwdriver in the - direction. If the left side is too fine, turn the buttonhole fine adjustment screw with a large screwdriver in the + direction. 1 Stitch length dial 2 Buttonhole fine adjustment screw 3 Left side 4 In this case Sewing Buttons Stitch Stitch Stitch Name Pattern Length Width Foot [mm (inch)] [mm (inch)] Zigzag Stitch (1/64) Button Any Sewing Foot Measure the distance between the holes and 1 set the appropriate stitch width using the stitch width dial. For example, if the distance between the holes is 1.5 mm (1/16"), set the stitch width to "1.5". Attach the button sewing foot. 2 Place the darning plate on the needle plate. 3 (On a machine equipped with a drop feed lever, lower the feed dogs by setting the drop feed lever to the up position.) 33
-
 1
1 -
2
-
3
-
4
-
5
-
6
-
7
-
8
-
9
-
10
-
11
-
12
-
13
-
14
-
15
-
16
-
17
-
18
-
19
-
20
-
21
-
22
-
23
-
24
-
25
-
26
-
27
-
28
-
 29
29 -
 30
30 -
 31
31 -
 32
32 -
 33
33 -
 34
34 -
 35
35 -
 36
36 -
 37
37 -
 38
38 -
 39
39 -
40
-
41
-
42
-
43
-
44
-
45
-
46
 |
 |