Brother International XL 5500 Users Manual - English - Page 9
Checking the Needle, Changing the Presser Foot - parts
 |
View all Brother International XL 5500 manuals
Add to My Manuals
Save this manual to your list of manuals |
Page 9 highlights
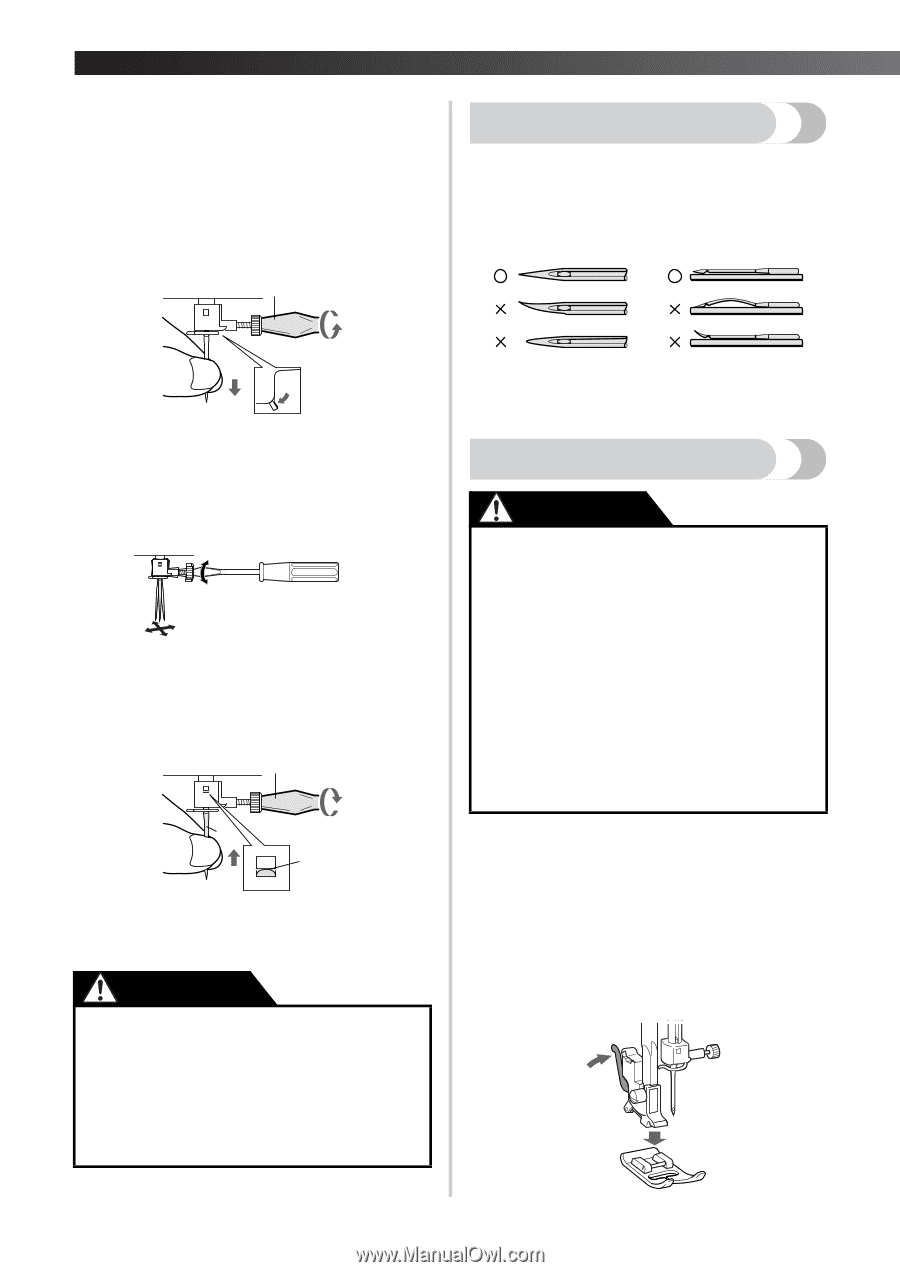
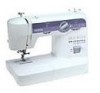
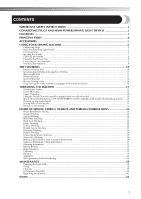
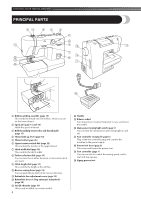
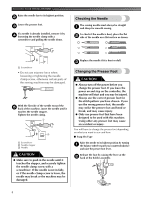
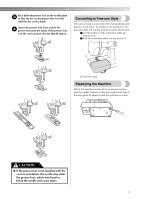
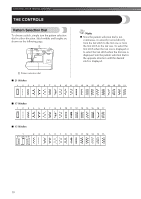
KNOWING YOUR SEWING MACHINE Raise the needle bar to its highest position. 2 Lower the presser foot. 3 If a needle is already installed, remove it by 4 loosening the needle clamp with a screwdriver and pulling the needle down. 1 Checking the Needle The sewing needle must always be straight 1 and sharp for smooth sewing. To check if the needle is bent, place the flat 2 side of the needle on a flat surface as shown. 1 Screwdriver • Do not use extreme force when loosening or tightening the needle clamp screw, otherwise certain parts of the sewing machine may be damaged. With the flat side of the needle toward the 5 back of the machine, insert the needle until it touches the needle stopper. Tighten the needle clamp. 1 3 2 1 Screwdriver 2 Needle stopper 3 Needle CAUTION ● Make sure to push in the needle until it touches the stopper, and securely tighten the needle clamp screw with a screwdriver. If the needle is not in fully, or if the needle clamp screw is loose, the needle may break or the machine may be damaged. Replace the needle if it is bent or dull. 3 Changing the Presser Foot CAUTION ● Always turn off the power before you change the presser foot. If you leave the power on and step on the controller, the machine will start and you may be injured. ● Always use the correct presser foot for the stitch pattern you have chosen. If you use the wrong presser foot, the needle may strike the presser foot and bend or break, and may cause injury. ● Only use presser feet that have been designed to be used with this machine. Using other any presser feet may cause an accident or injury. You will have to change the presser foot depending on what you want to sew and how. ■ Snap-On Type Raise the needle to its highest position by turning 1 the balance wheel toward you (counterclockwise) and raise the presser foot lever. Release the foot by raising the lever at the 2 back of the holder assembly. 8
-
 1
1 -
2
-
3
-
 4
4 -
 5
5 -
 6
6 -
 7
7 -
 8
8 -
 9
9 -
 10
10 -
 11
11 -
 12
12 -
 13
13 -
 14
14 -
15
-
16
-
17
-
18
-
19
-
20
-
21
-
22
-
23
-
24
-
25
-
26
-
27
-
28
-
29
-
30
-
31
-
32
-
33
-
34
-
35
-
36
-
37
-
38
-
39
-
40
-
41
-
42
-
43
-
44
-
45
-
46
 |
 |