Brother International XL 5500 Users Manual - English - Page 39
Maintenance
 |
View all Brother International XL 5500 manuals
Add to My Manuals
Save this manual to your list of manuals |
Page 39 highlights
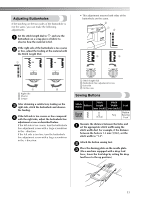
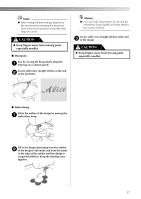
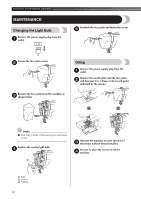
KNOWING YOUR SEWING MACHINE MAINTENANCE Changing the Light Bulb Remove the power supply plug from the 1 outlet. Reattach the face plate and fasten the screw. 5 Loosen the face plate screw. 2 Remove the face plate from the machine as 3 shown below. Oiling Remove the power supply plug from the 1 outlet. Remove the needle plate and the face plate, 2 and then put 2 to 3 drops of oil at each point indicated by the arrows. Note ● Use only a bulb of the same type and rated 15 W. Replace the sewing light bulb. 4 1 2 3 1 Bulb 2 Loosen 3 Tighten Operate the machine at a fast speed for a 3 short time without thread installed. Be sure to wipe any excess oil off the 4 machine. 38
-
 1
1 -
2
-
3
-
4
-
5
-
6
-
7
-
8
-
9
-
10
-
11
-
12
-
13
-
14
-
15
-
16
-
17
-
18
-
19
-
20
-
21
-
22
-
23
-
24
-
25
-
26
-
27
-
28
-
29
-
30
-
31
-
32
-
33
-
 34
34 -
 35
35 -
 36
36 -
 37
37 -
 38
38 -
 39
39 -
 40
40 -
 41
41 -
 42
42 -
 43
43 -
 44
44 -
45
-
46
 |
 |
KNOWING YOUR SEWING MACHINE
—————————————————————————————————————————
38
MAINTENANCE
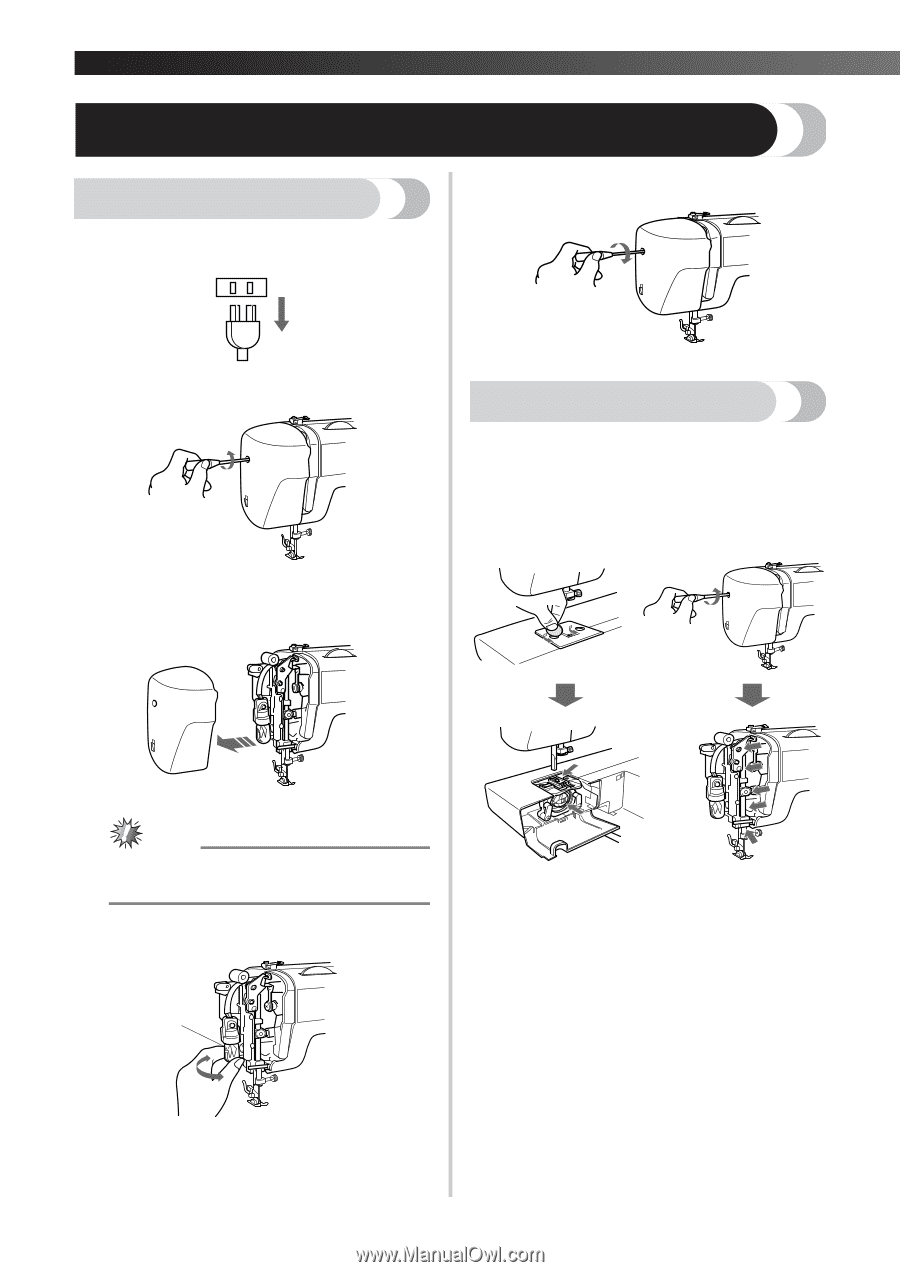
Changing the Light Bulb
1
Remove the power supply plug from the
outlet.
2
Loosen the face plate screw.
3
Remove the face plate from the machine as
shown below.
Note
●
Use only a bulb of the same type and rated
15 W.
4
Replace the sewing light bulb.
1
Bulb
2
Loosen
3
Tighten
5
Reattach the face plate and fasten the screw.
Oiling
1
Remove the power supply plug from the
outlet.
2
Remove the needle plate and the face plate,
and then put 2 to 3 drops of oil at each point
indicated by the arrows.
3
Operate the machine at a fast speed for a
short time without thread installed.
4
Be sure to wipe any excess oil off the
machine.
1
3
2