Canon CanoScan LiDE 80 CanoScan LiDE80 Quick Start Guide - Page 16
Start ScanGear CS. - windows 8 1
 |
View all Canon CanoScan LiDE 80 manuals
Add to My Manuals
Save this manual to your list of manuals |
Page 16 highlights
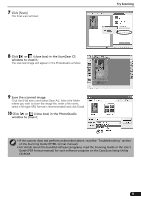
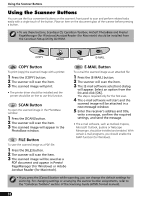
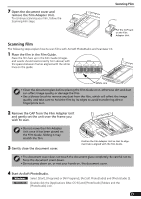
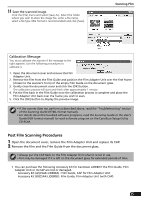
Scanning Film 5 Start ScanGear CS. Click the Acquire icon or click the [File] menu and select [Acquire]. If an error message appears, click the [File] menu, choose [Select Source], select your scanner model name and click the [Select] button. Click the Acquire icon or click the [File] menu and select [Import...]. When the [Select Source] dialog displays, select [ScanGear CS 7.2] and click the [OK] button. ScanGear CS will start. 6 In the [Select source] category, select [Color Negative Film] or [Color Positive Film]. • Use the Advanced Mode to scan monochrome film (See the Scanning Guide). 7 Confirm that the [Select Frame] category is set to [Auto select]. You can also select a frame number. ScanGear CS's Simple Mode is preset so that film is scanned and printed at 300 dpi at approximately the photo size (8.9 x 12.7 cm/ 3.5 x 4.7 in.). 8 Click [Preview]. ScanGear CS will display the preview image. • If the image does not display, select a frame number in Step 7, before clicking the [Preview] button. • Do not open the document cover while a scan is in progress. • Read the "Calibration Message" section (p. 15) if a calibration message appears. 9 Click [Scan]. The final scan will start. 10 Click or (close box) in the ScanGear CS window to close it. The scanned image will appear in the PhotoStudio window. 14
-
 1
1 -
2
-
3
-
4
-
5
-
6
-
7
-
8
-
9
-
10
-
 11
11 -
 12
12 -
 13
13 -
 14
14 -
 15
15 -
 16
16 -
 17
17 -
 18
18 -
 19
19 -
 20
20
 |
 |